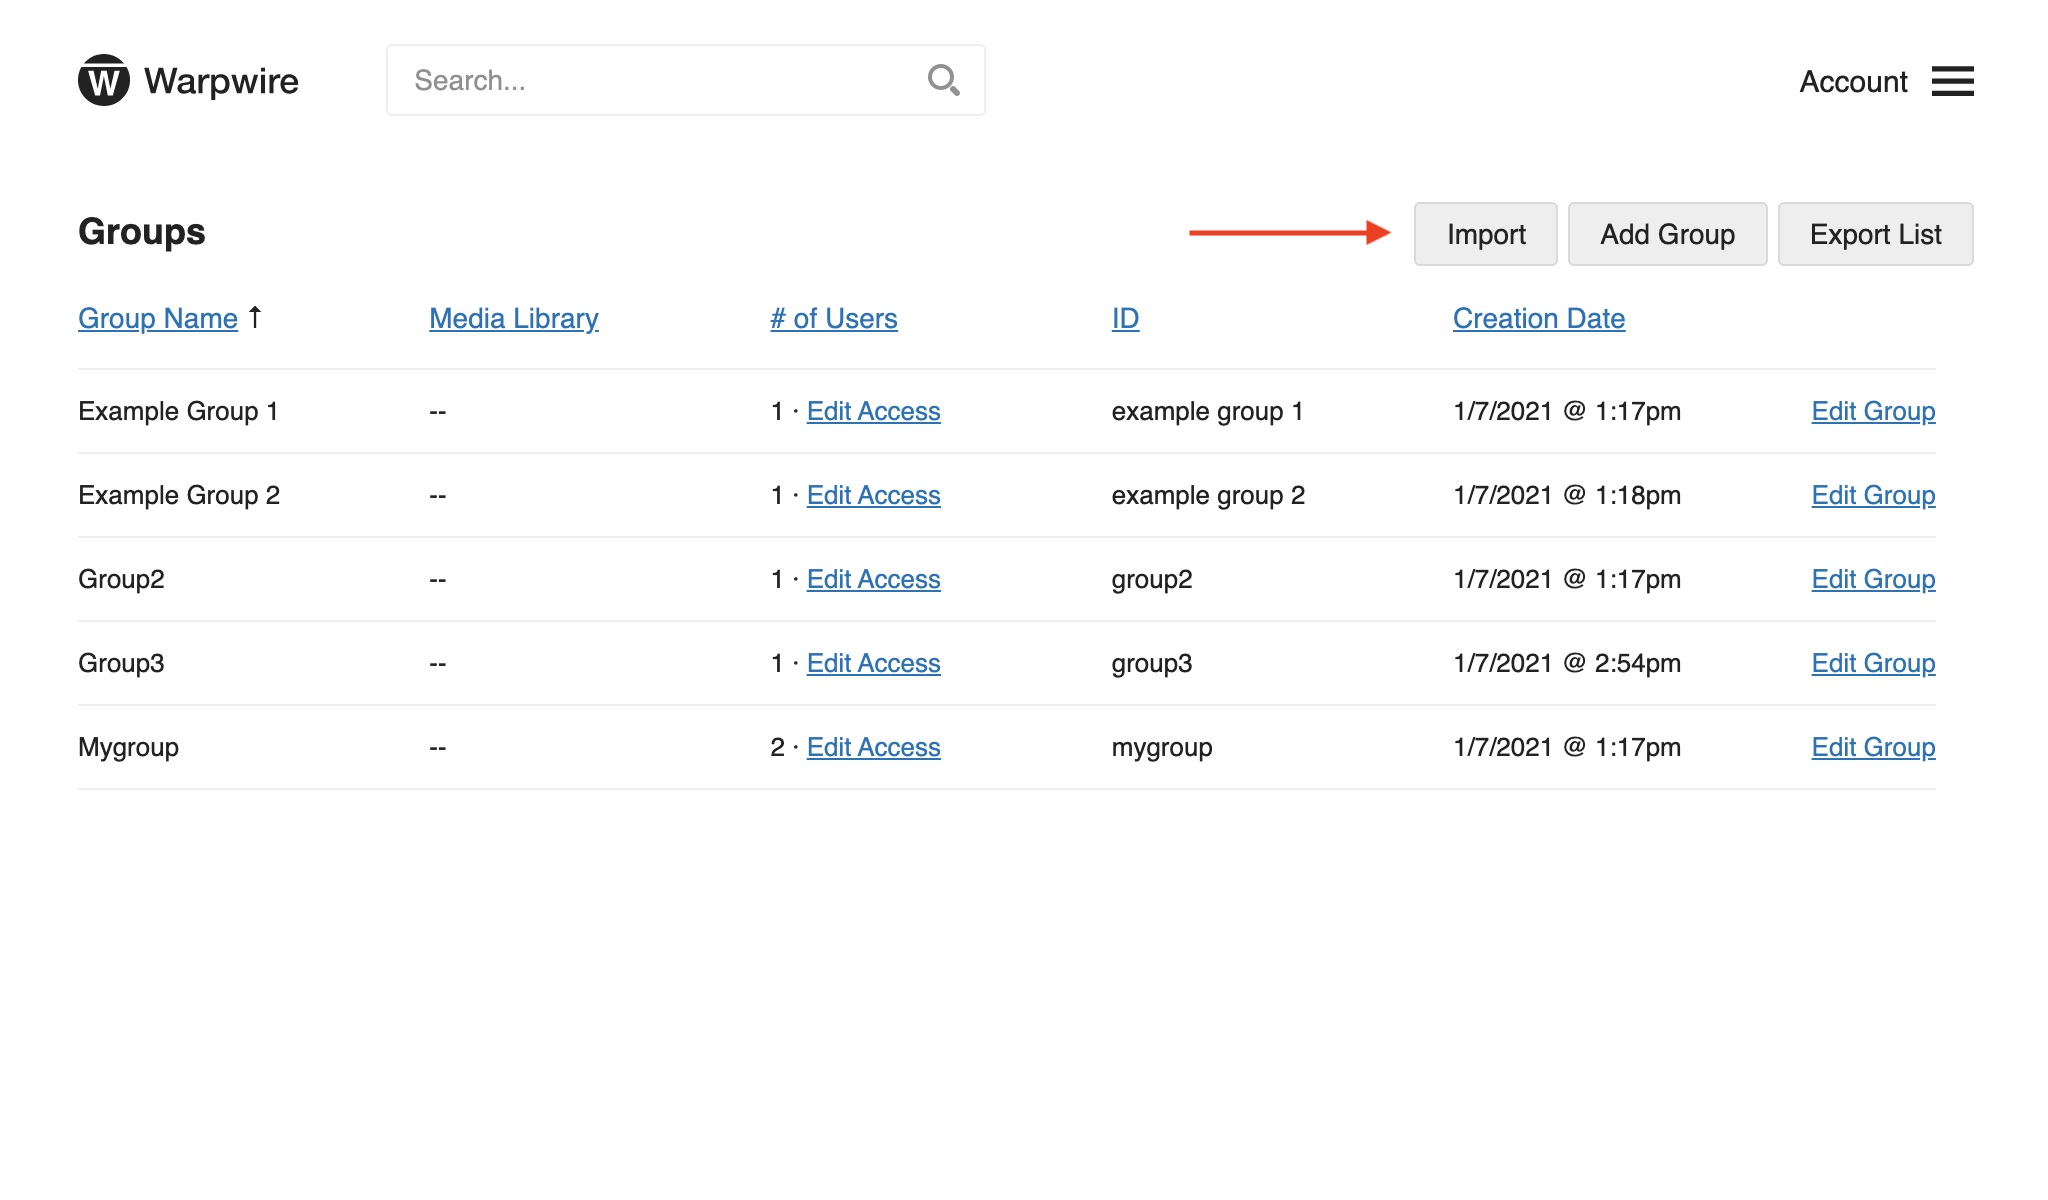
Click "Groups" from the Account Menu > Admin Tool pane. This page allows Institutional Admins to browse and search through all Groups at their institution, and to sort results by Group name or group ID using the column headers.
You can use the search box at the top of the page to quickly find groups that match your search criteria.
The Admin Tool search allows you to see relevant details for each Group. You can see the Group name, how many Users are part of the Group, and the unique Group ID. If you click on the "Edit Access" link for a Group, a window will open, showing you the specific Users in the Group.
By clicking the "Add User" button, you'll be able to quickly add users to that Group.
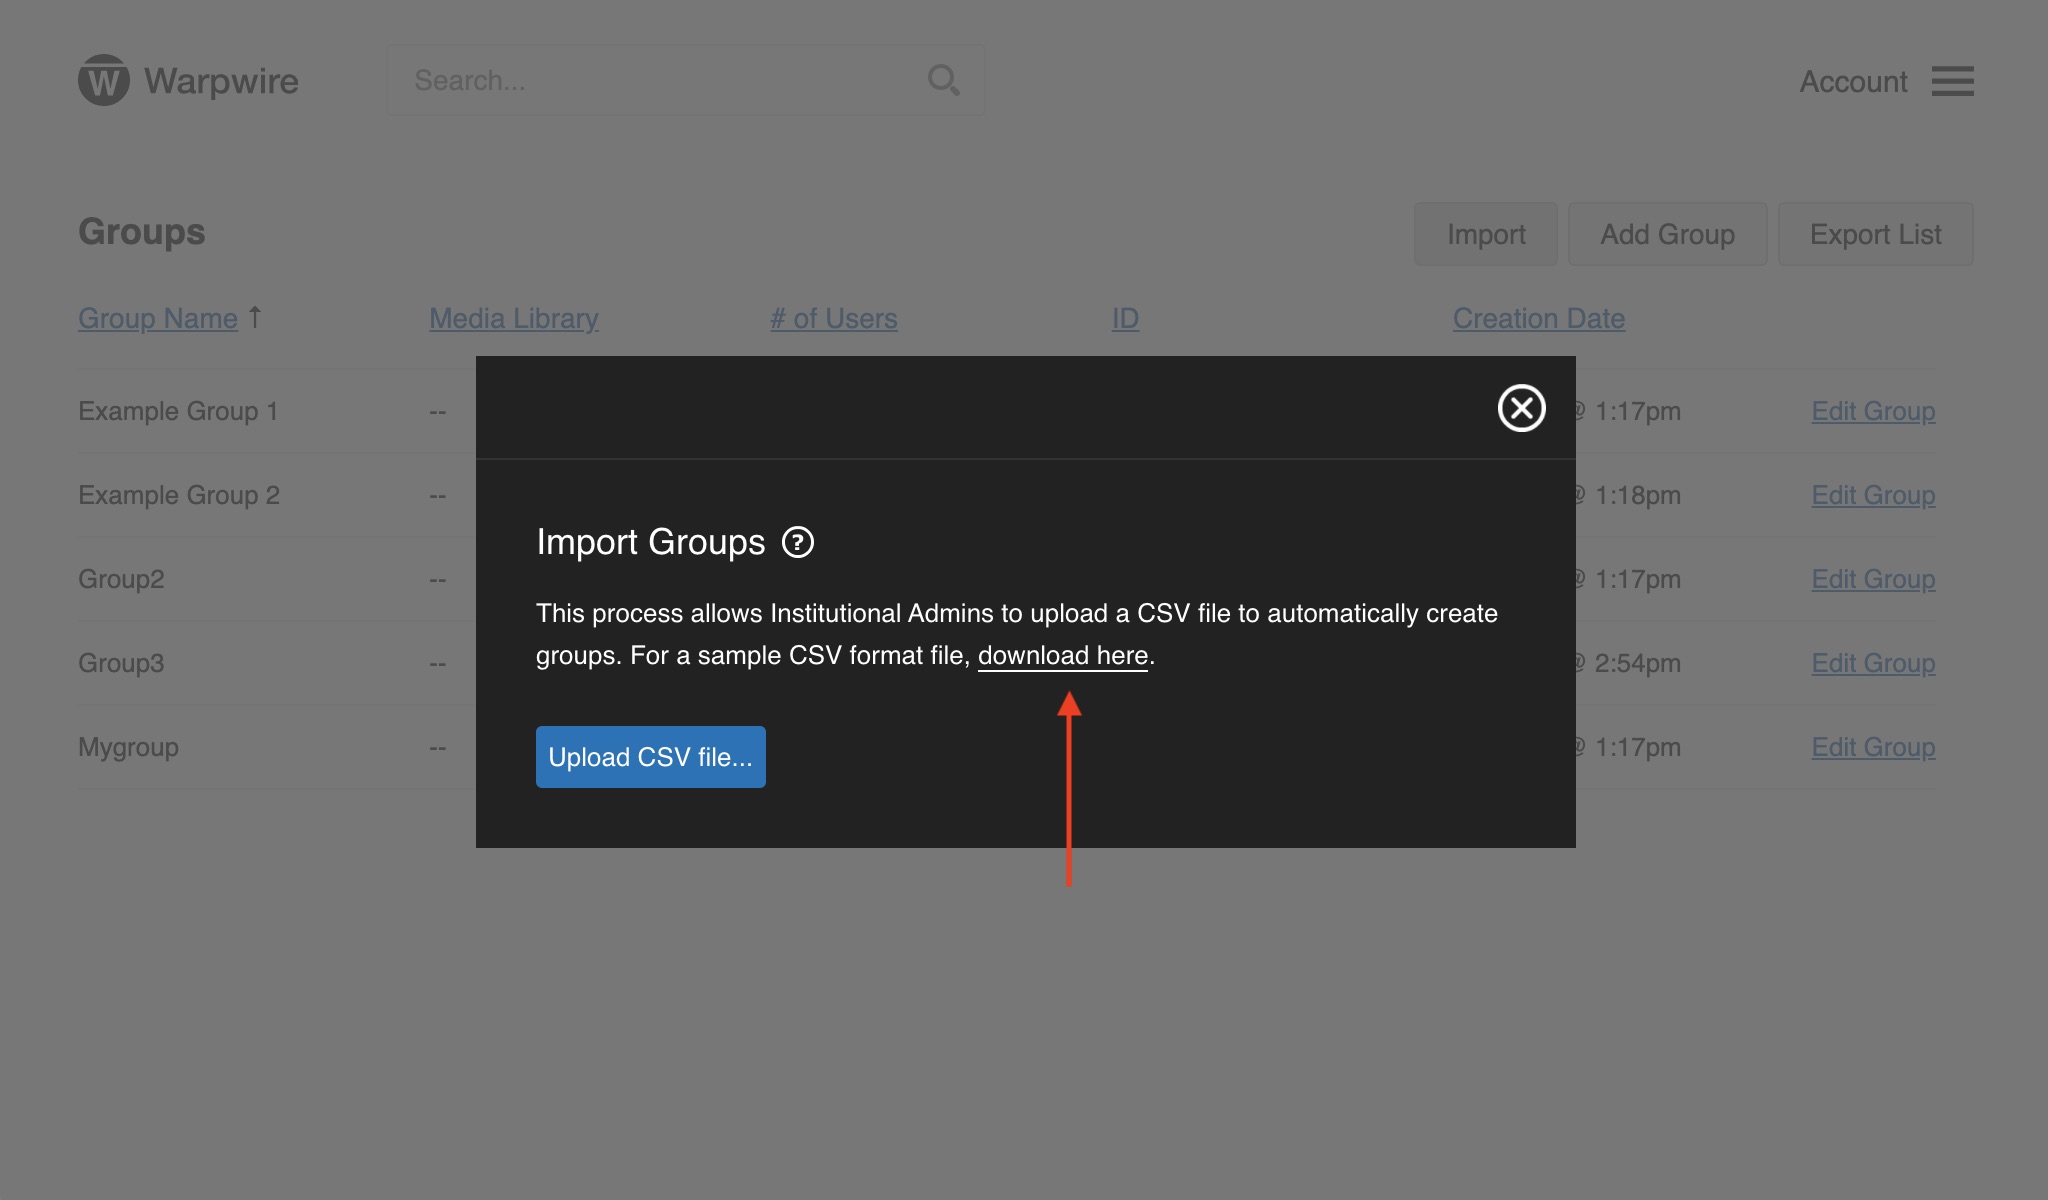
Institutional Admins can add Groups directly from the Admin Tool. This can be particularly useful if your work in Warpwire is a bit ahead of the registrar's office, for example.
When you click the "Add Group" button in the upper right of the page, a window will appear.
You'll fill the Name, Unique Identifier, and SIS ID for the Group you are about to create. The SIS ID will vary by institution, depending on the LMS and group management setup in use. If you're unsure about what to put in this field, talk to the other Institutional Admins at your institution, or contact Warpwire.
You can also edit groups from the Admin Tool, changing any of the fields. Simply click the "Edit Group" link to the right of the Group you wish to edit.
Institutional Admins can add Groups in bulk via a CSV file with the Import function.
To begin, navigate to the Import button.
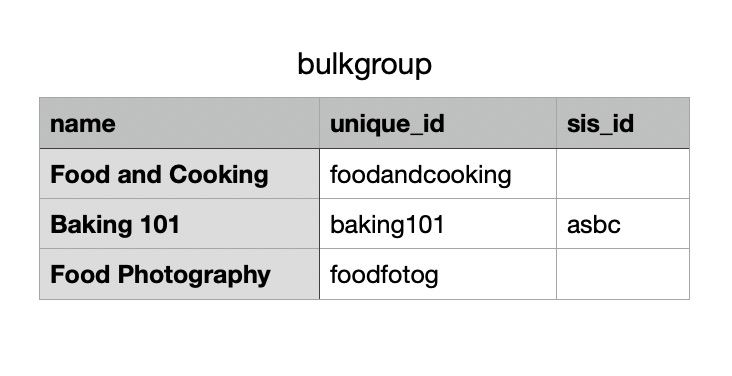
You can use the sample CSV format file as a template. To do so, click the "download here" link.
Follow these instructions to complete the CSV file correctly:
name column, enter in the group name.unique_id column, enter in any string that can be used to uniquely identify this group.sis_id column, enter an ID to be used by external providers (optional).Your CSV file should look similar to this example.
Note: Keep your CSV file as simple as possible and remove any blank lines that may be in the file.
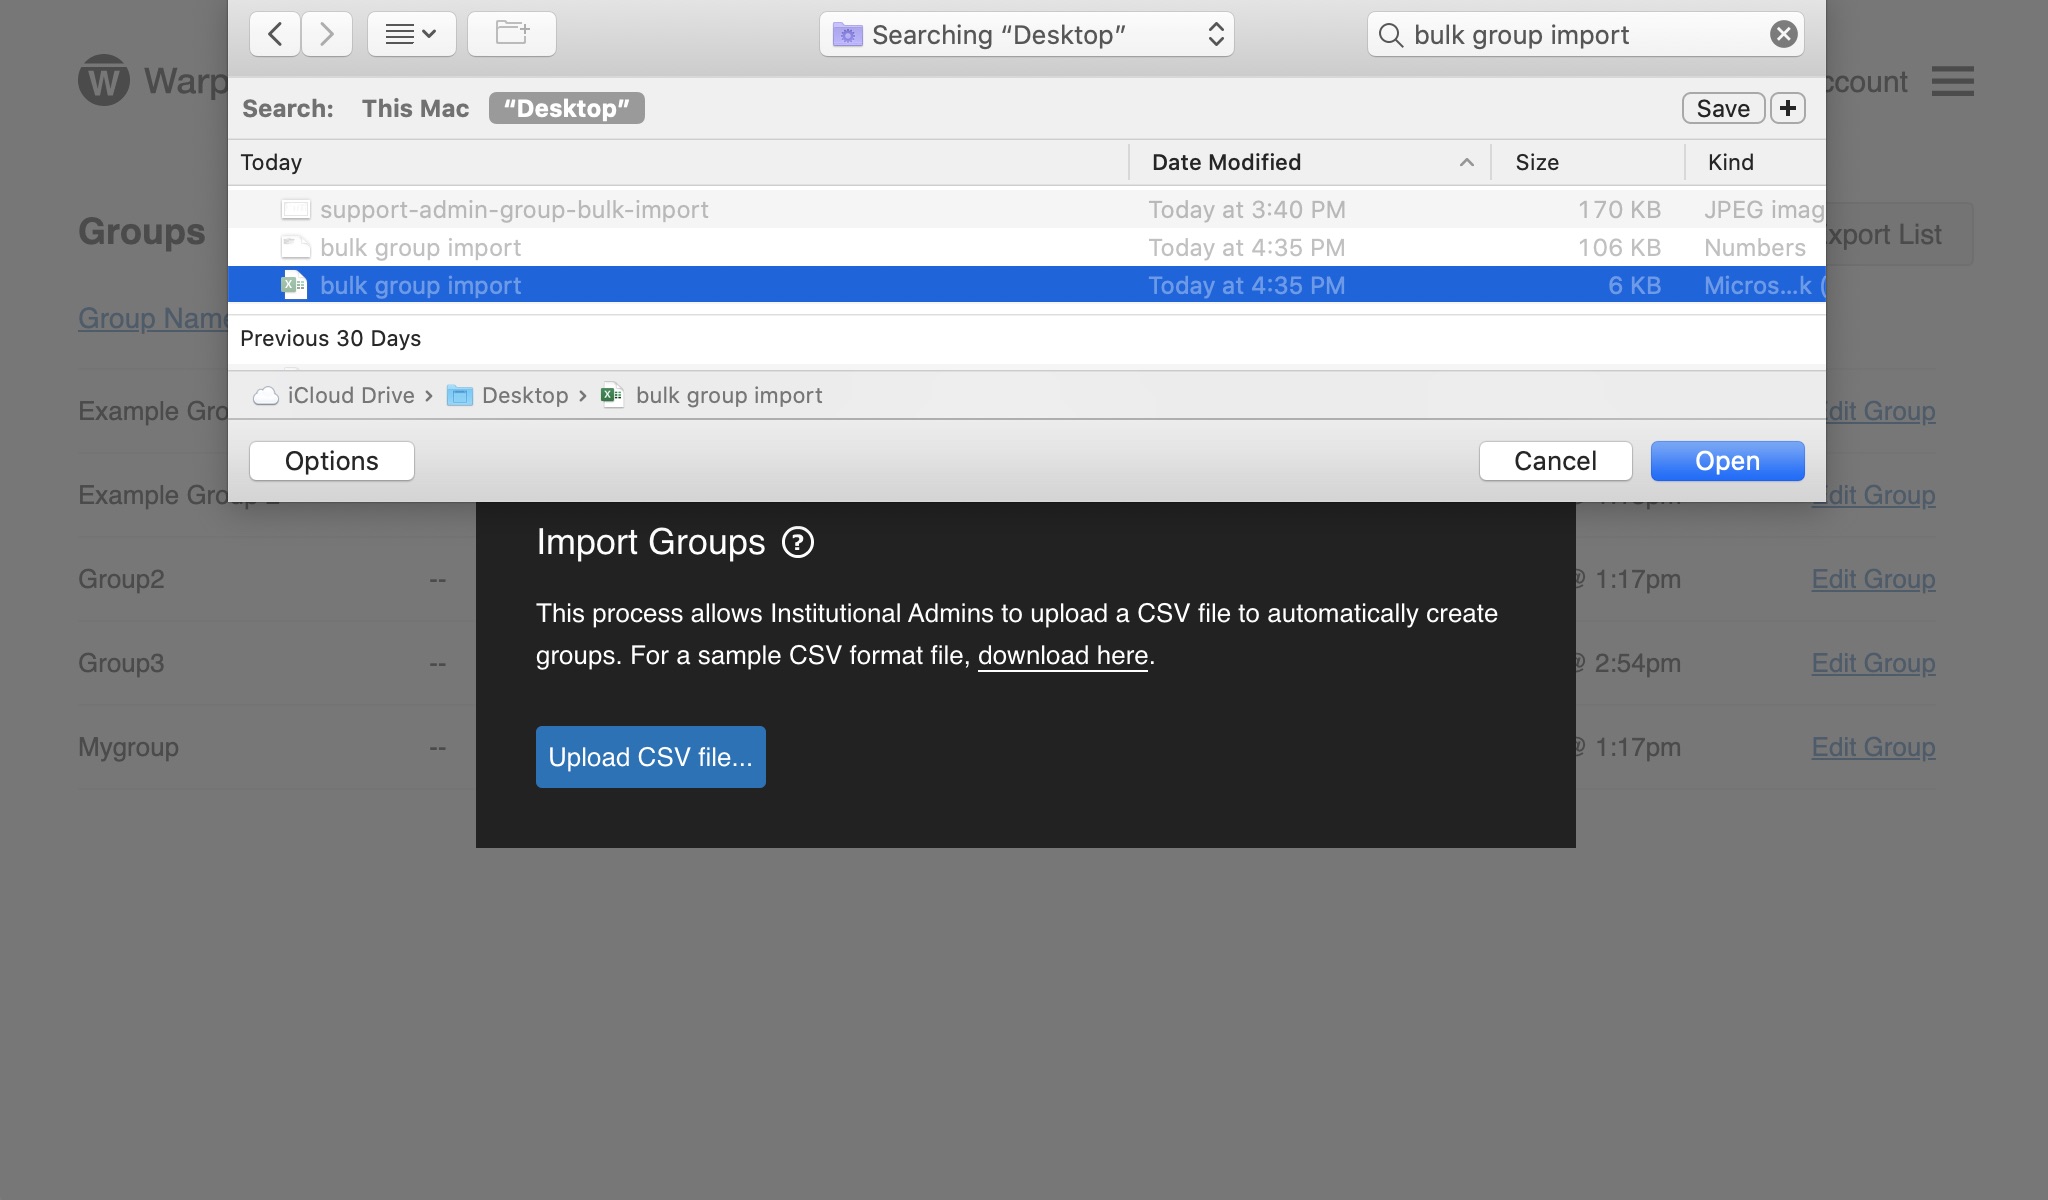
When you are ready to upload your CSV file, click the blue “Upload CSV file…” button and select the file you would like to upload.
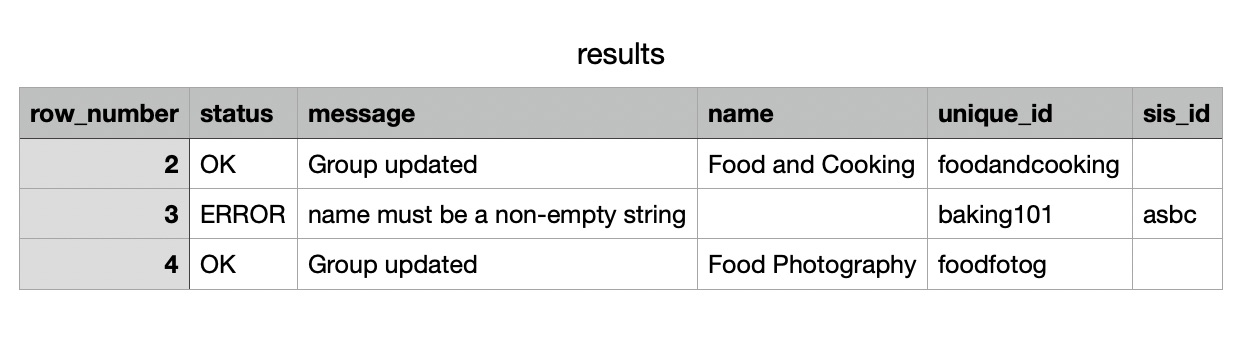
Once your files are uploaded, you will be able to view the results of the import, including the number of new records, existing records and records that failed to import. To save the results, click the “download” link.

If any part of your import fails, download the results to identify the error.
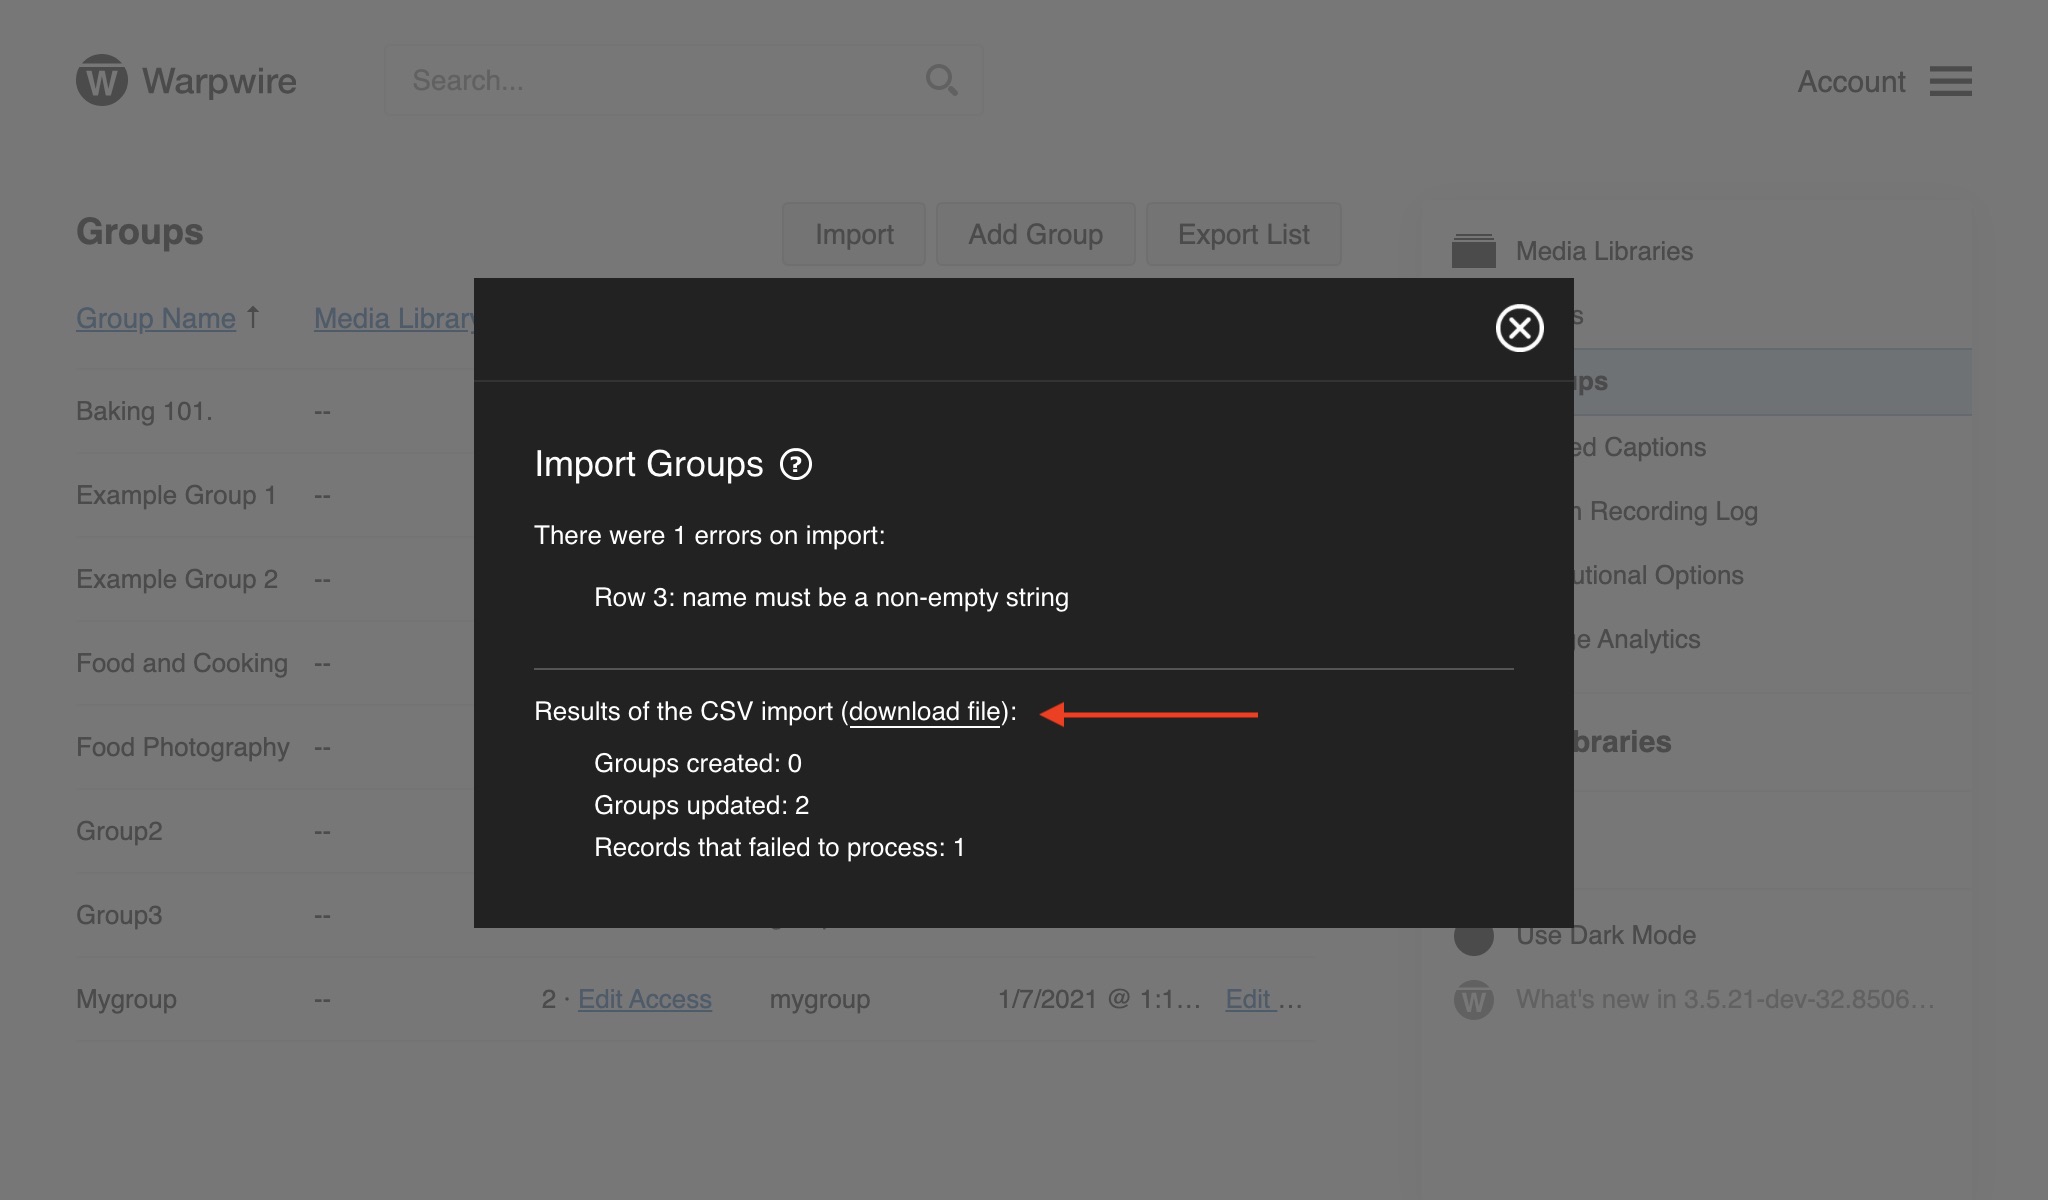
The below image is an example of a results error message within the downloaded results file. Fix the error and import your file again.
If you click the "Export List" link in the upper-right of the screen, a CSV will download.

This CSV will list all of the Groups, along with their unique identifier, and the number of users in the Group.
See also: Users in the Admin Tool and Share with Users and Groups (Protected).