Sometimes you may want to work on many assets at once. If you're a Media Library admin, you have that power with Warpwire's Batch Edit Mode. With Batch Edit Mode, you can copy assets to other Media Libraries, change asset share settings, change asset visibility, add or remove tags, and remove or delete assets from the Media Library.
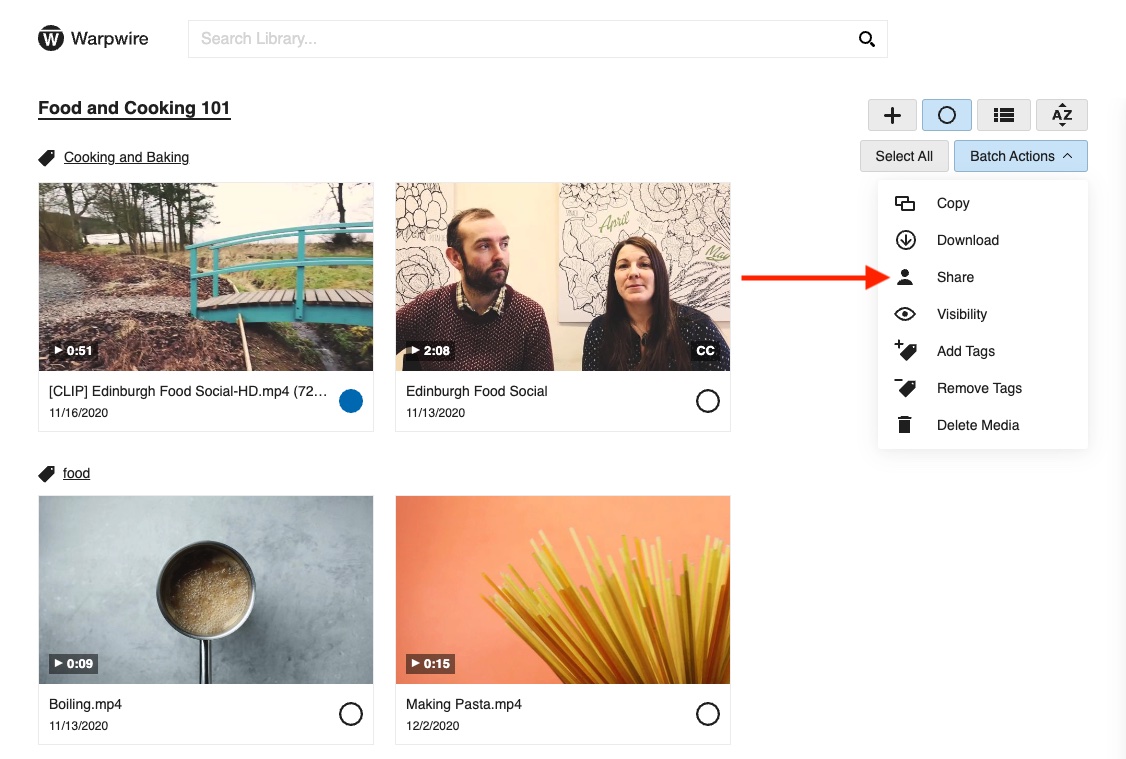
To turn on Batch Edit Mode, just navigate to your Media Library. If you have the appropriate permission (i.e. you are the owner or admin of that Media Library), you'll see the edit (circle) button at the top of the screen.
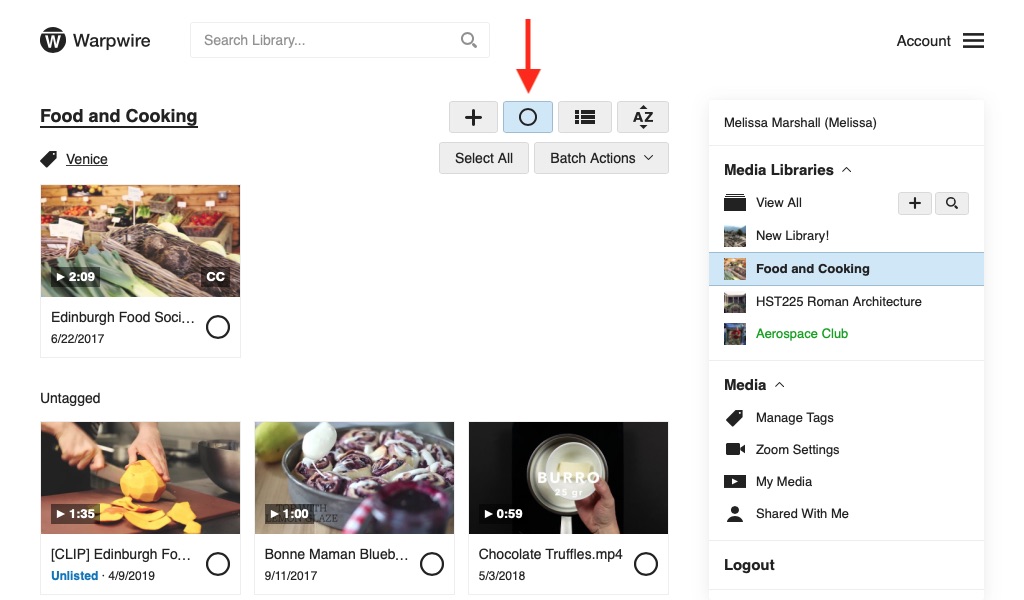
Click it to turn on Batch Edit Mode. The Media Options button ![]() next to each item in the Media Library will turn into a selection button, allowing you to select multiple assets simultaneously.
next to each item in the Media Library will turn into a selection button, allowing you to select multiple assets simultaneously.
To select or deselect all of the assets in the Media Library, use the "Select All"/"Select None" button on the toolbar that appears at the top of the screen.
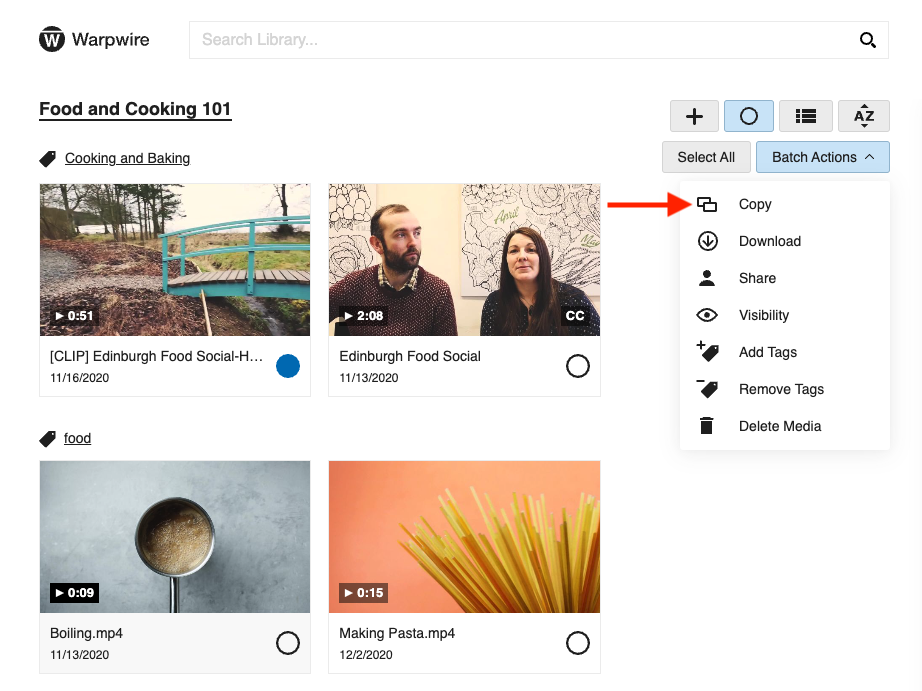
When you've selected the assets you want to batch edit, click the "Batch Actions" button on the top that matches the action you want to perform. You can:
You can be even more efficient by making use of Warpwire's keyboard shortcuts for the Batch Edit Mode.
On Mac:
On Windows:
After selecting your assets in Batch Edit Mode, click "Copy" from the "Batch Actions" menu.
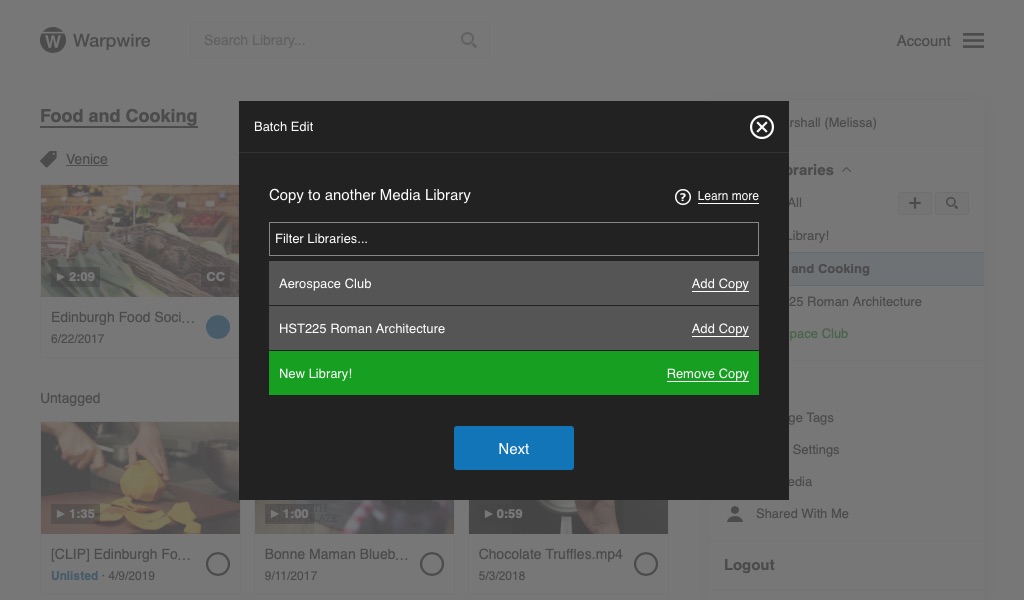
You'll see a list of Media Libraries you can copy to.

Now, select one or many Media Libraries for the copies of your assets. If you don't have access to any other Media Libraries, none will appear and you won't be able to make use of this option. Click "Next."
You'll now see a list of the assets you're about to copy to the selected Media Library or Libraries. Click "Start" when you're ready.

The assets will transfer one by one, while you watch. You'll be able to see any errors, if they occur (e.g. if you try to copy a asset to a Media Library that already has a copy of that asset). Click "Done."
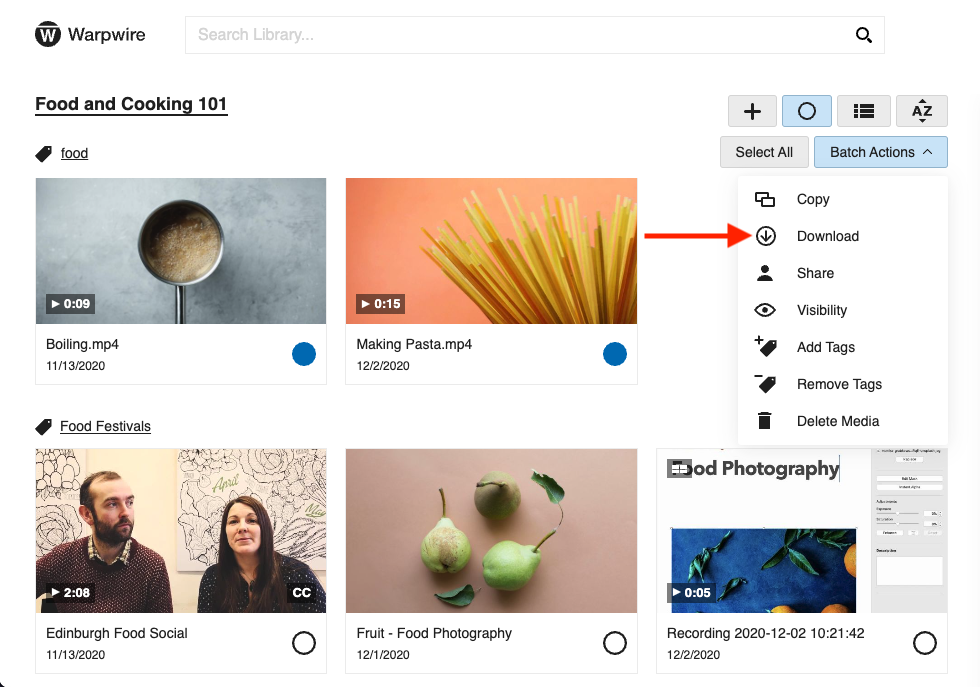
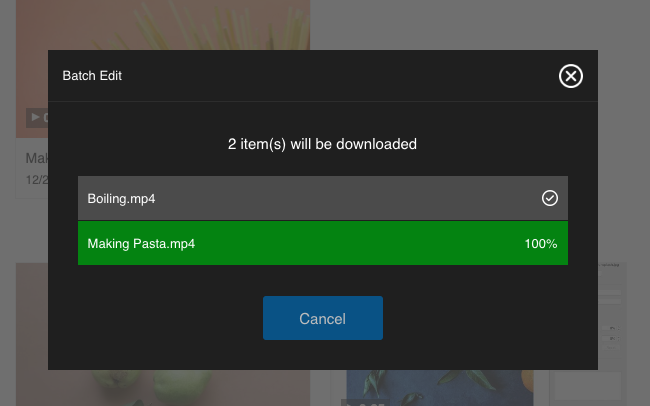
After selecting your assets in Batch Edit Mode, click "Download" from the "Batch Actions" menu.
You will see the assets you selected for download.
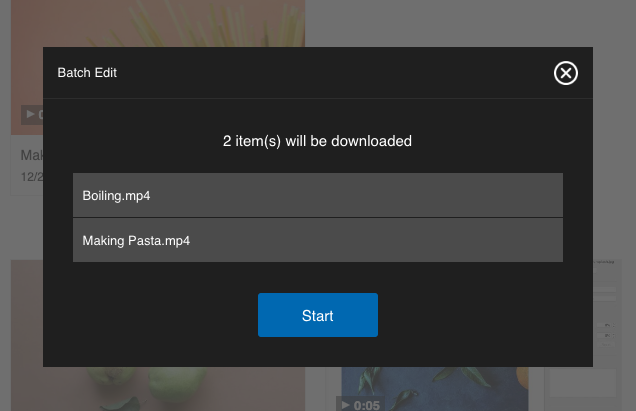
Click ‘Start’ and your assets will begin downloading. You do have the ability to ‘Cancel’.
After selecting your assets in Batch Edit Mode, Click "Share" from the "Batch Actions" menu.
Select the type of share setting you want for the chosen assets.
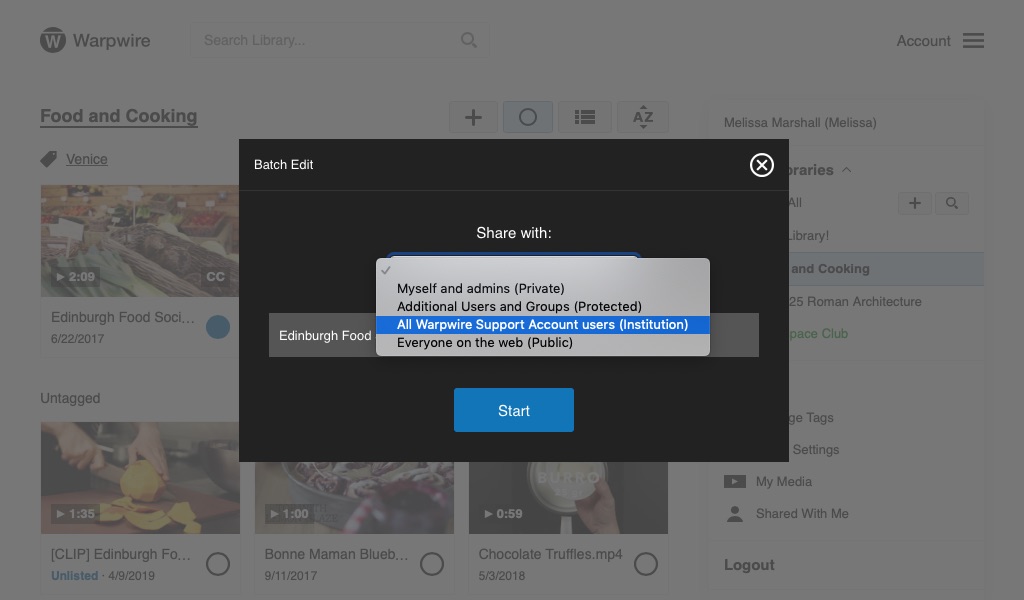
Click "Start." The assets will be processed one by one. Click "Done" when all of them have finished, to return to the Media Library.
After selecting your assets in Batch Edit Mode, click "Visibility" from the "Batch Actions" menu.
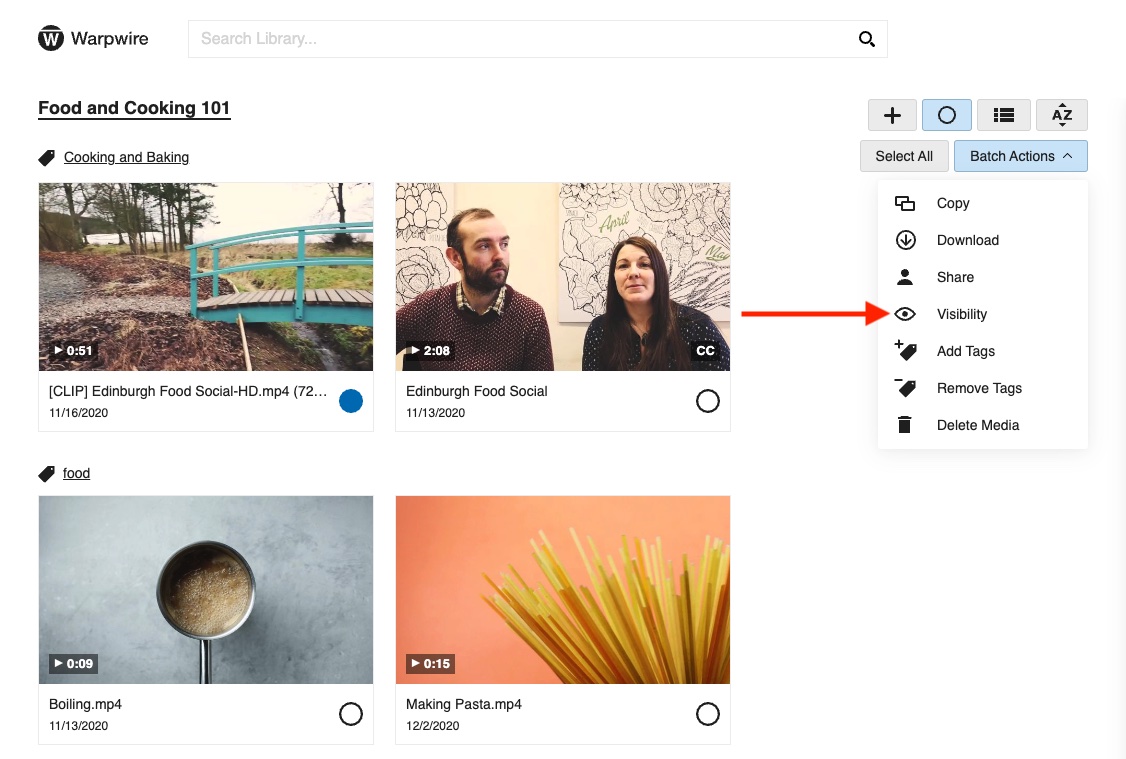
Select the whether you want to make the assets Visible or Unlisted.
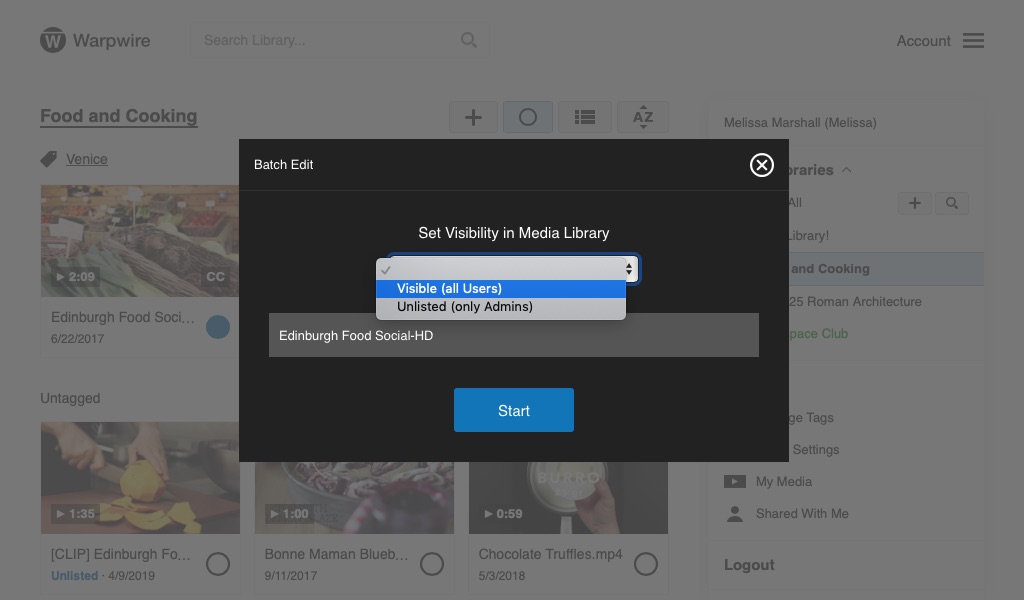
Click "Start." The assets will be processed one by one. Click "Done" when all of them have finished, to return to the Media Library.
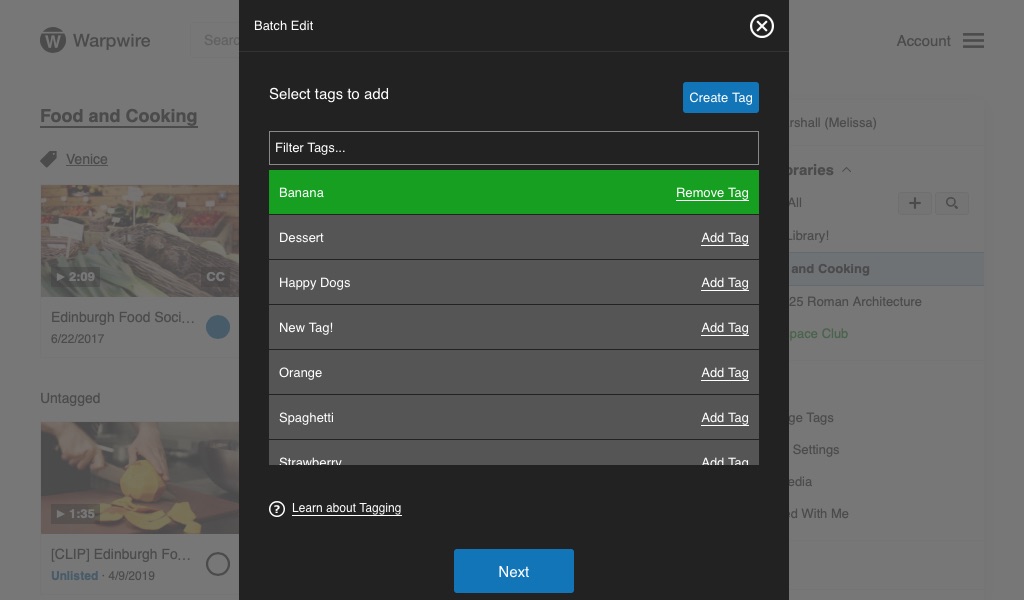
After selecting your assets in Batch Edit Mode, click "Add Tags" from the "Batch Actions" menu.
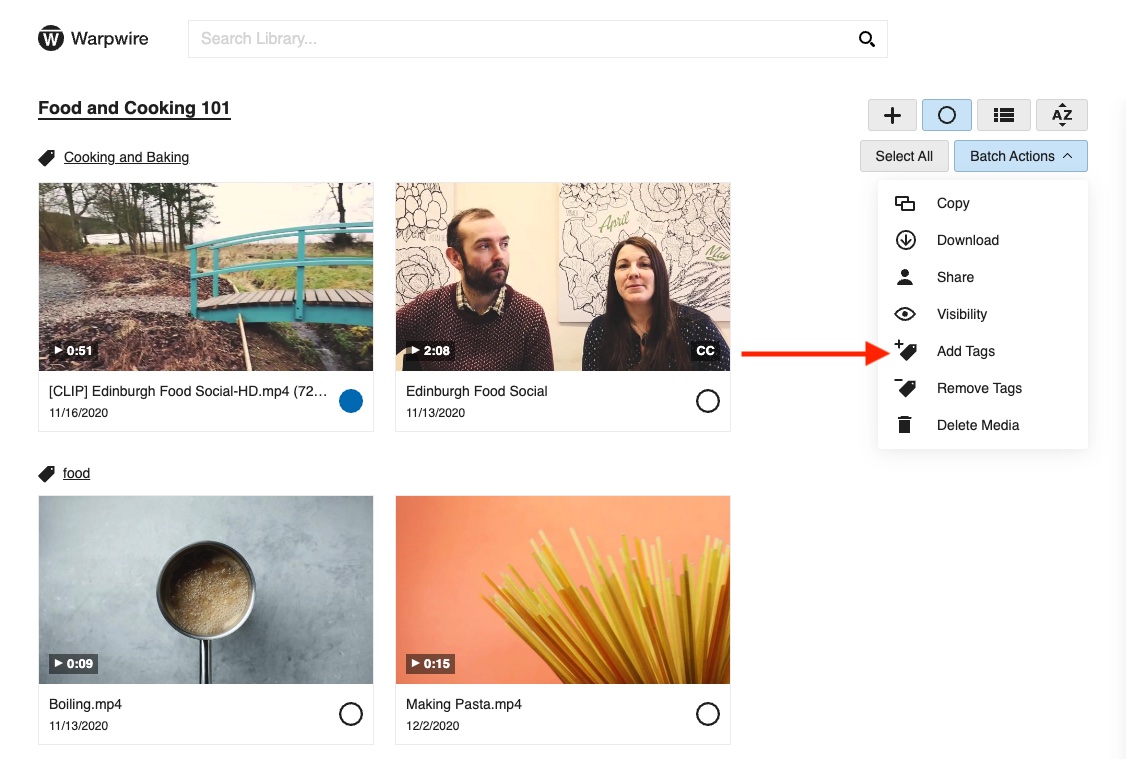
You'll now be able to browse and search through all of your Tags and select those you want to add to your chosen assets. Just click the Tags you want to add — they'll turn green.
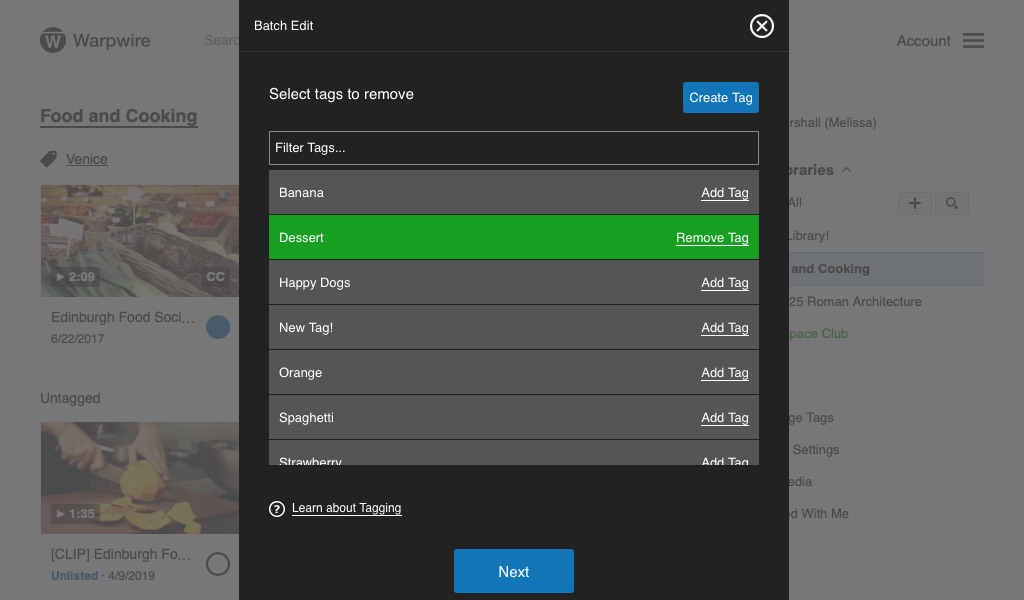
If the Tag you want to add doesn't exist yet, just click "Create Tag" to make it.
You'll now see a list of the assets you're about to add tags to. Click "Start" when you're ready.

Tags will be added to the assets one by one. You'll be able to see any errors, if they occur (e.g. if you attempt to add a tag to an asset that already has that tag). Click "Done."
After selecting your assets in Batch Edit Mode, click "Remove Tags" from the "Batch Actions" menu.

You'll now be able to browse and search through all of your tags and select those you want to remove from your chosen assets. Just click the tags you want to remove — they'll turn green.
You'll now see a list of the assets you're about to remove Tags from. Click "Start" when you're ready.

Tags will be removed from the assets one by one, while you watch. You'll be able to see any errors, if they occur (e.g. an error will appear if you try to remove a tag that isn't associated with the asset you selected). Click "Done."
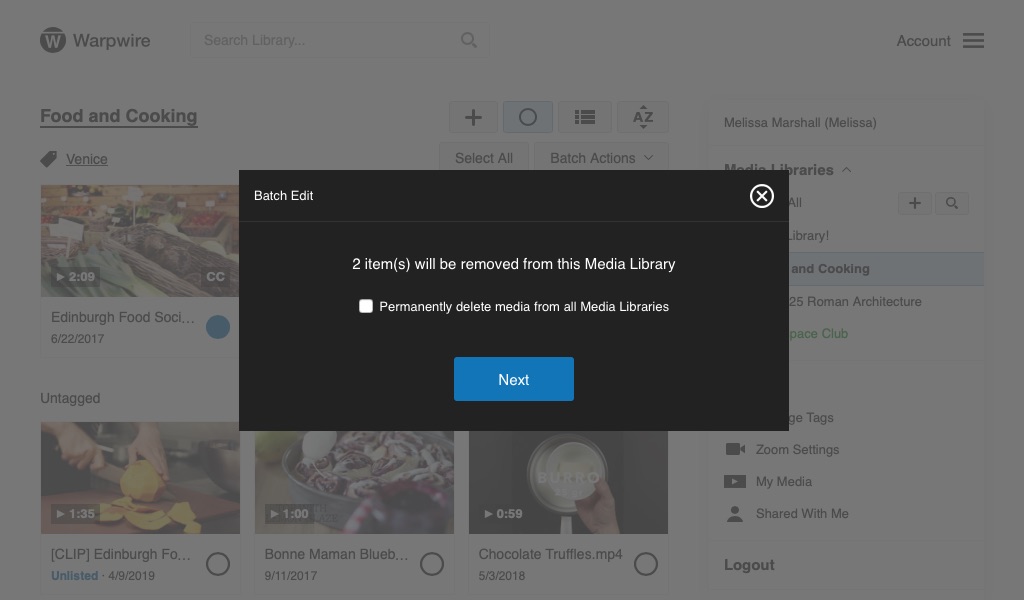
After selecting your assets in Batch Edit Mode, click "Delete Media" from the "Batch Actions" menu.

The number of assets you're about to remove from the Library will appear, for your verification. You also have the option of clicking the "Permanently delete media from all Media Libraries" checkbox if you'd like to remove all copies of the assets from ALL Media Libraries. Leave it unchecked to remove the assets only from the current Media Library. Click "Next."
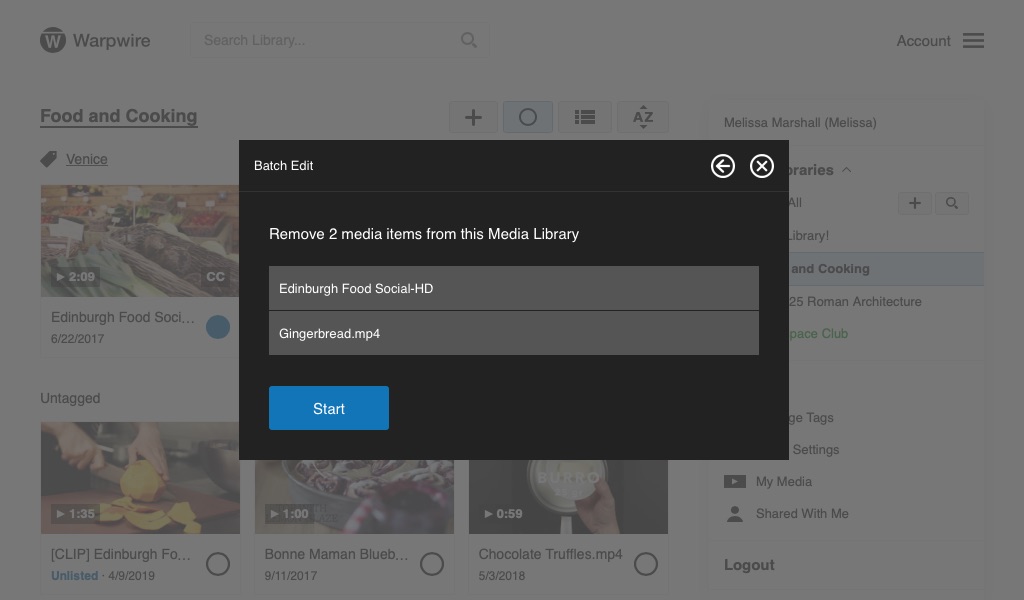
You'll now see a list of the assets you're about to remove from the Media Library. Click "Start" when you're ready.
The assets will be removed one by one, while you watch. You'll be able to see any errors, if they occur. Click "Done."
See also: Introduction, Sort and Find.