Note: This process is available only to Institutional Administrators!
This guide will walk you through the process of setting up a Rev caption profile and managing caption requests from the Warpwire Admin Tool.
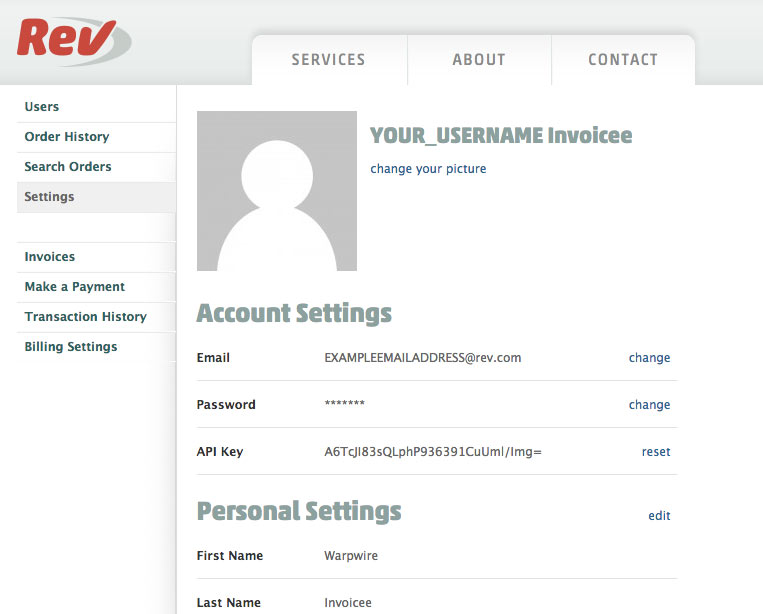
Note that to follow this guide you'll need to have an account with Rev set up with invoice billing. Credit card billing is insufficient to make use of their API key. Get in touch with Rev directly to set up the appropriate billing! You can sign up for invoice billing at this link.
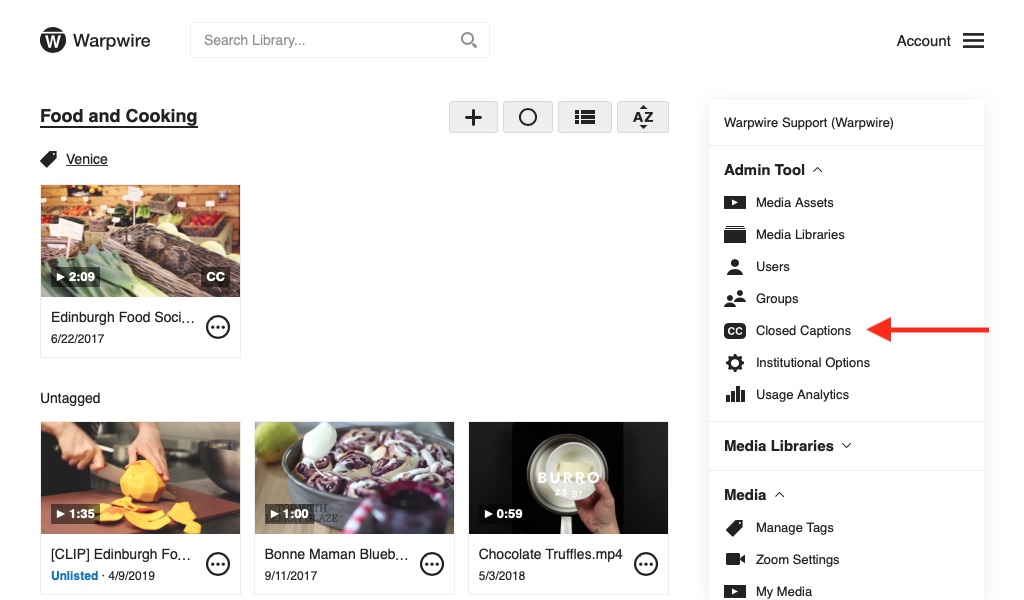
Now that you've got the API Key, let's go to the Warpwire Admin Tool and get started!
To navigate to the Warpwire Admin Tool, open the Account Menu > Admin Tool pane, and click "Closed Captions."
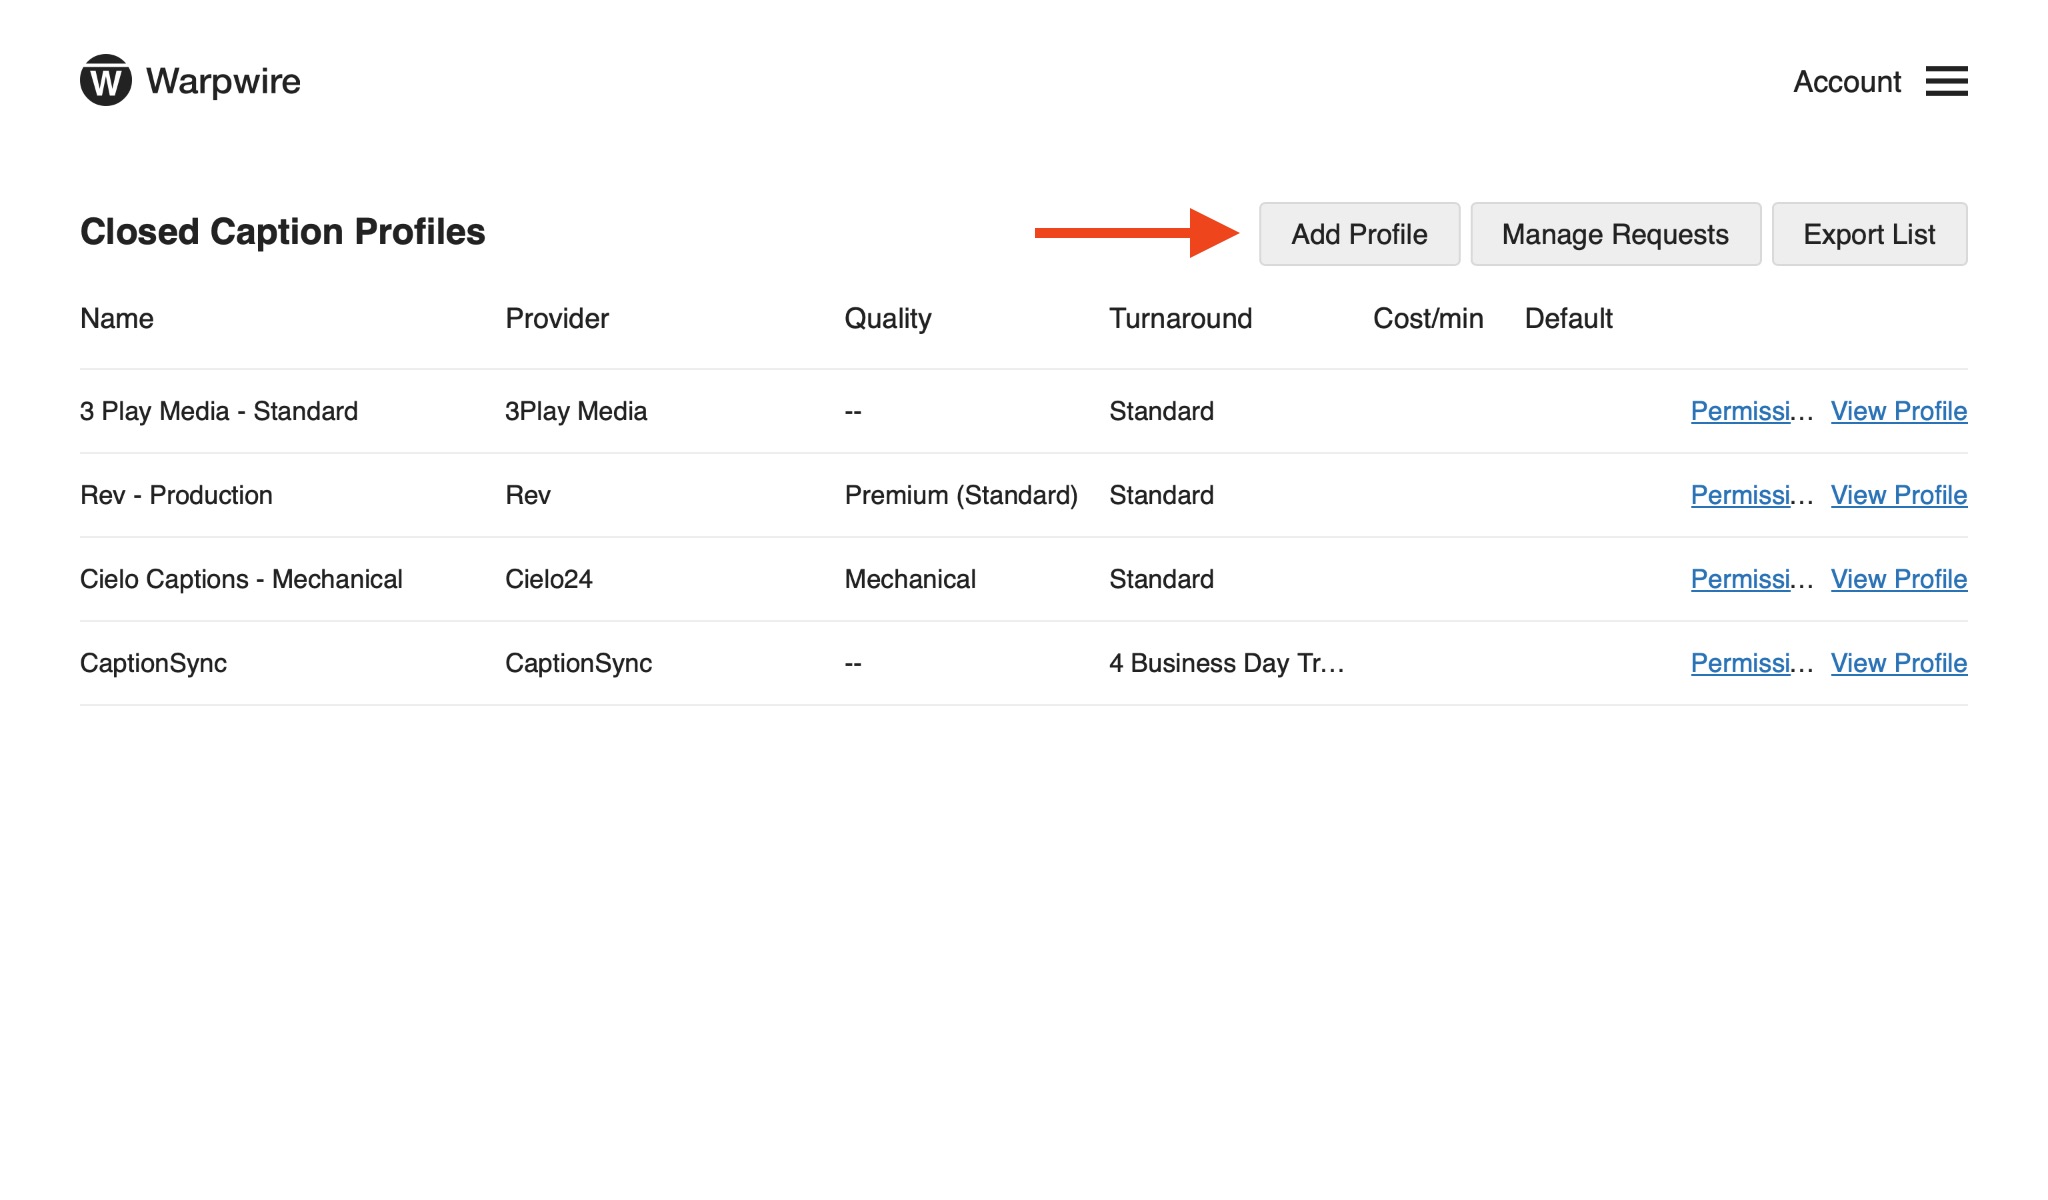
Now, because you haven't set up a closed caption profile, you won't see any caption requests on this page, because no one has been able to make a request yet!
Click "Manage Profiles" in the upper-right of the screen. Then, click "Add Profile" to create your first profile.
When you click "Add Profile," you'll be able to give your new profile a name, and optionally designate it as the default profile for requests.
You'll then select "Rev" as your caption provider and the API key you copied from the Rev website as the User API Key.
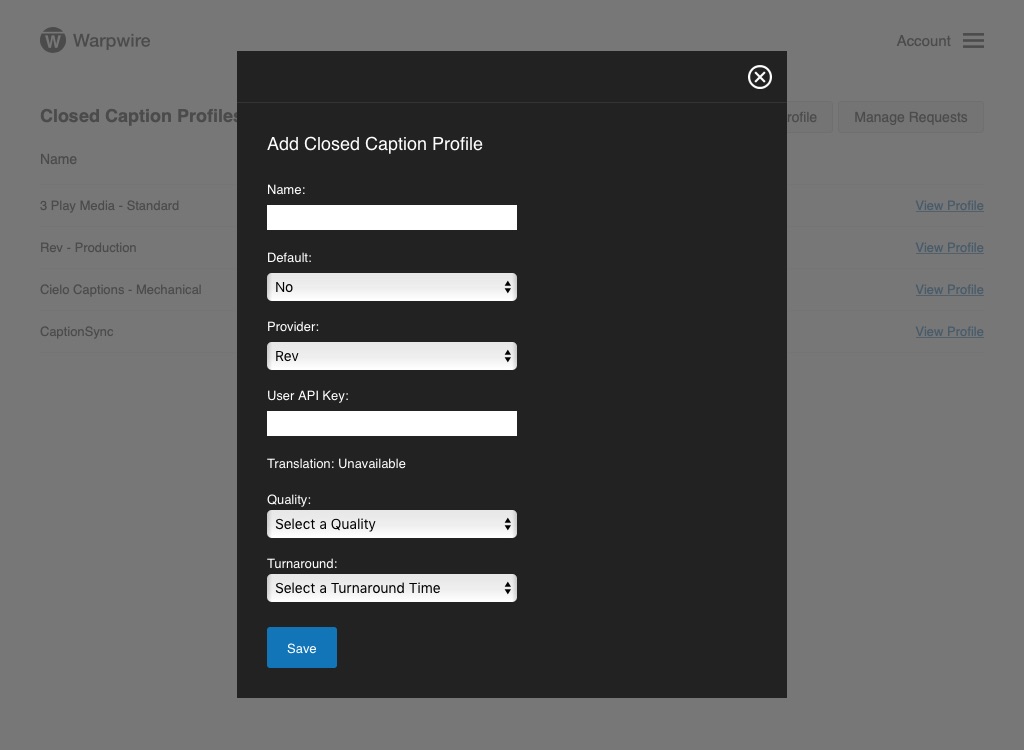
Select the quality of caption from options as well as the desired turnaround time.
Click "Save" to finish creating the closed caption profile!
See also: Introduction to Closed Captions.