Warpwire's Multi-Source Capture tool is an in-browser capture system, where no app is required to use. Users can record up to four different video sources simultaneously. The video sources are saved as a single media asset for selected playback after completion. Read about Multi-Source Playback to learn more.
Multi-Source Capture is supported in Google Chrome, Mozilla Firefox, Microsoft Edge, and Opera web browsers.
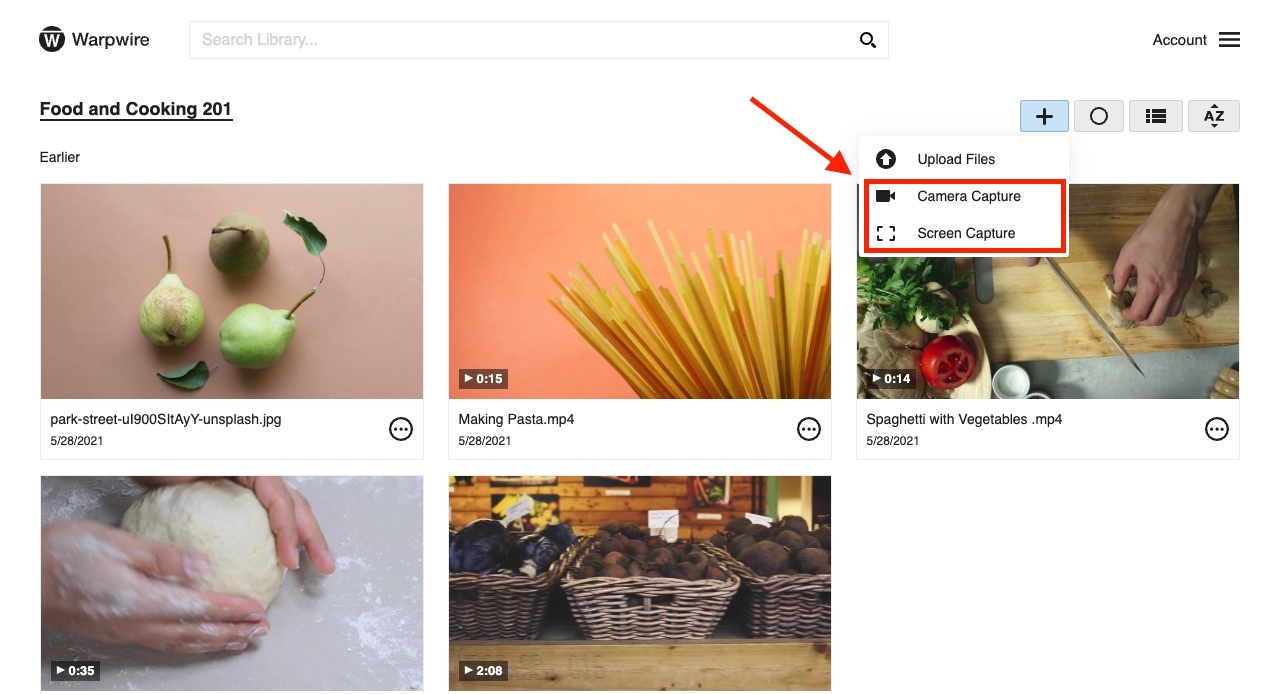
To begin recording, first navigate to the Media Library where you'd like to make your recording. Then, click the plus (+) button at the top of the screen. Select either Camera Capture or Screen Capture from the menu. This selection will default the Multi-Source Capture primary source to either camera or screen. Users can also change this selection from within the capture workflow.
Once Camera Capture or Screen Capture is clicked, a new tab will open to the Multi-Source Capture page.
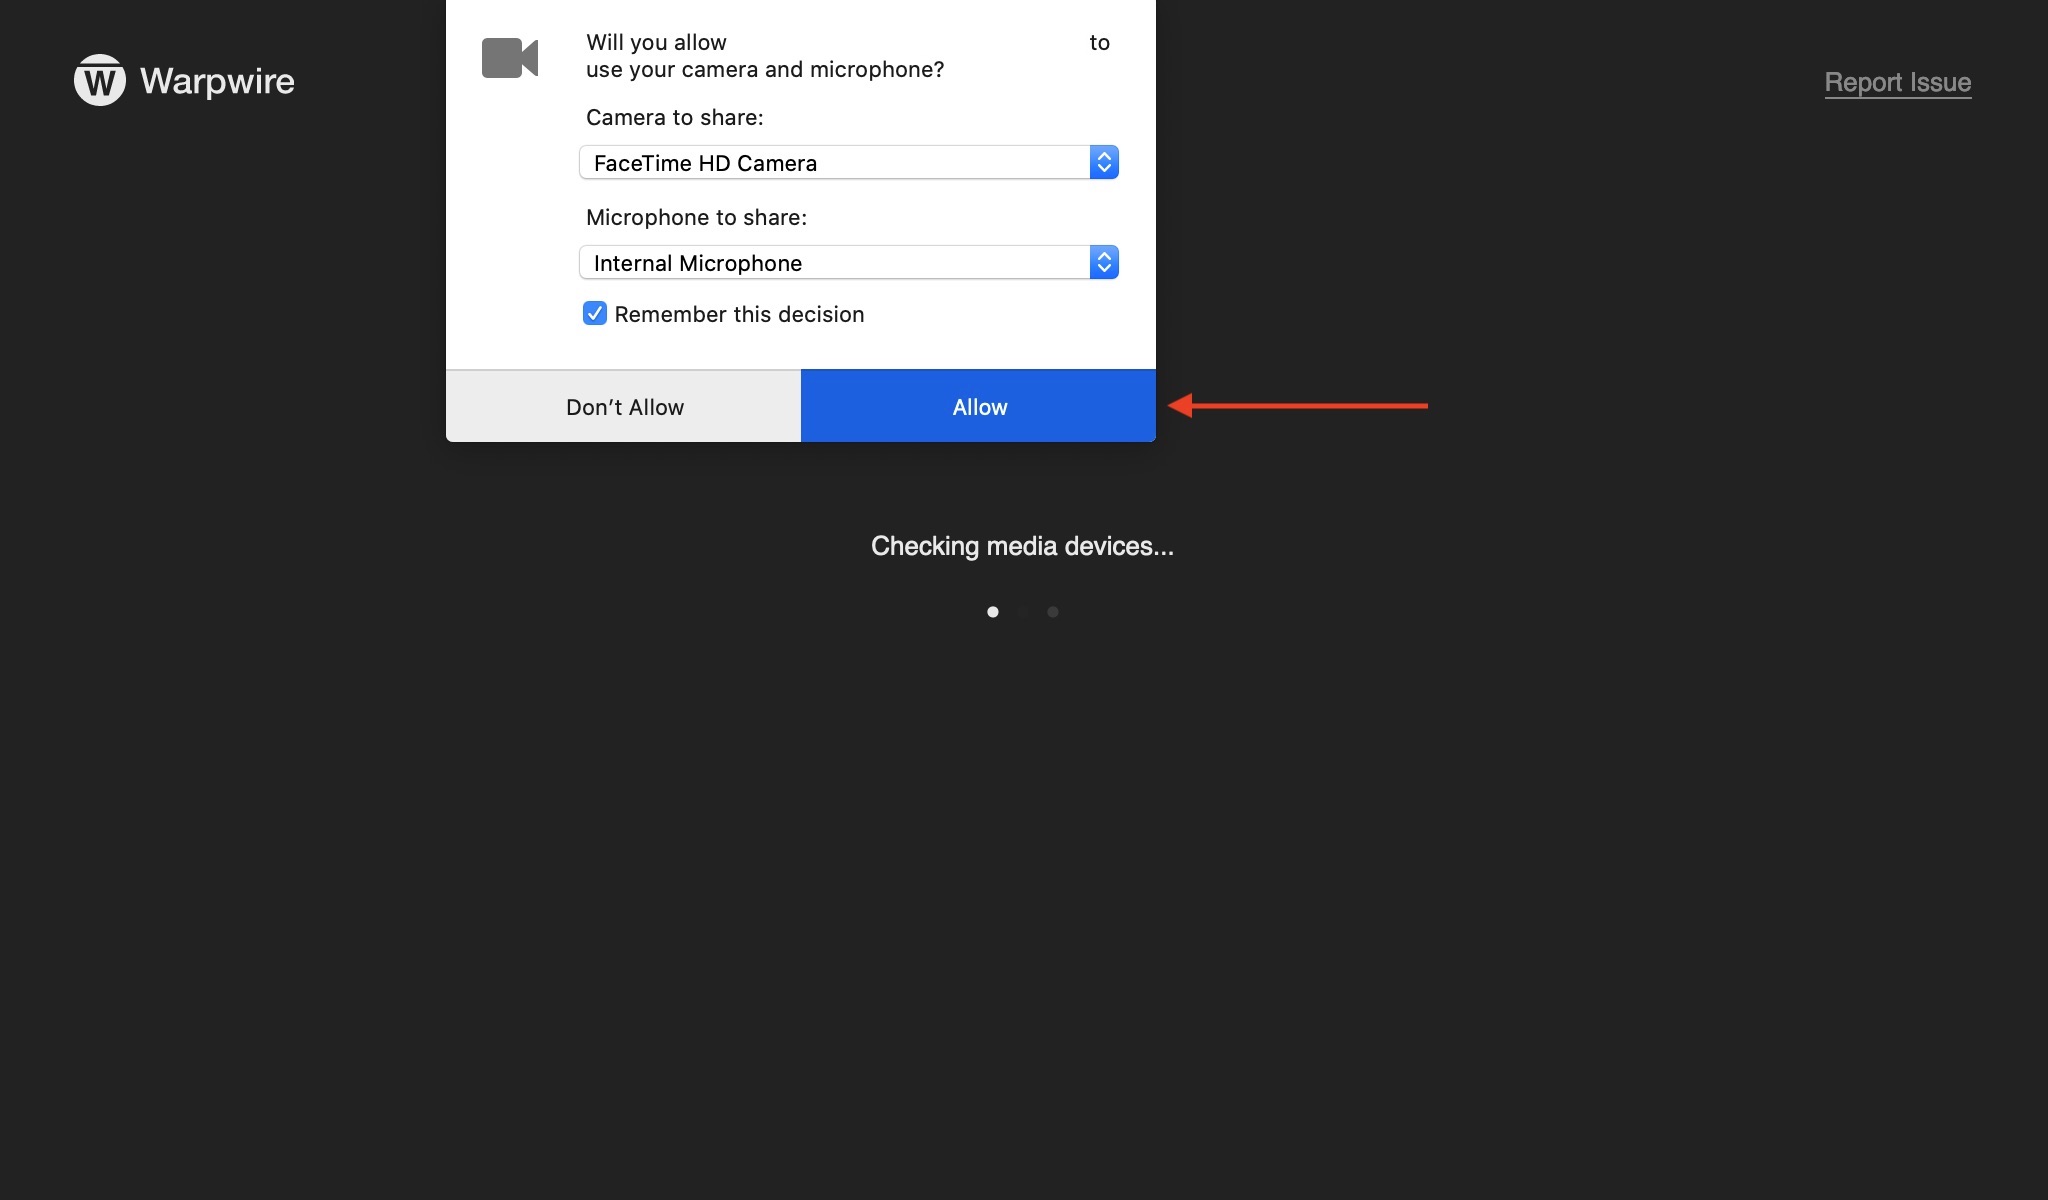
In Google Chrome, you will be asked to allow Warpwire to use your device's camera. Click "Allow".

In Mozilla Firefox, you will be asked to allow Warpwire Multi-Source Capture to use your camera and microphone. To save this setting for the future, check the box "Remember this decision". Then, click "Allow".
To select your capture sources, navigate to the Settings menu on the right side of the screen.
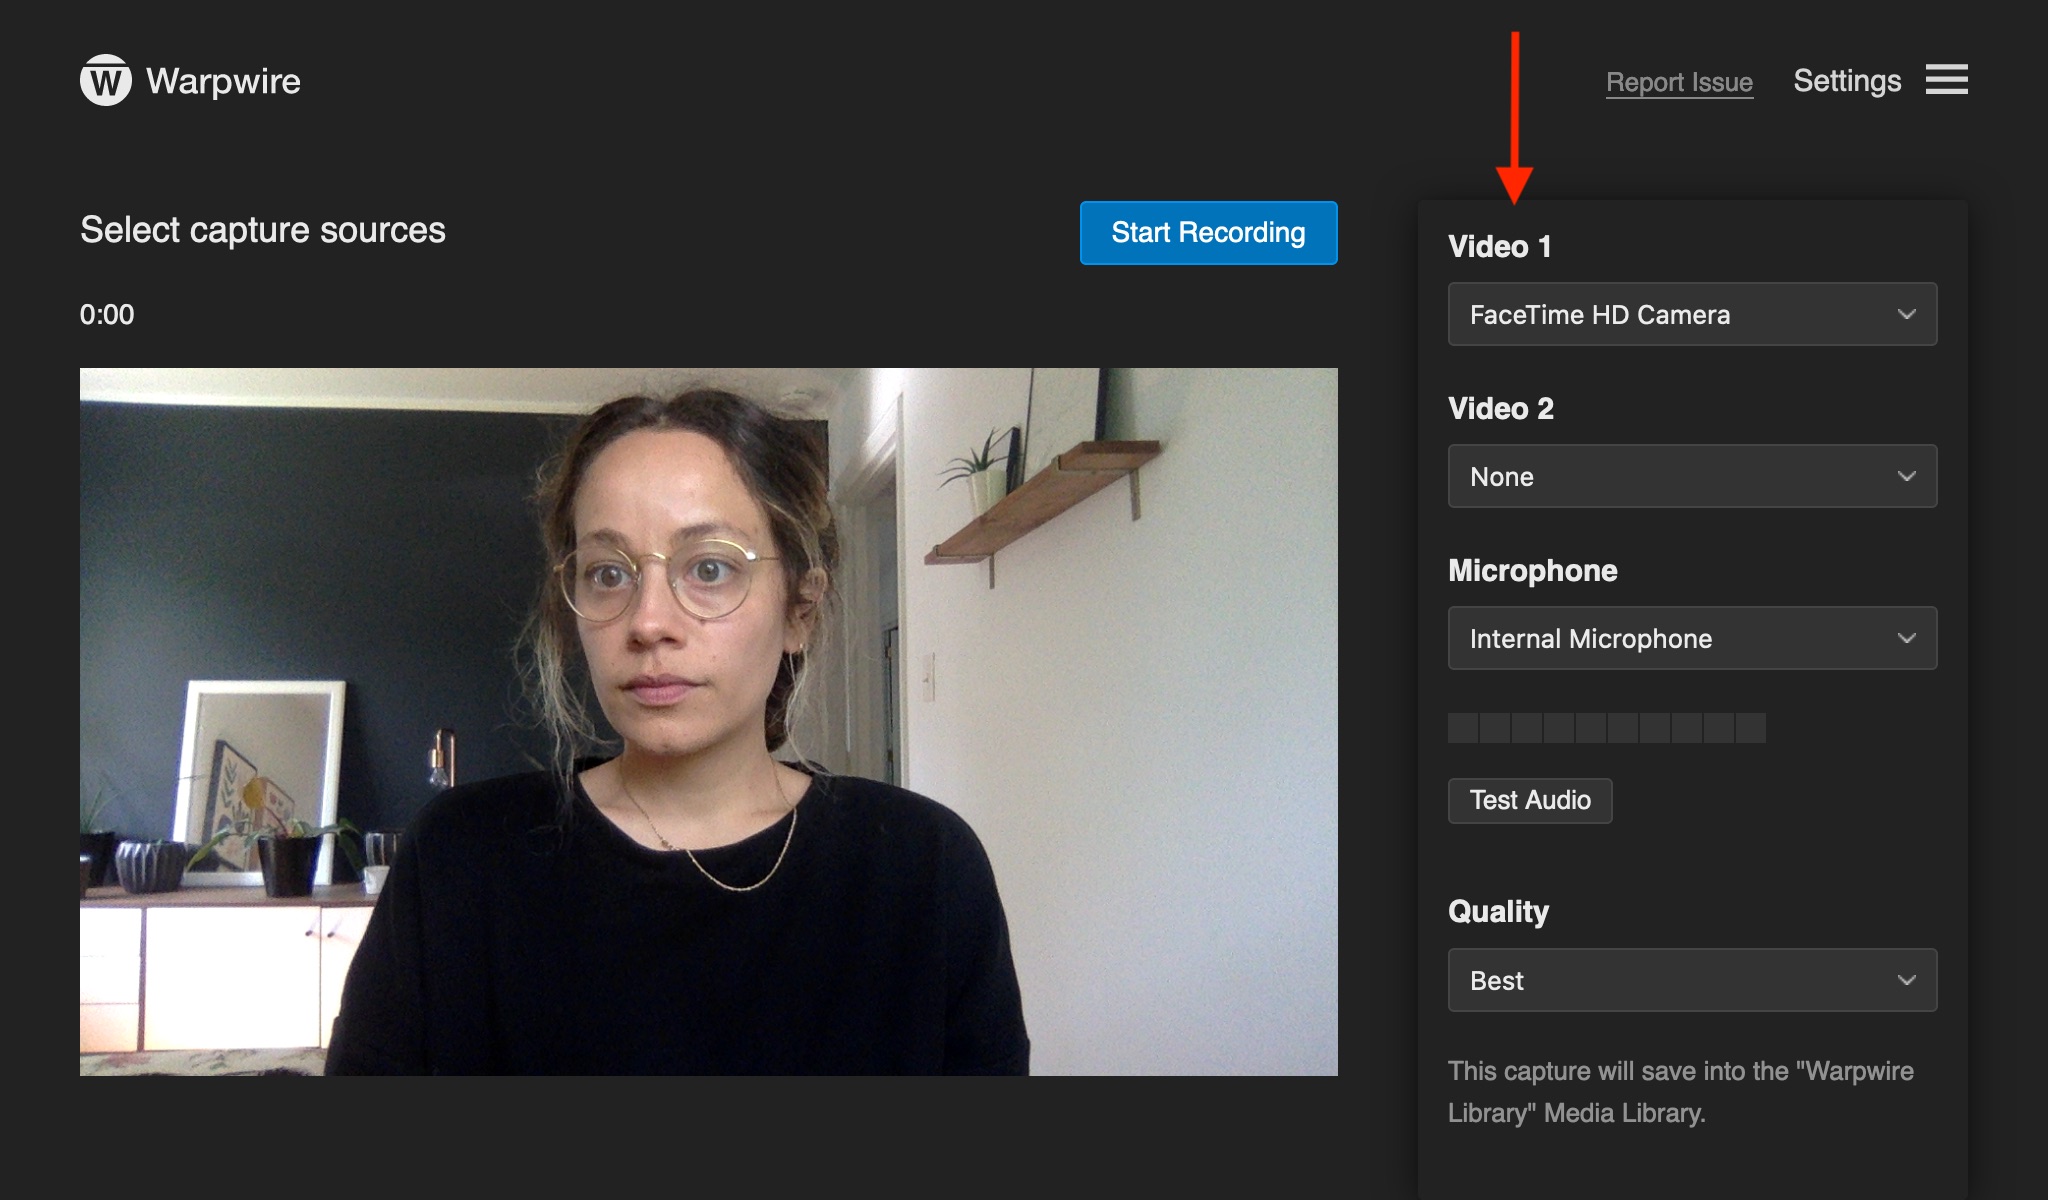
Warpwire will automatically choose a camera (if available) on your device for the first source if Camera Capture was initially selected. A screen selection window will appear if Screen Capture was initially selected.
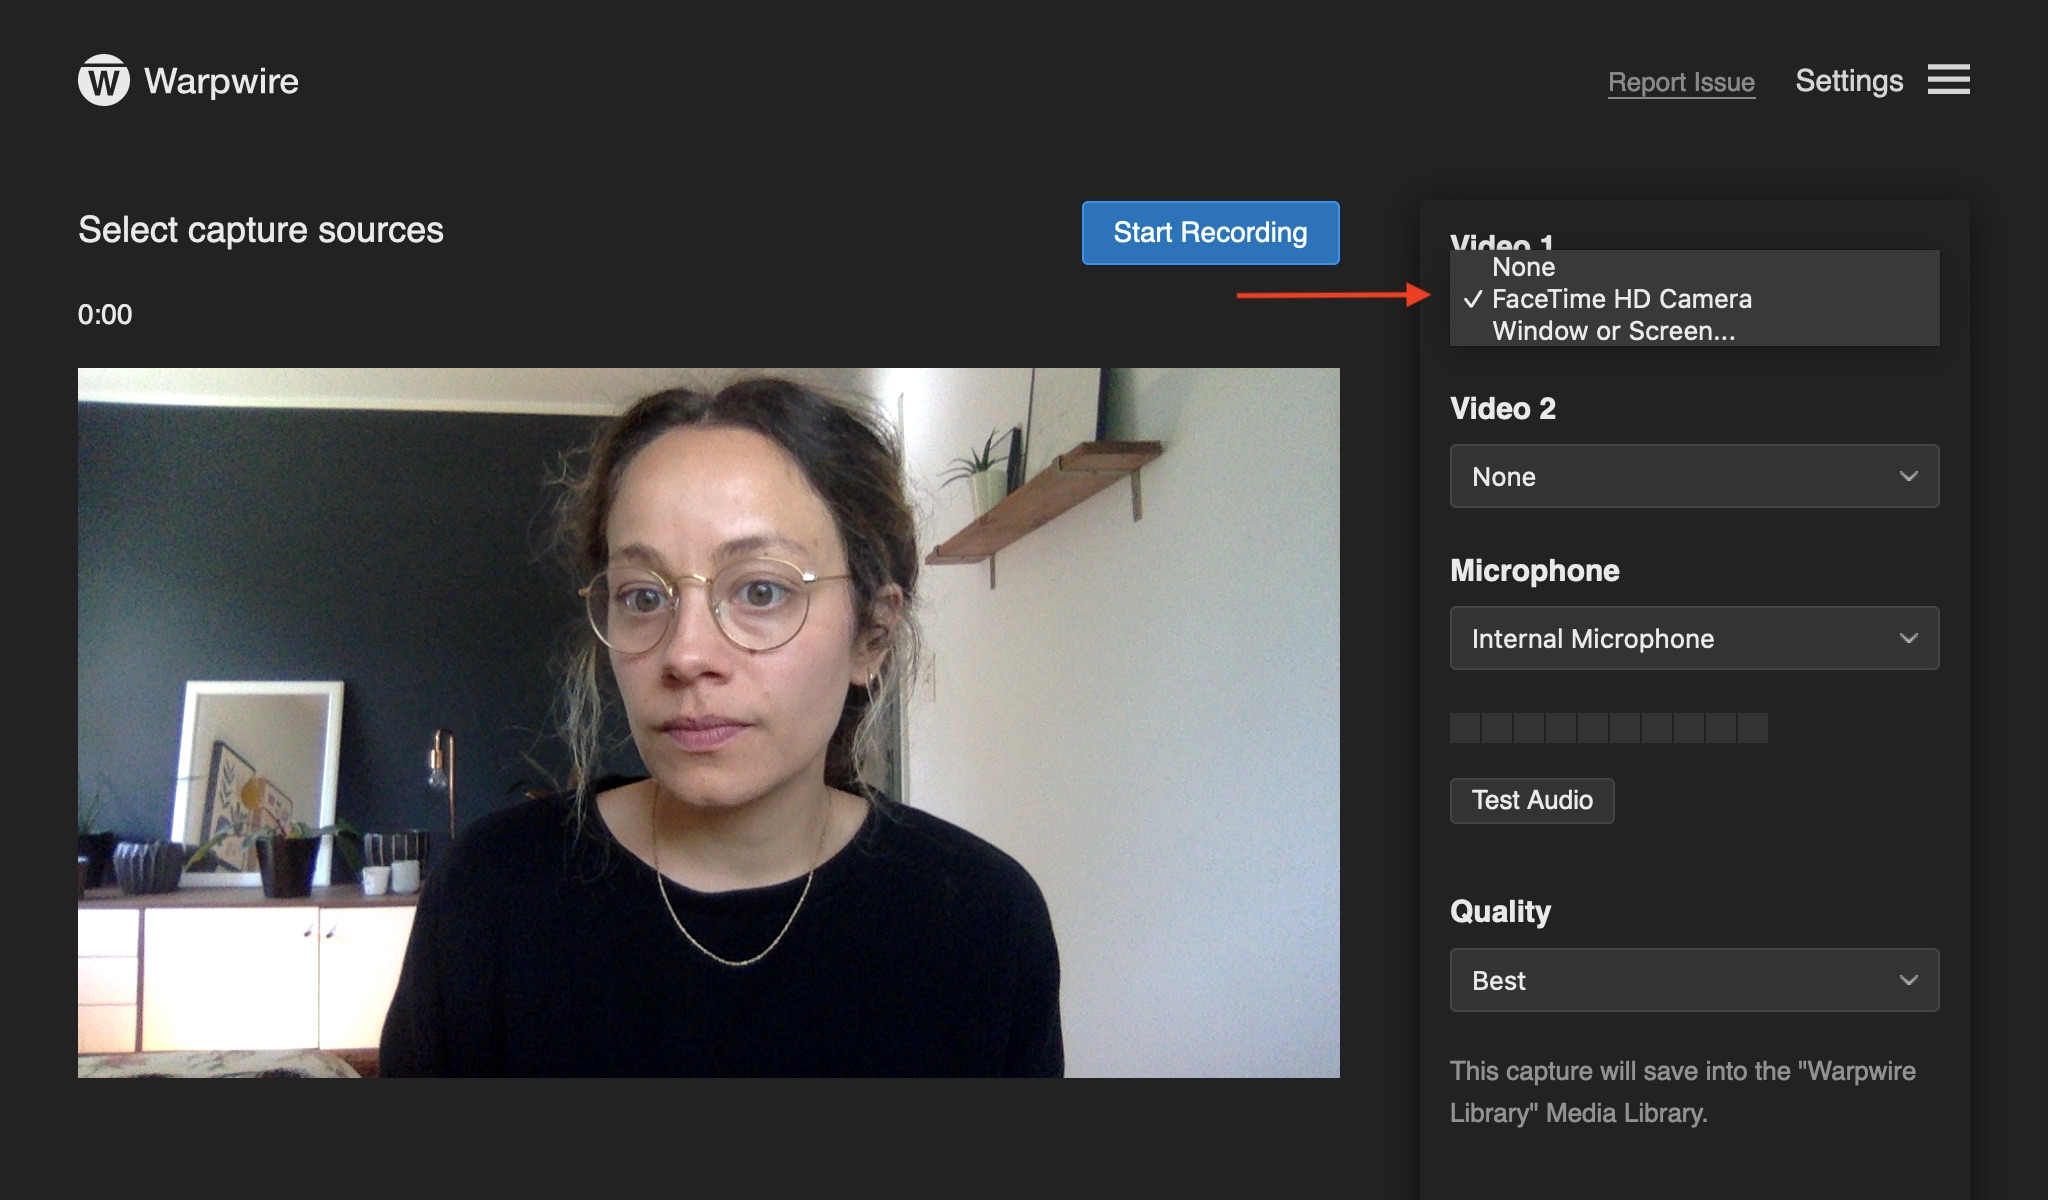
To change any capture source, simply click the select menu below any video or audio source. You will have multiple video source options: any camera available on your device, a Window or Screen, or None (to perform an audio-only capture).
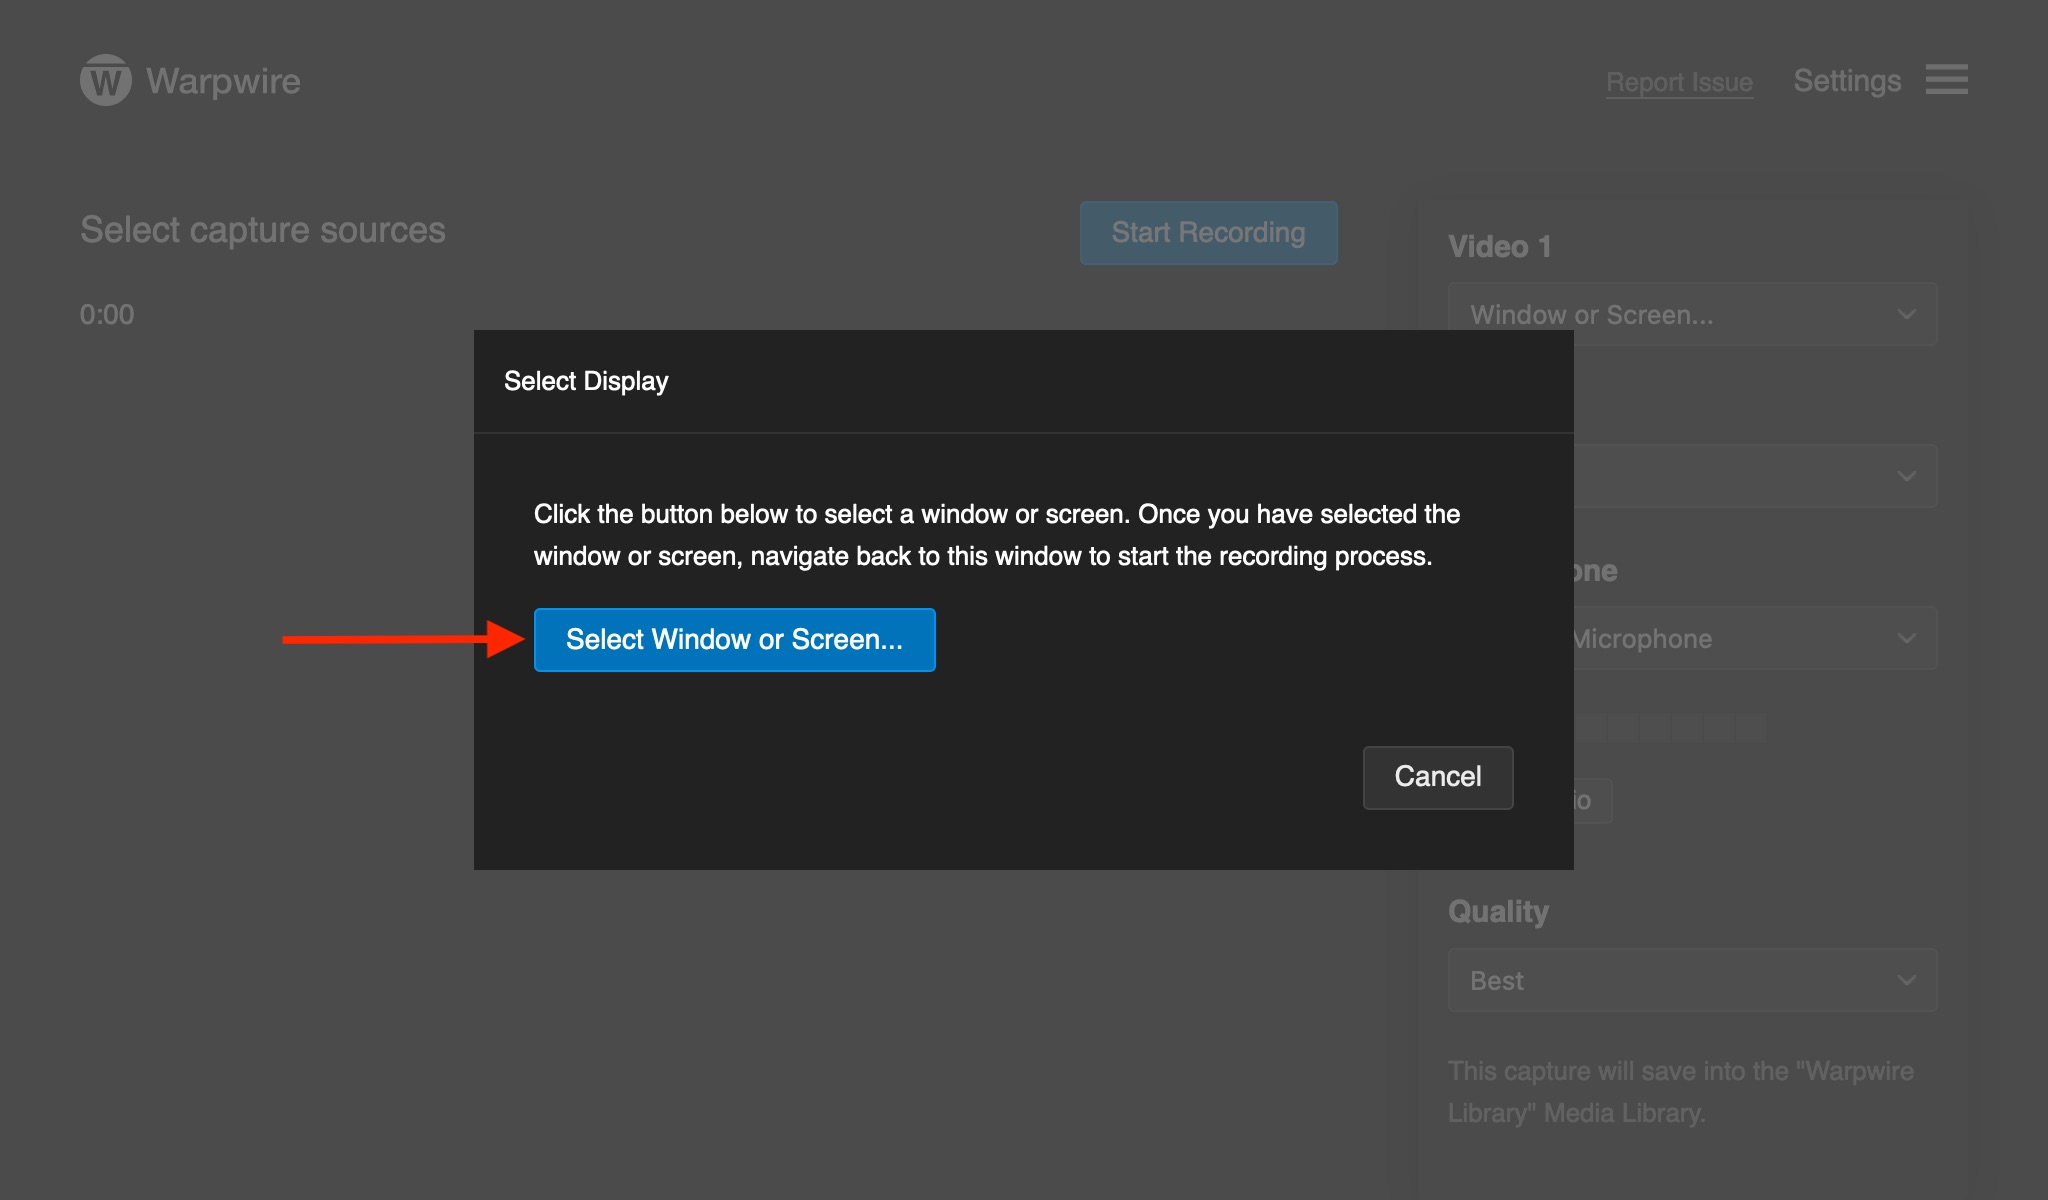
To capture a window or screen from your computer, simply click the "Window or Screen..." option from the video source menu. Once clicked, the "Select Display" window will open.
Read the instructions and then click the blue "Select Window or Screen..." button to select the source.
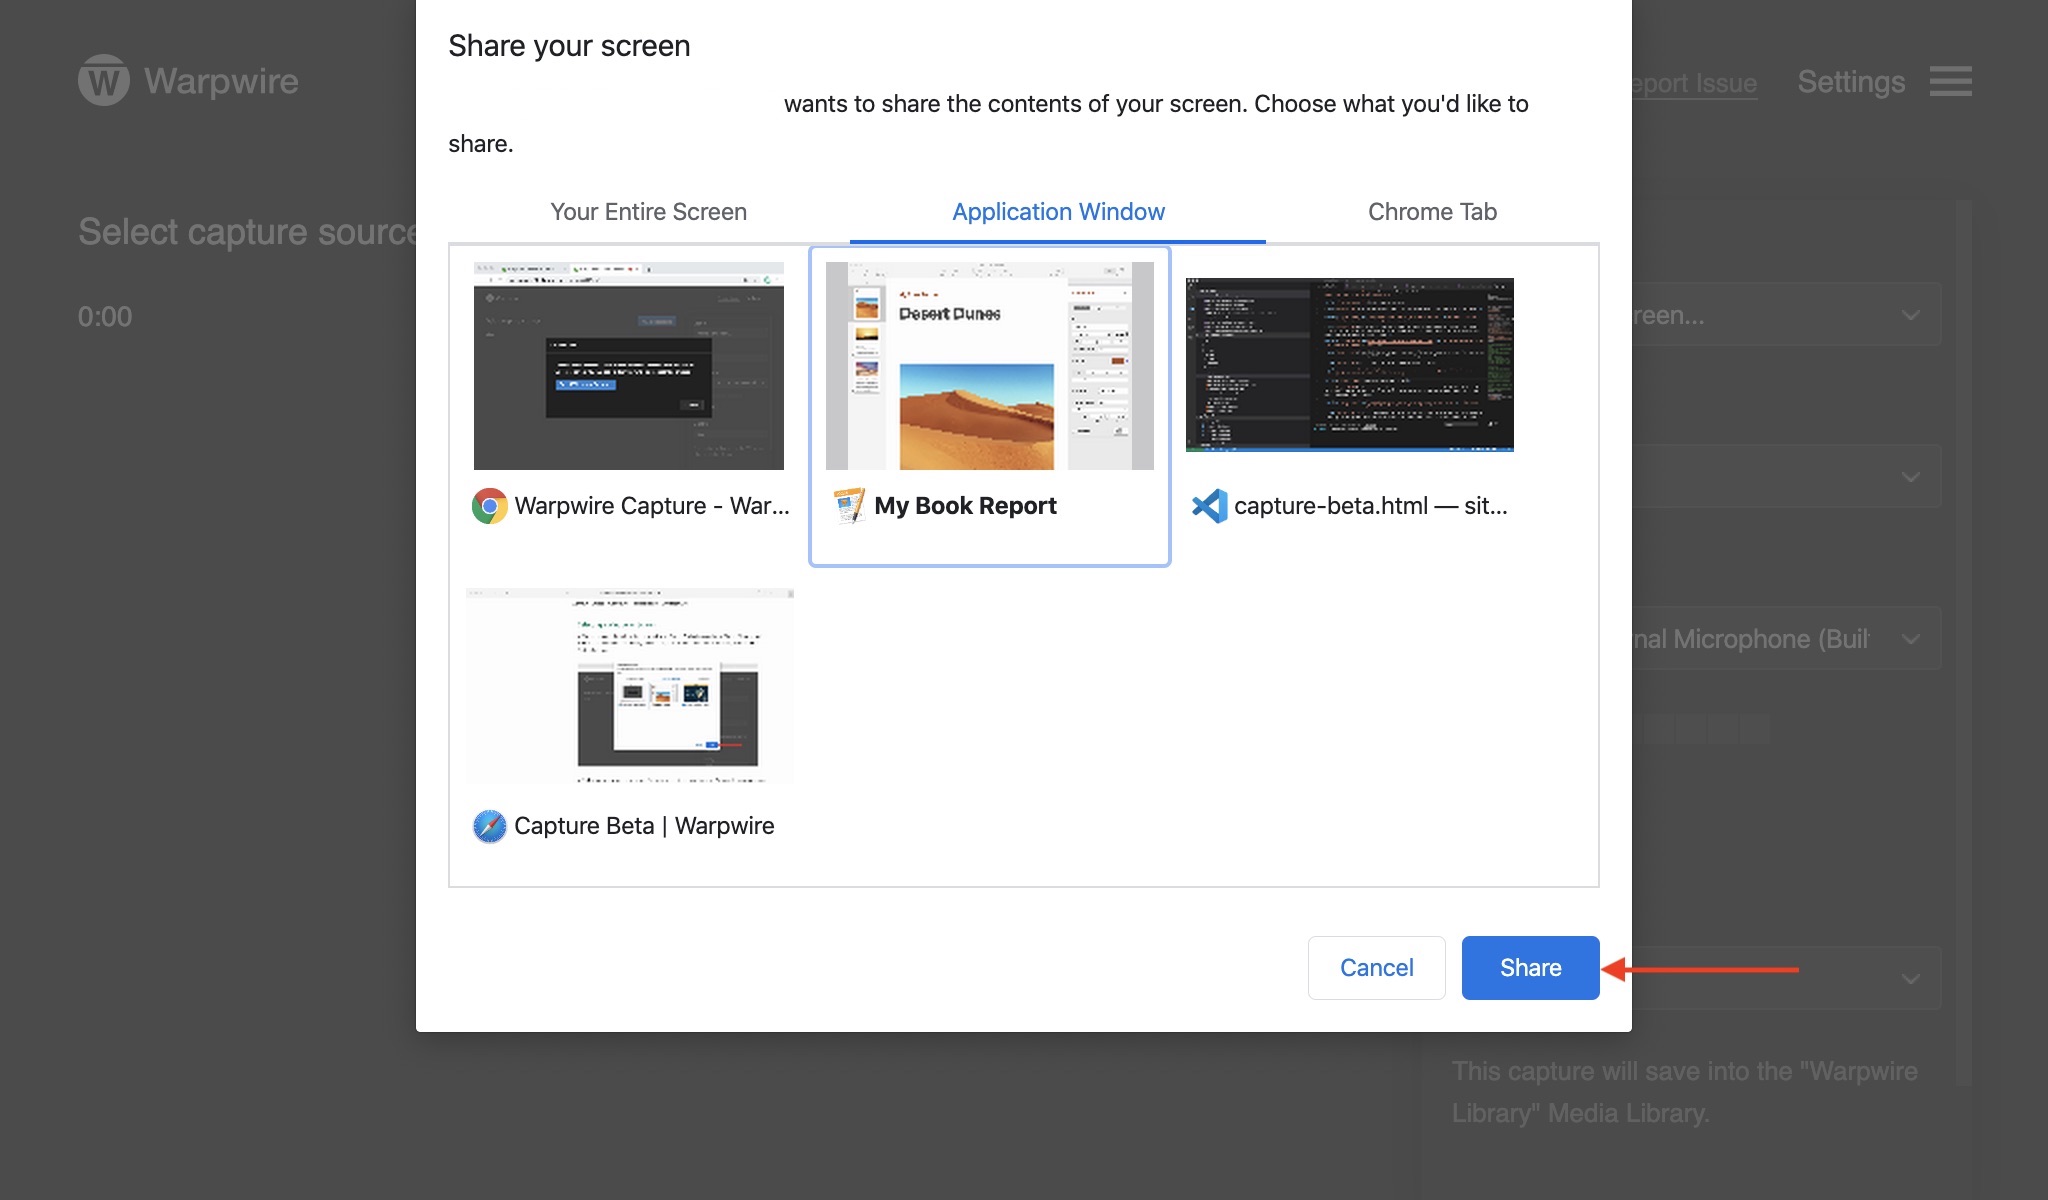
In Google Chrome, navigate through the tabs to select which Screen, Application Window or Chrome Tab you would like to record. Once you have made your selection, click the blue "Share" button. Once the window or screen is selected, you must navigate back to the Multi-Source Capture window to begin recording.
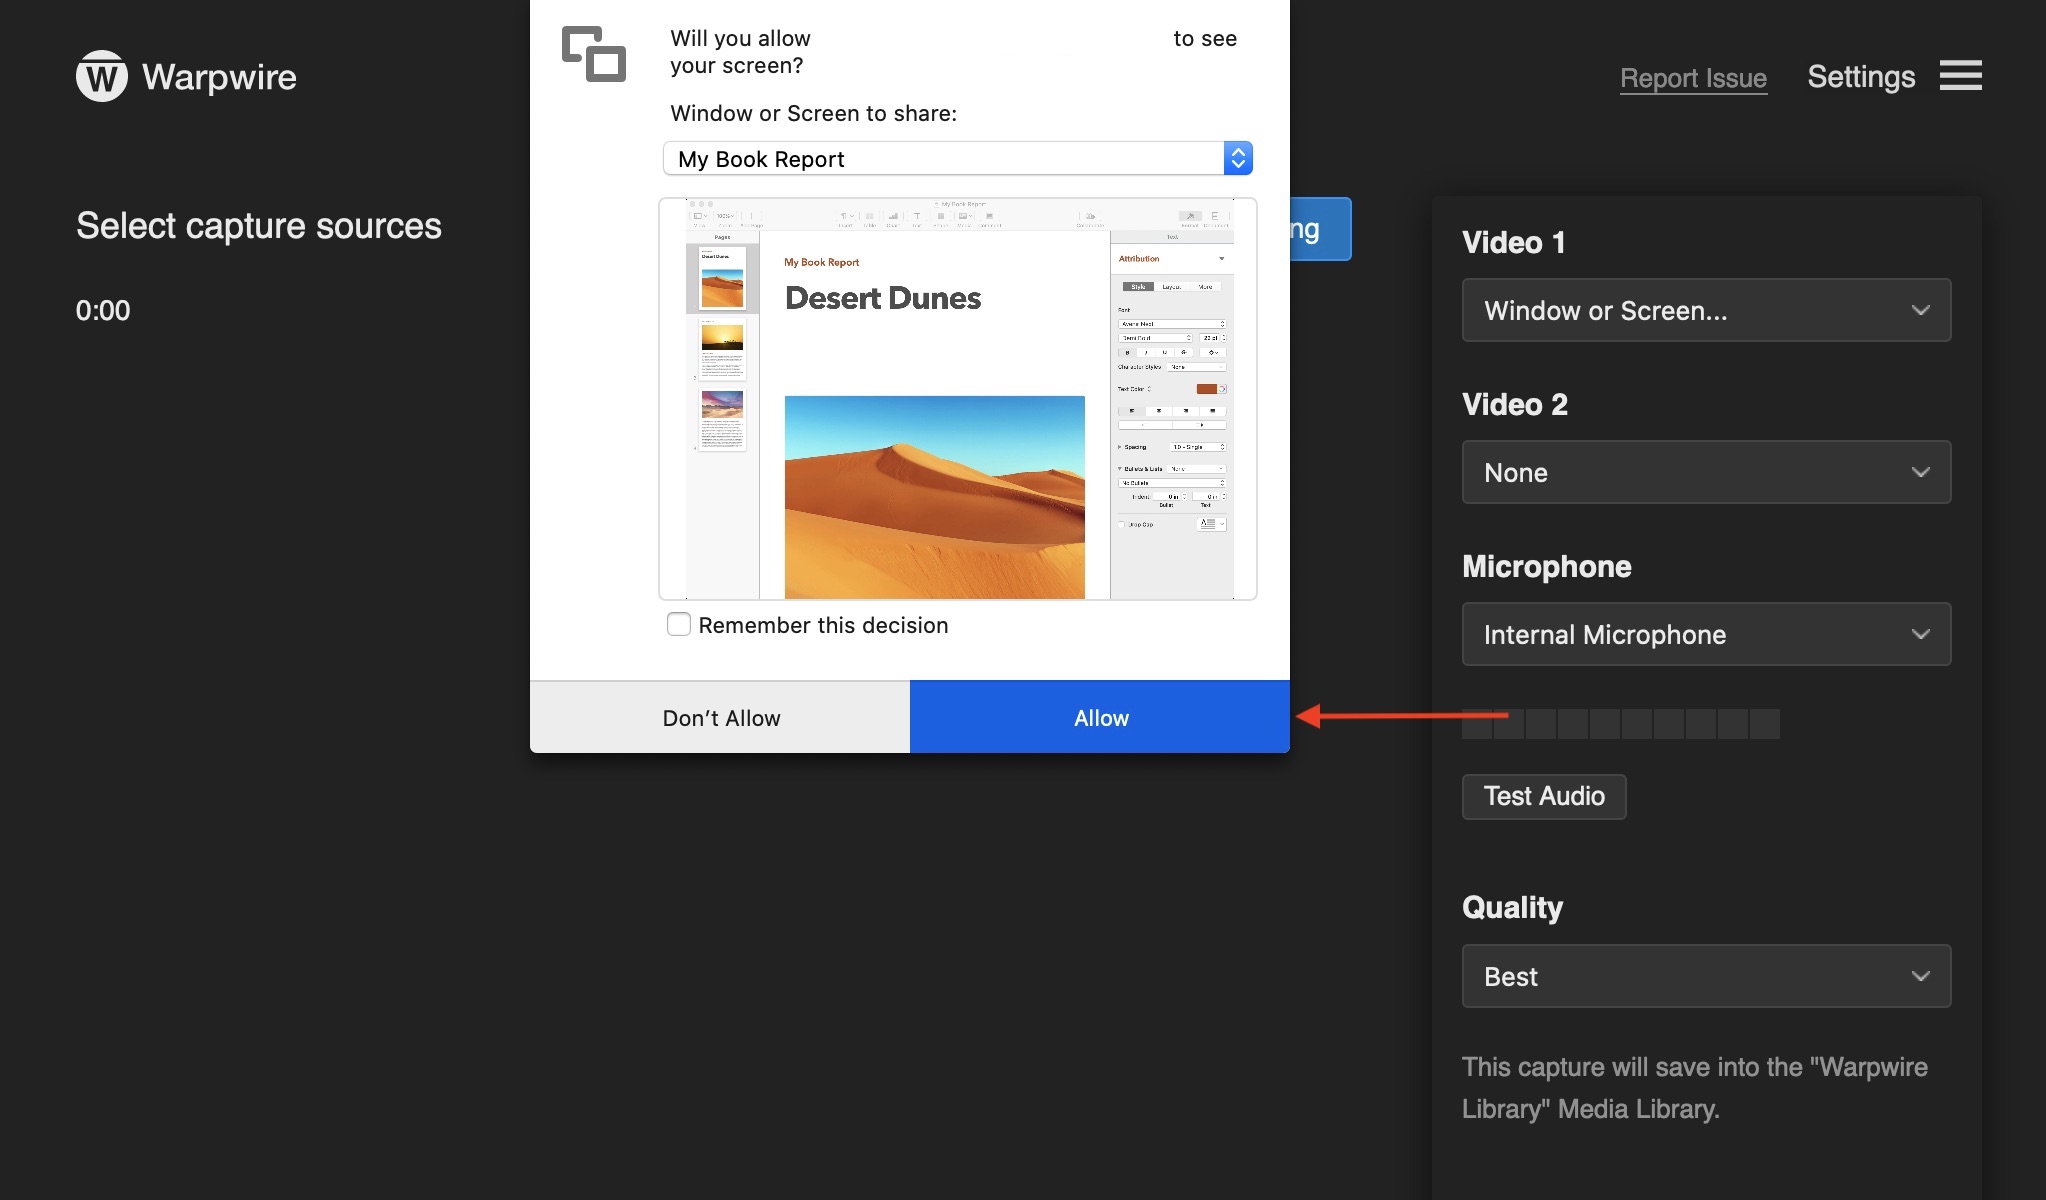
In Mozilla Firefox, a menu from your browser will ask permission for Warpwire to see your screen. It will also ask you to select which window or screen to record. Choose the window or screen, then click "Allow". Once the window or screen is selected, you must navigate back to the Multi-Source Capture window to begin recording.
To add a second video source, navigate to the menu on the right side of the recorder screen and click the select menu below Add Video Source.
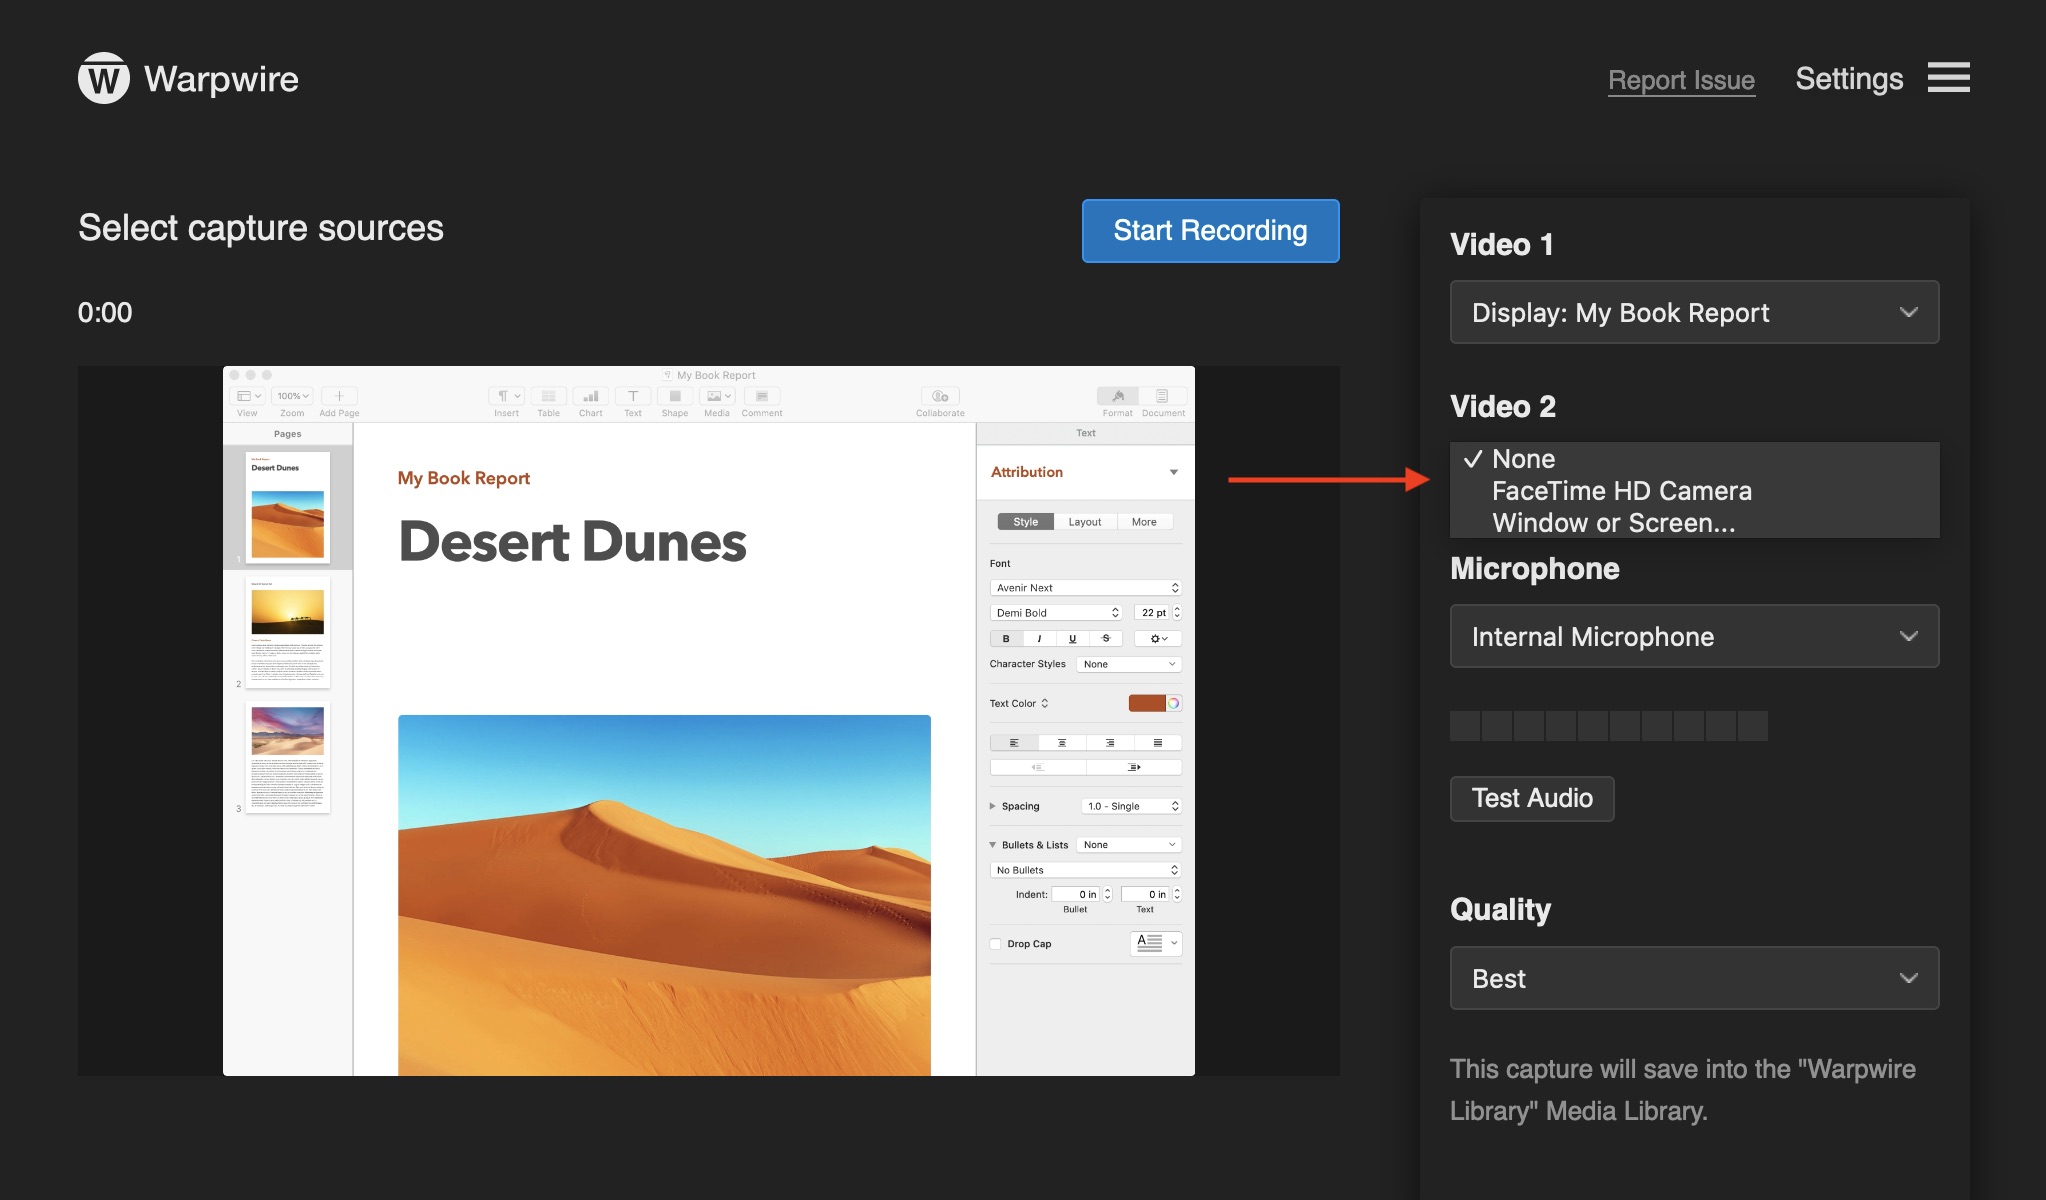
Repeat the same steps as above to add up to four video sources.
Depending on the specifications of your capture computer, you may be only able to select up to one video source. This is to ensure reliability of the recording process for older machines.
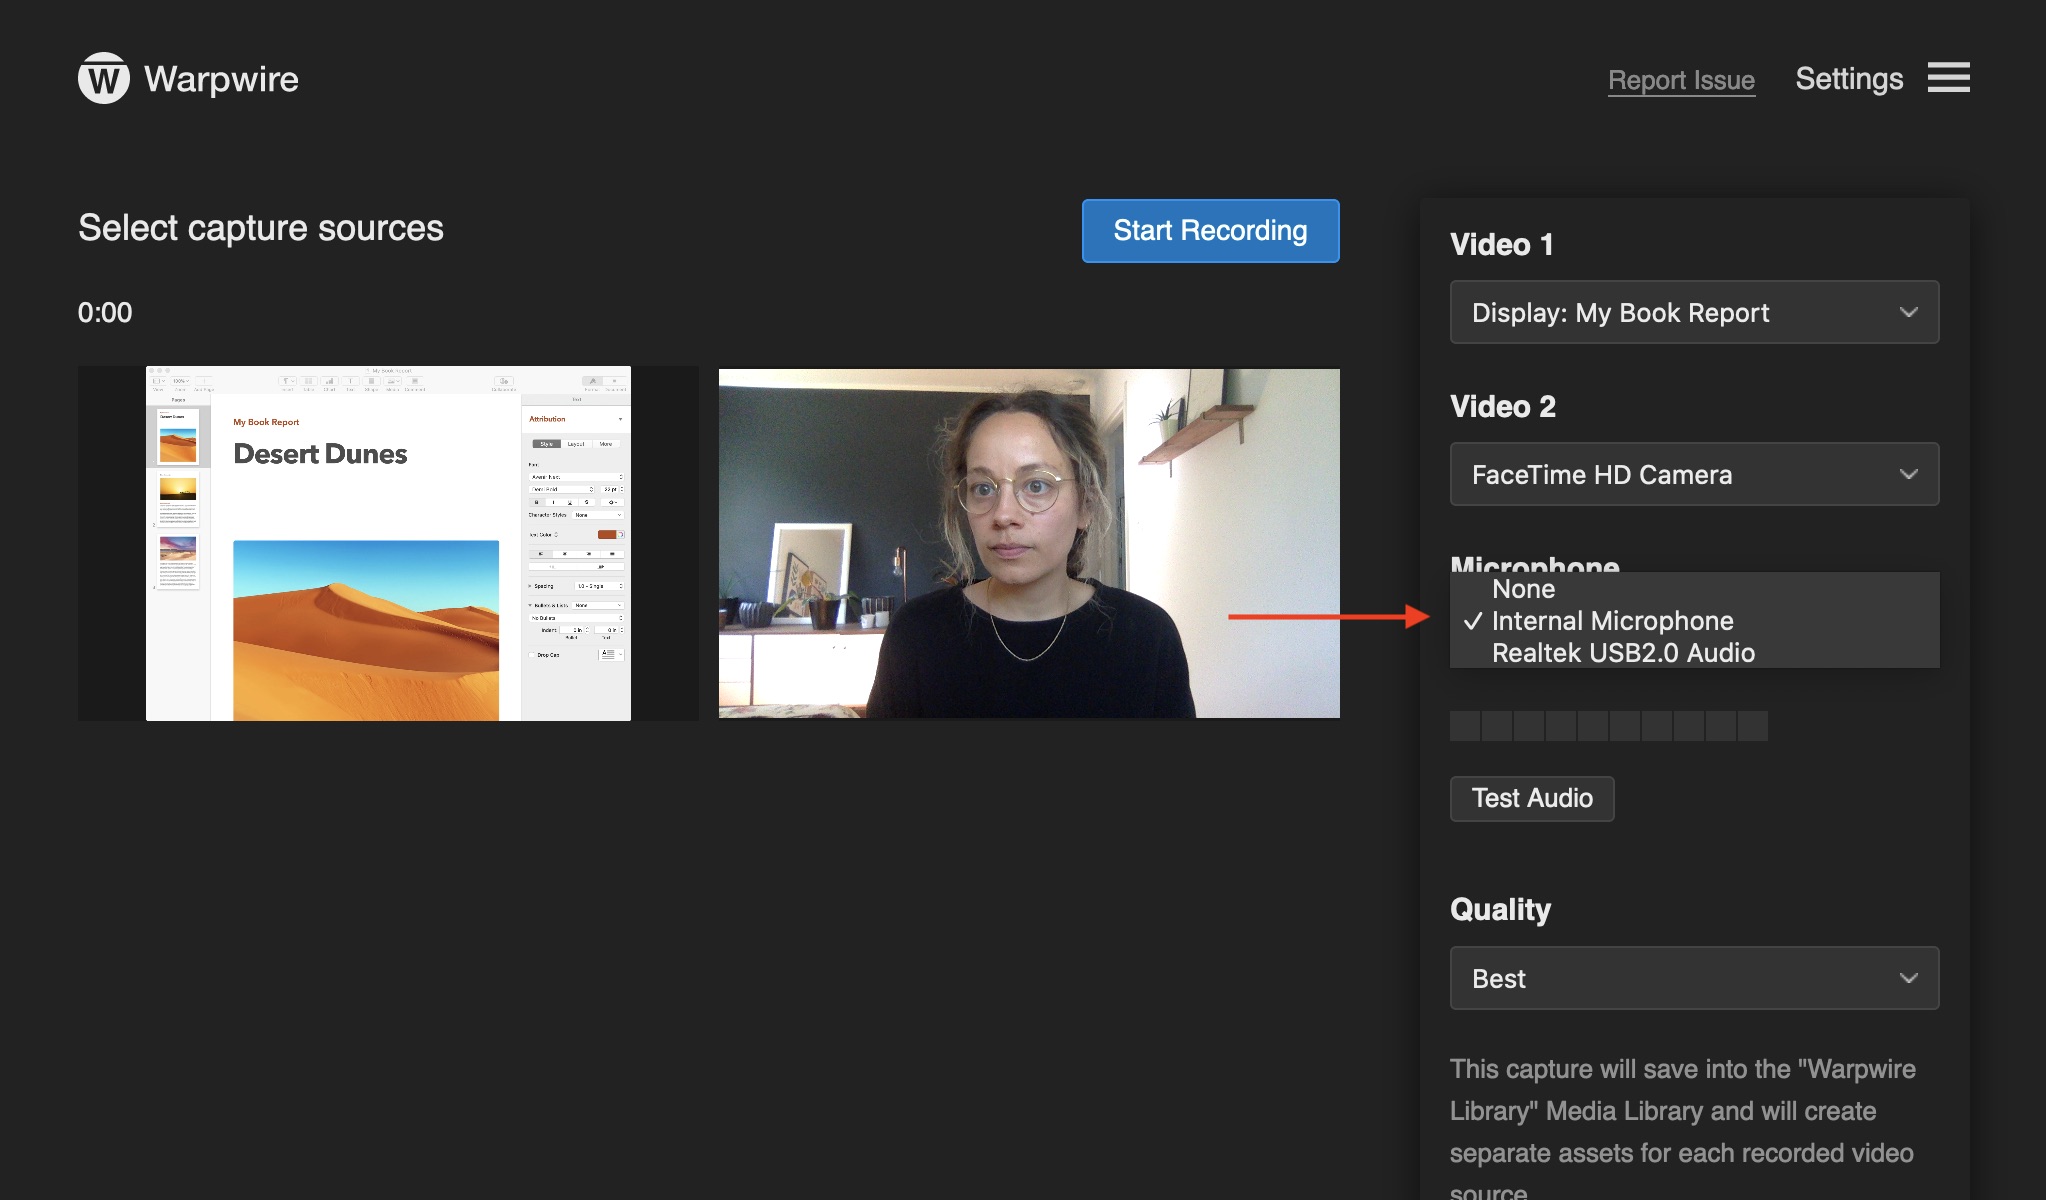
Choose your audio source by clicking on the select menu below "Microphone".
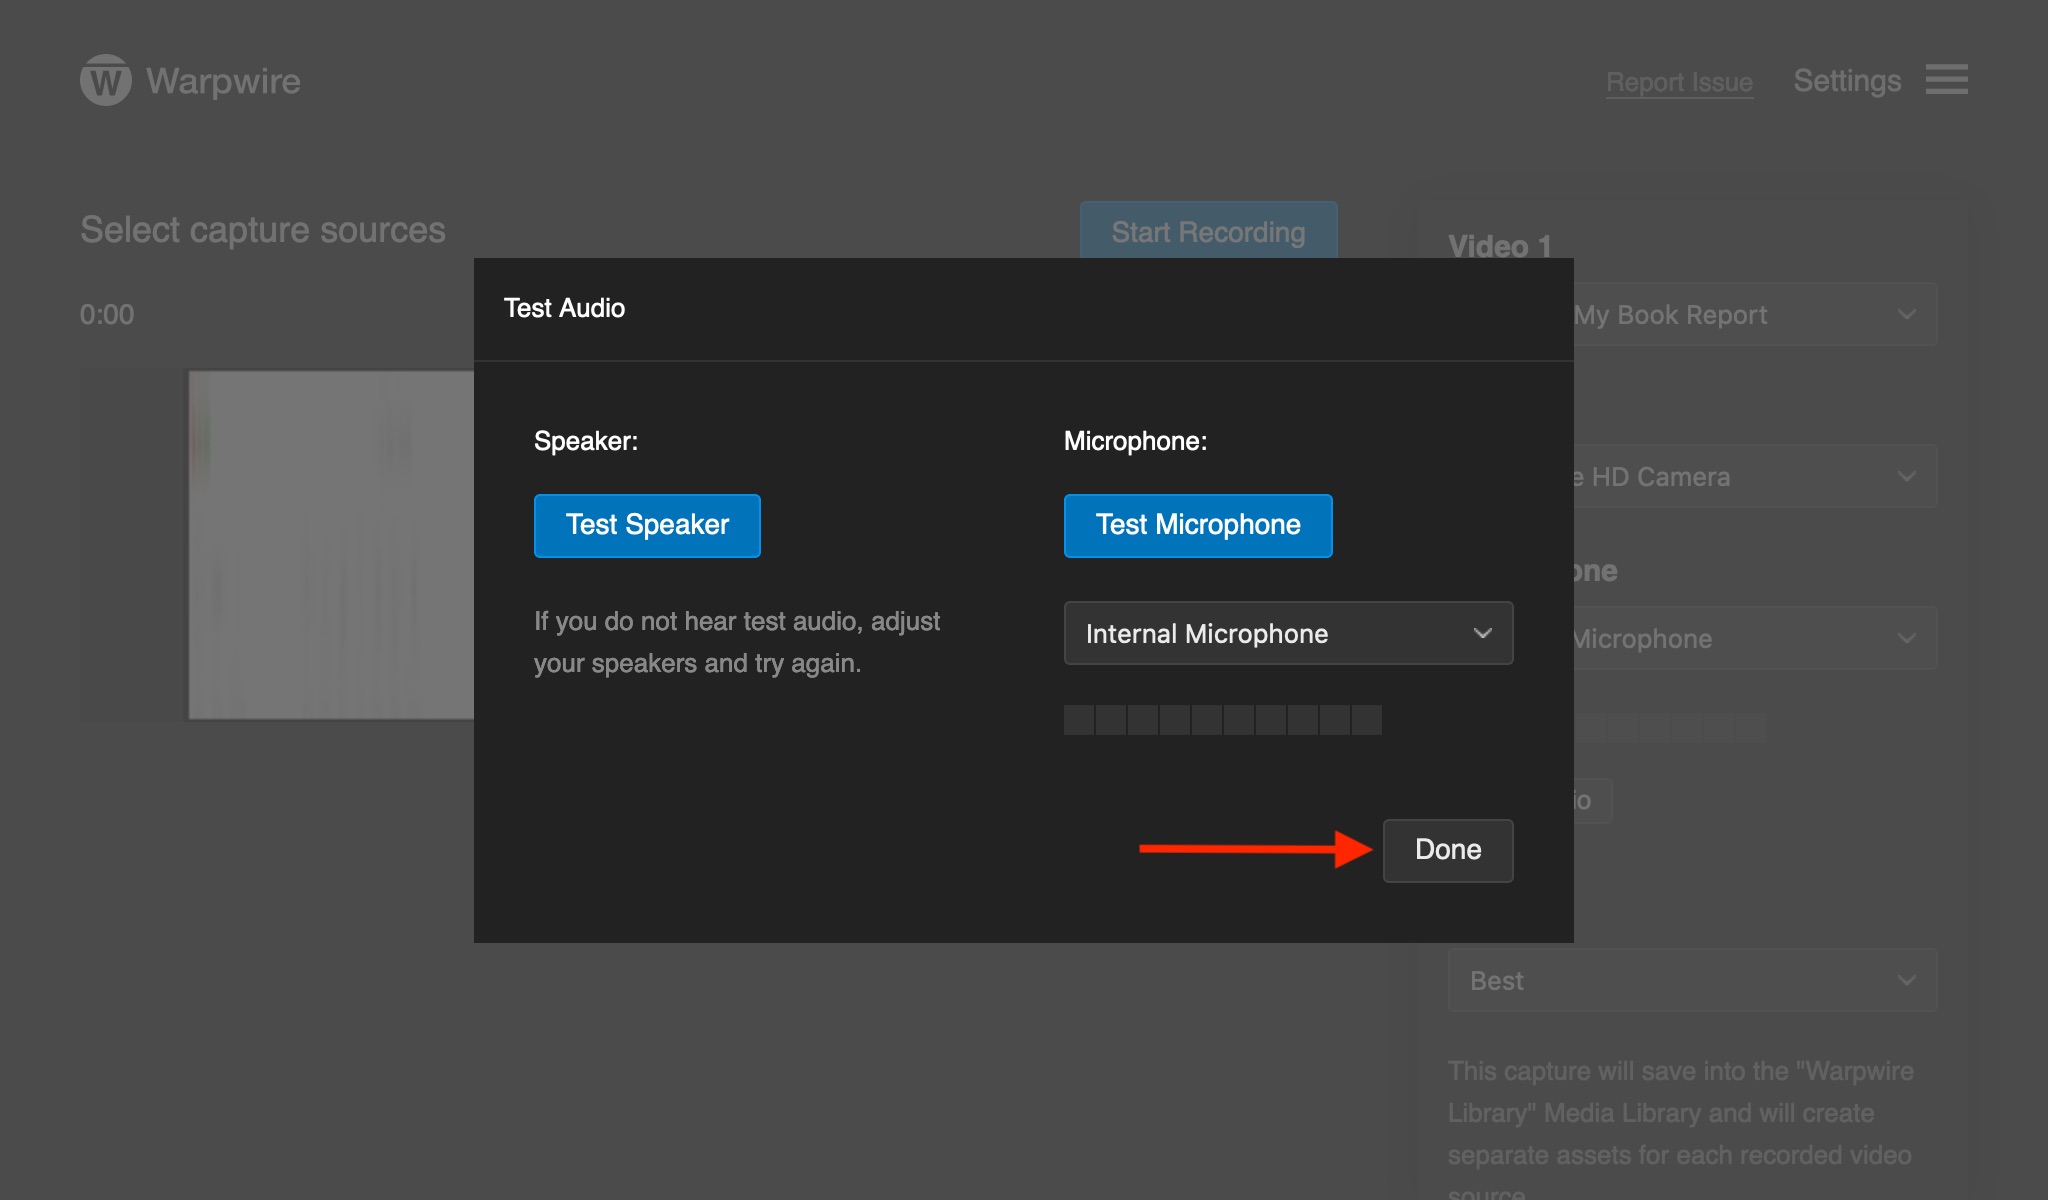
To test your microphone and speaker before recording, click on the "Test Audio" button below the Microphone select menu. You will have up to 5 seconds to test your selected microphone, though you may stop it at any time. After 5 seconds, you will hear a playback of your recording. When you have completed your testing, click "Done".
Please note: You may change your microphone in the Test Audio window and it will update to your selection as the microphone source.
You can also choose your video quality by clicking the select menu below "Quality". Your video quality options are: Best, Good and Low. Please note: If you decide to change the quality, it will reset the video and audio device selections.
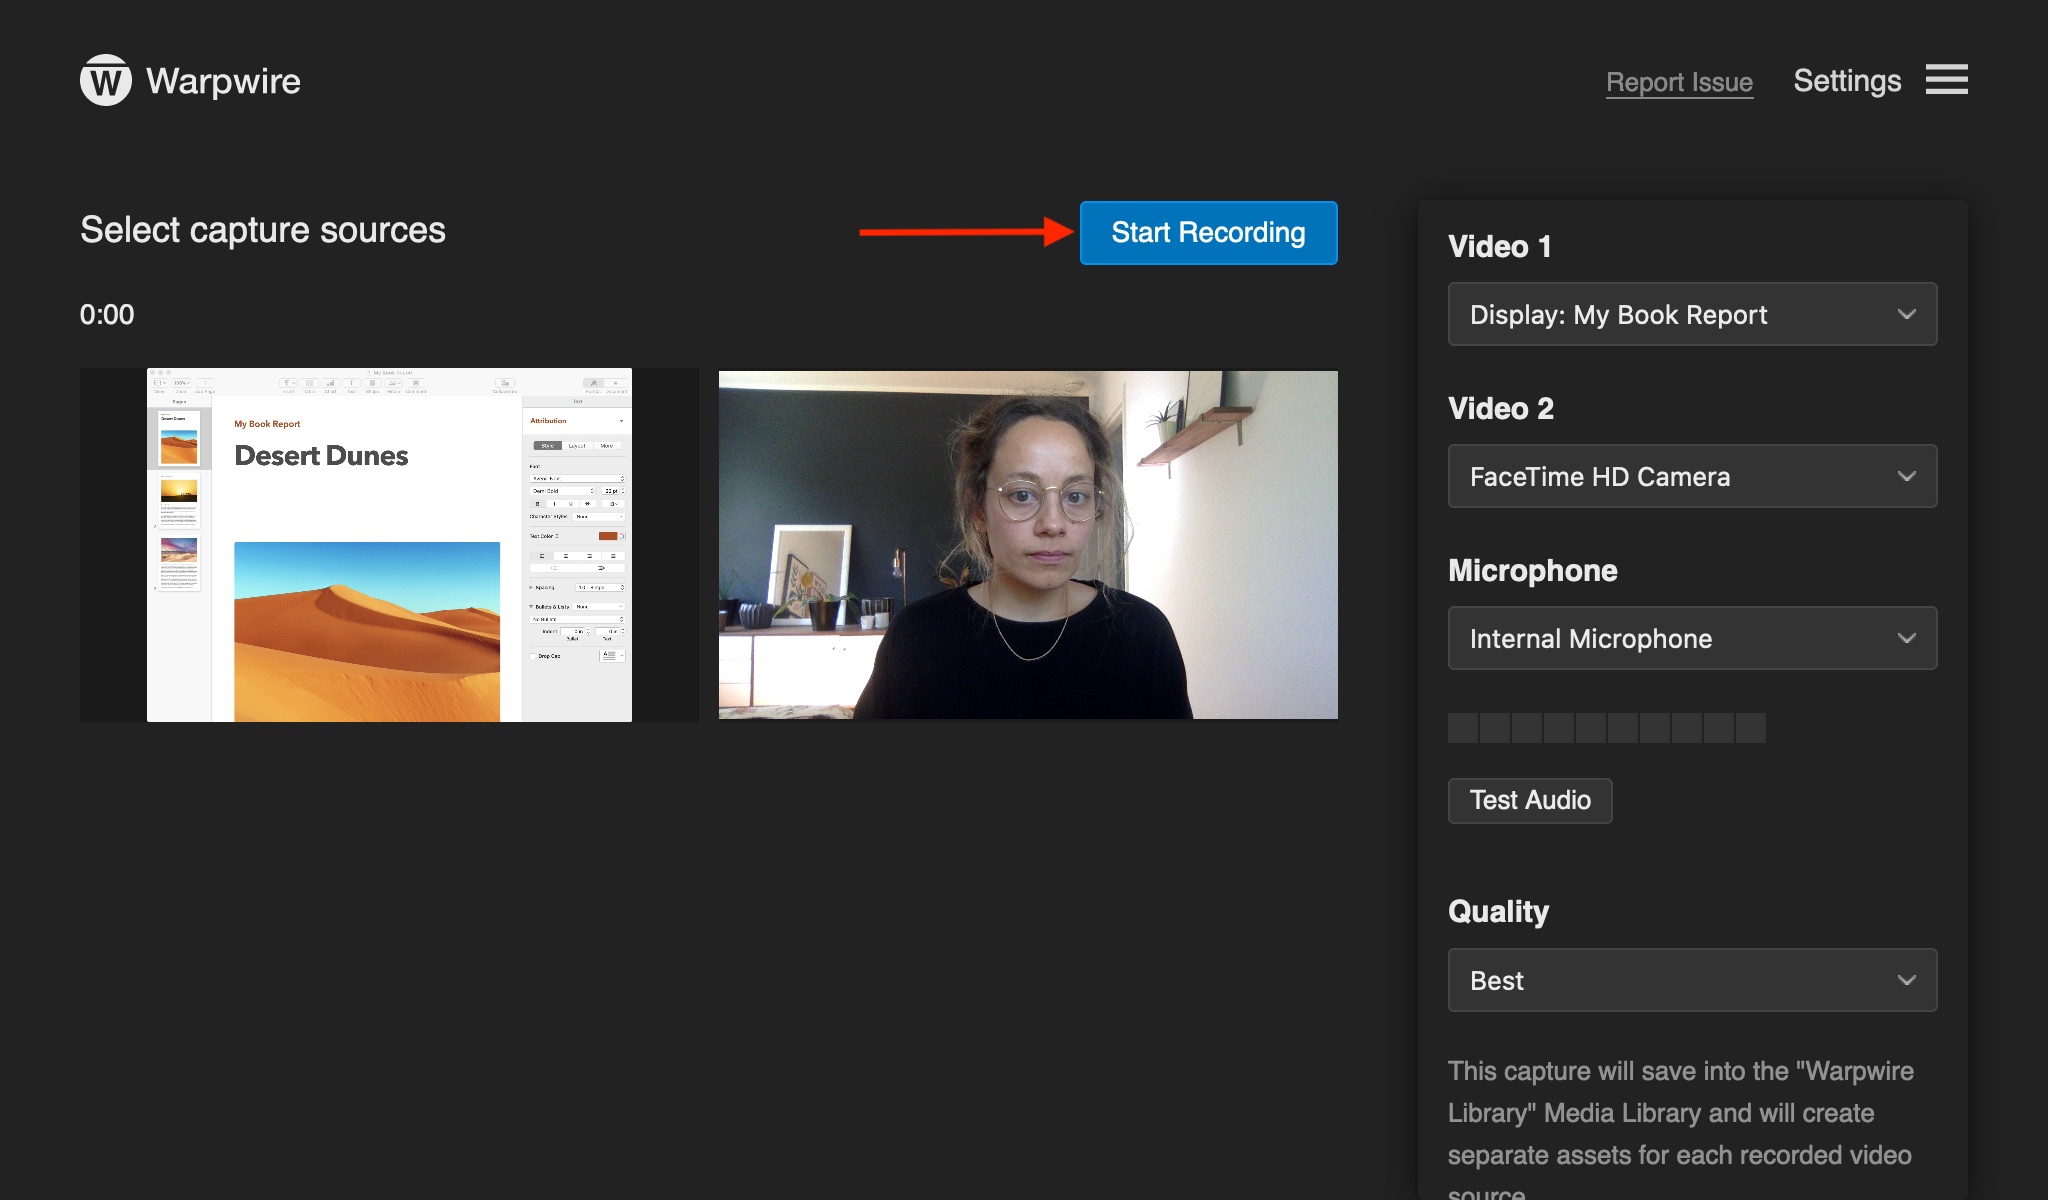
When you are ready to record, click the blue "Start Recording" button at the top of the screen.
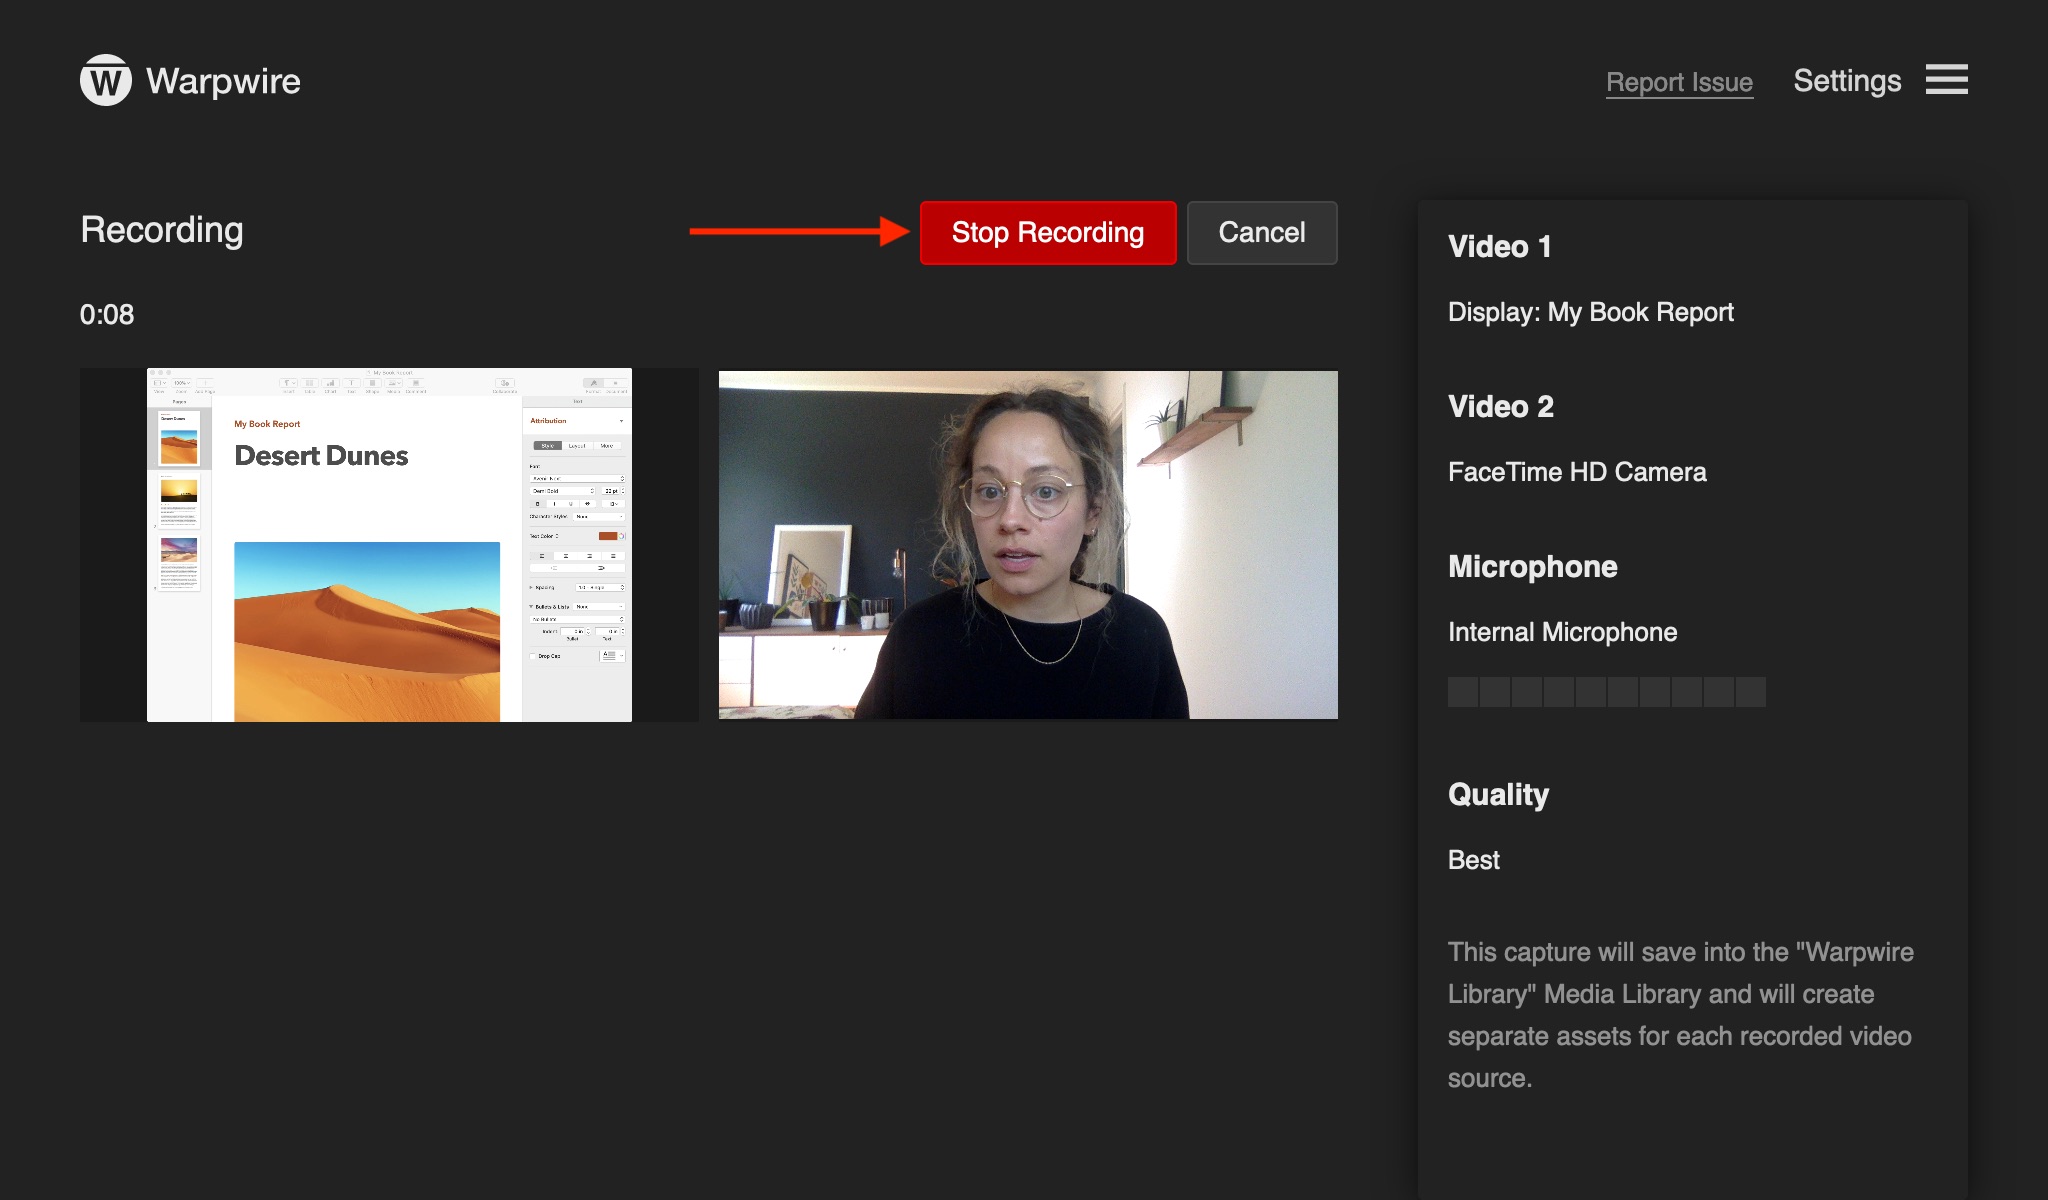
When you are ready to end your capture, click the red "Stop Recording" button. You will now have the opportunity to review your recording.
For recordings with one video source, you will also have the option to pause the recording using the "Pause" button in the menu. Pausing will create a gap in the final recording based on the amount of time you have the capture paused. A "Resume" button will appear to continue your capture.
If you need to, you may cancel your recording at any time by clicking the "Cancel" button. When you cancel a recording, any parts of it will be deleted.
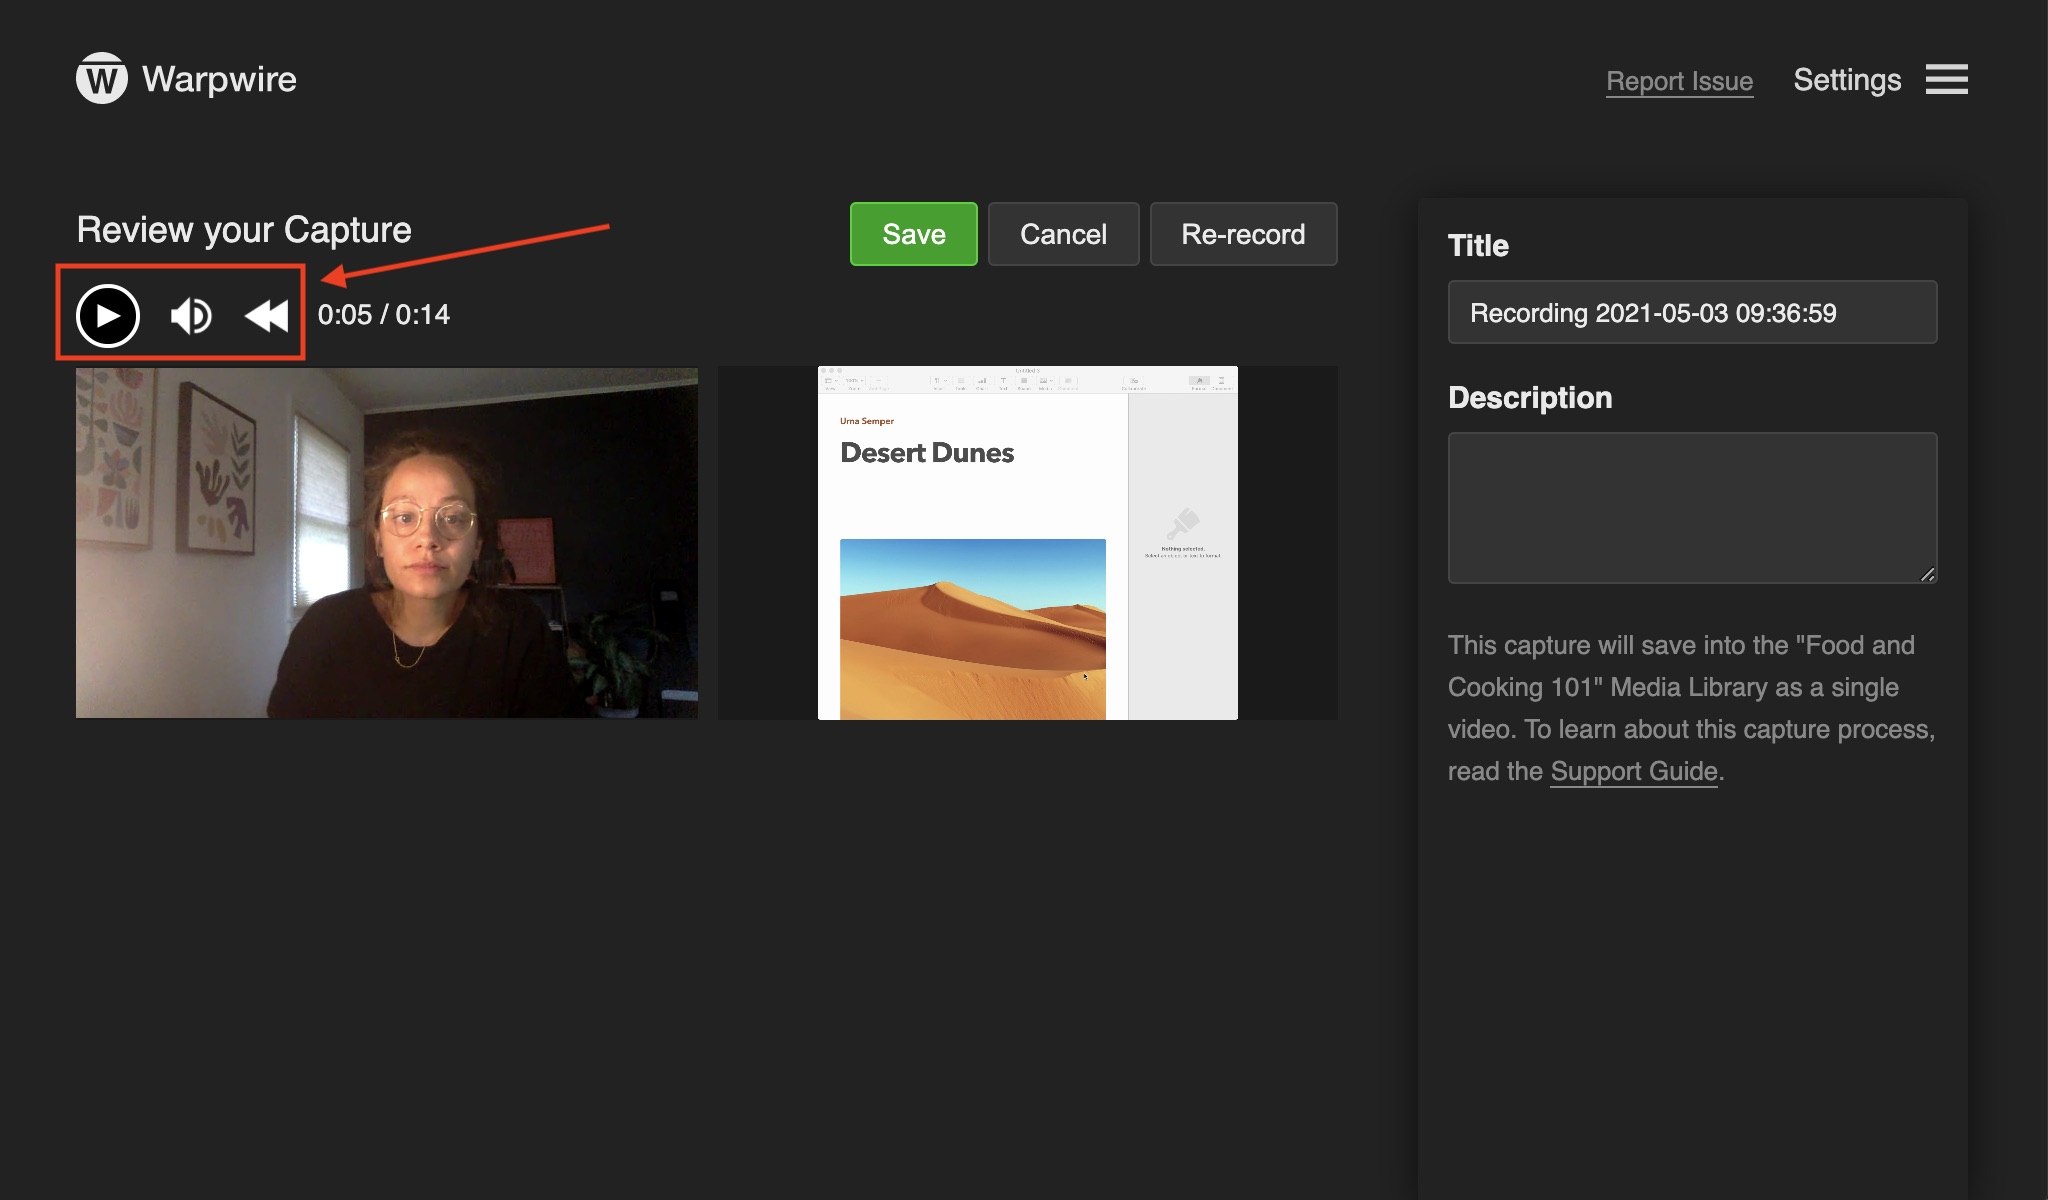
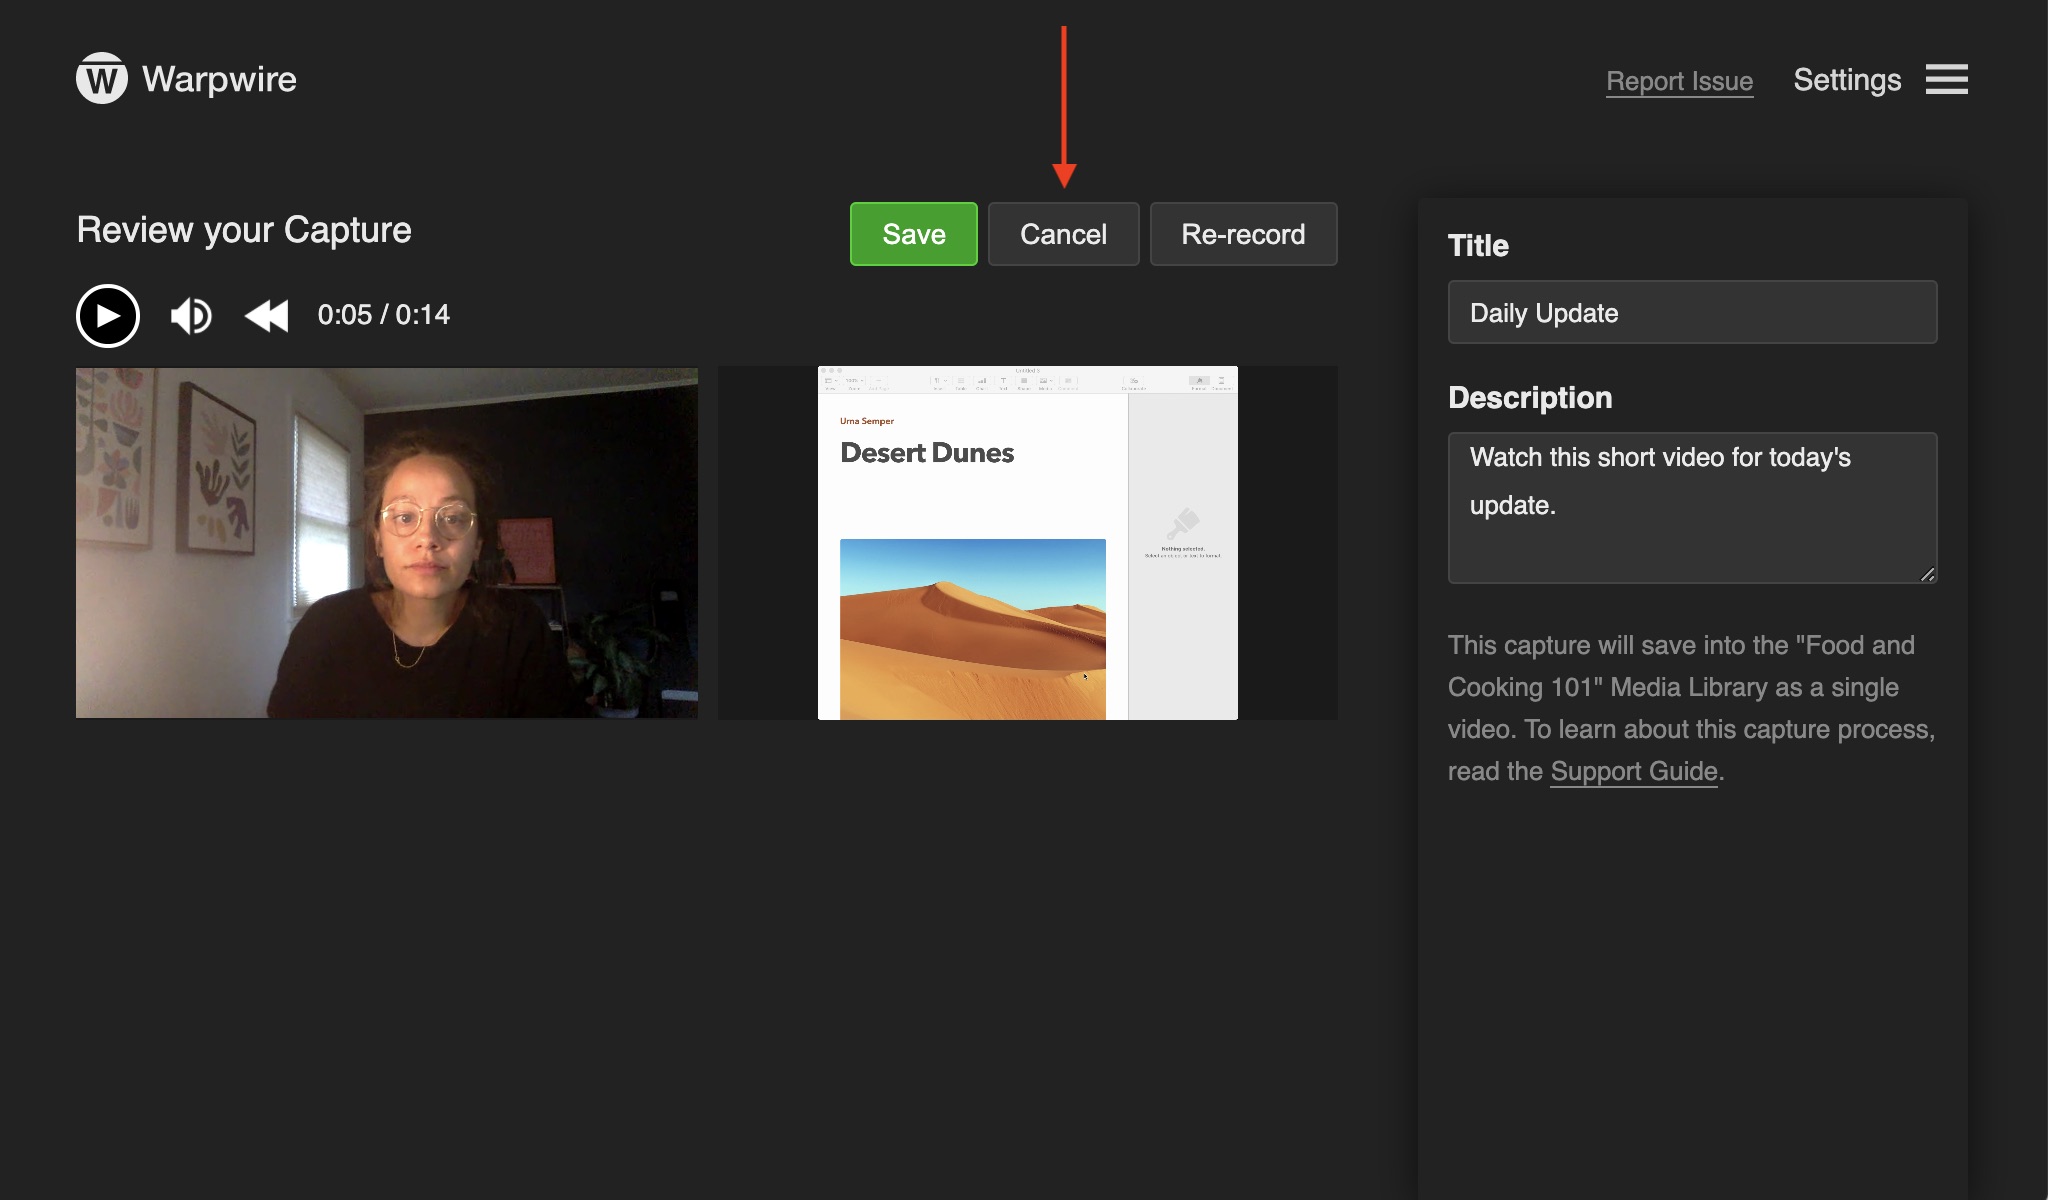
Once you click the "Stop Recording" button, you will have the chance to review your capture before saving.

Use the icons on the top left of your capture to play, mute, and rewatch your capture from the beginning without leaving the review mode page.
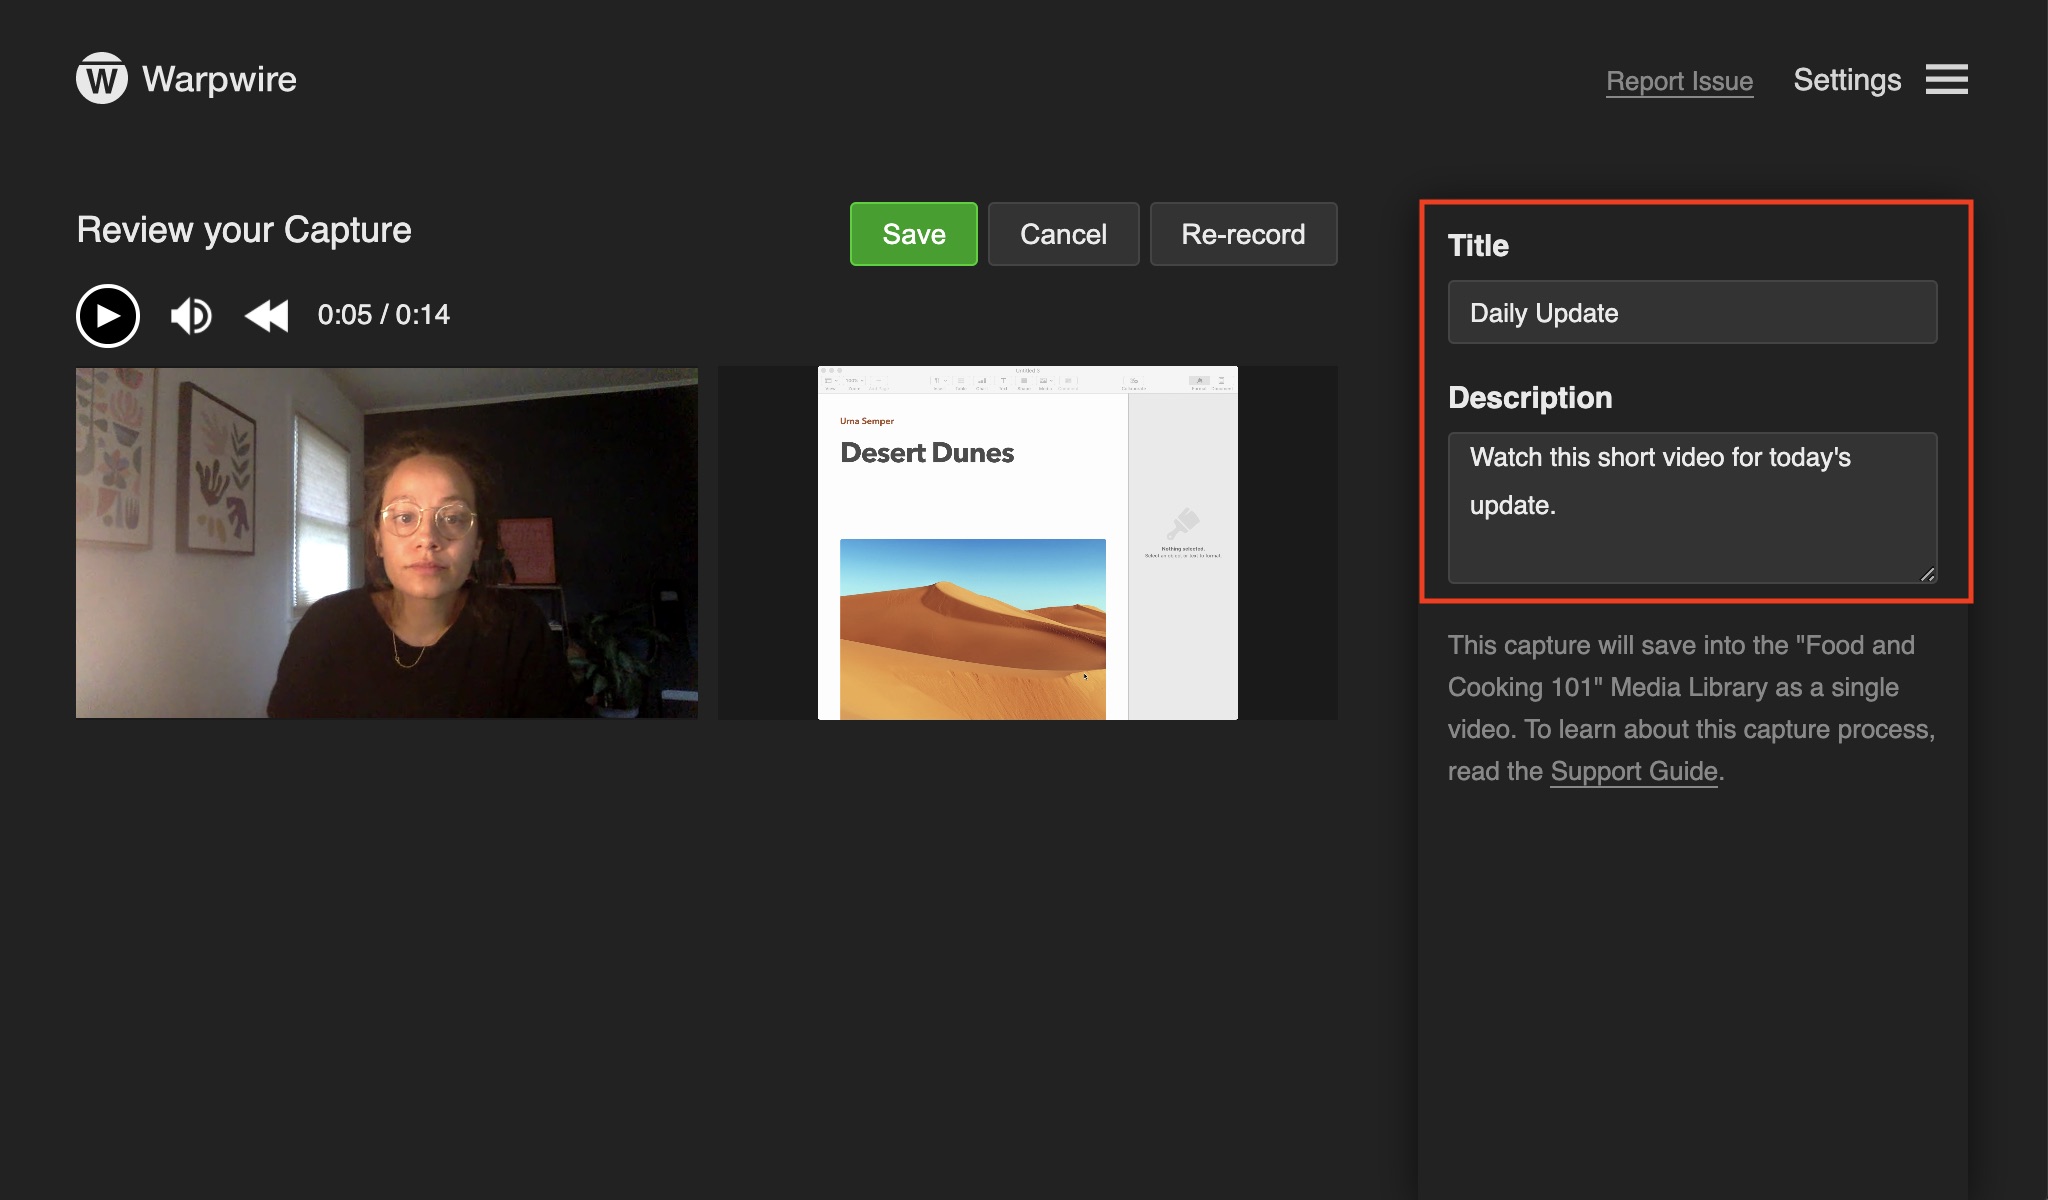
Within the review mode page, you can choose to update your recording title and description before saving to your Media Library.
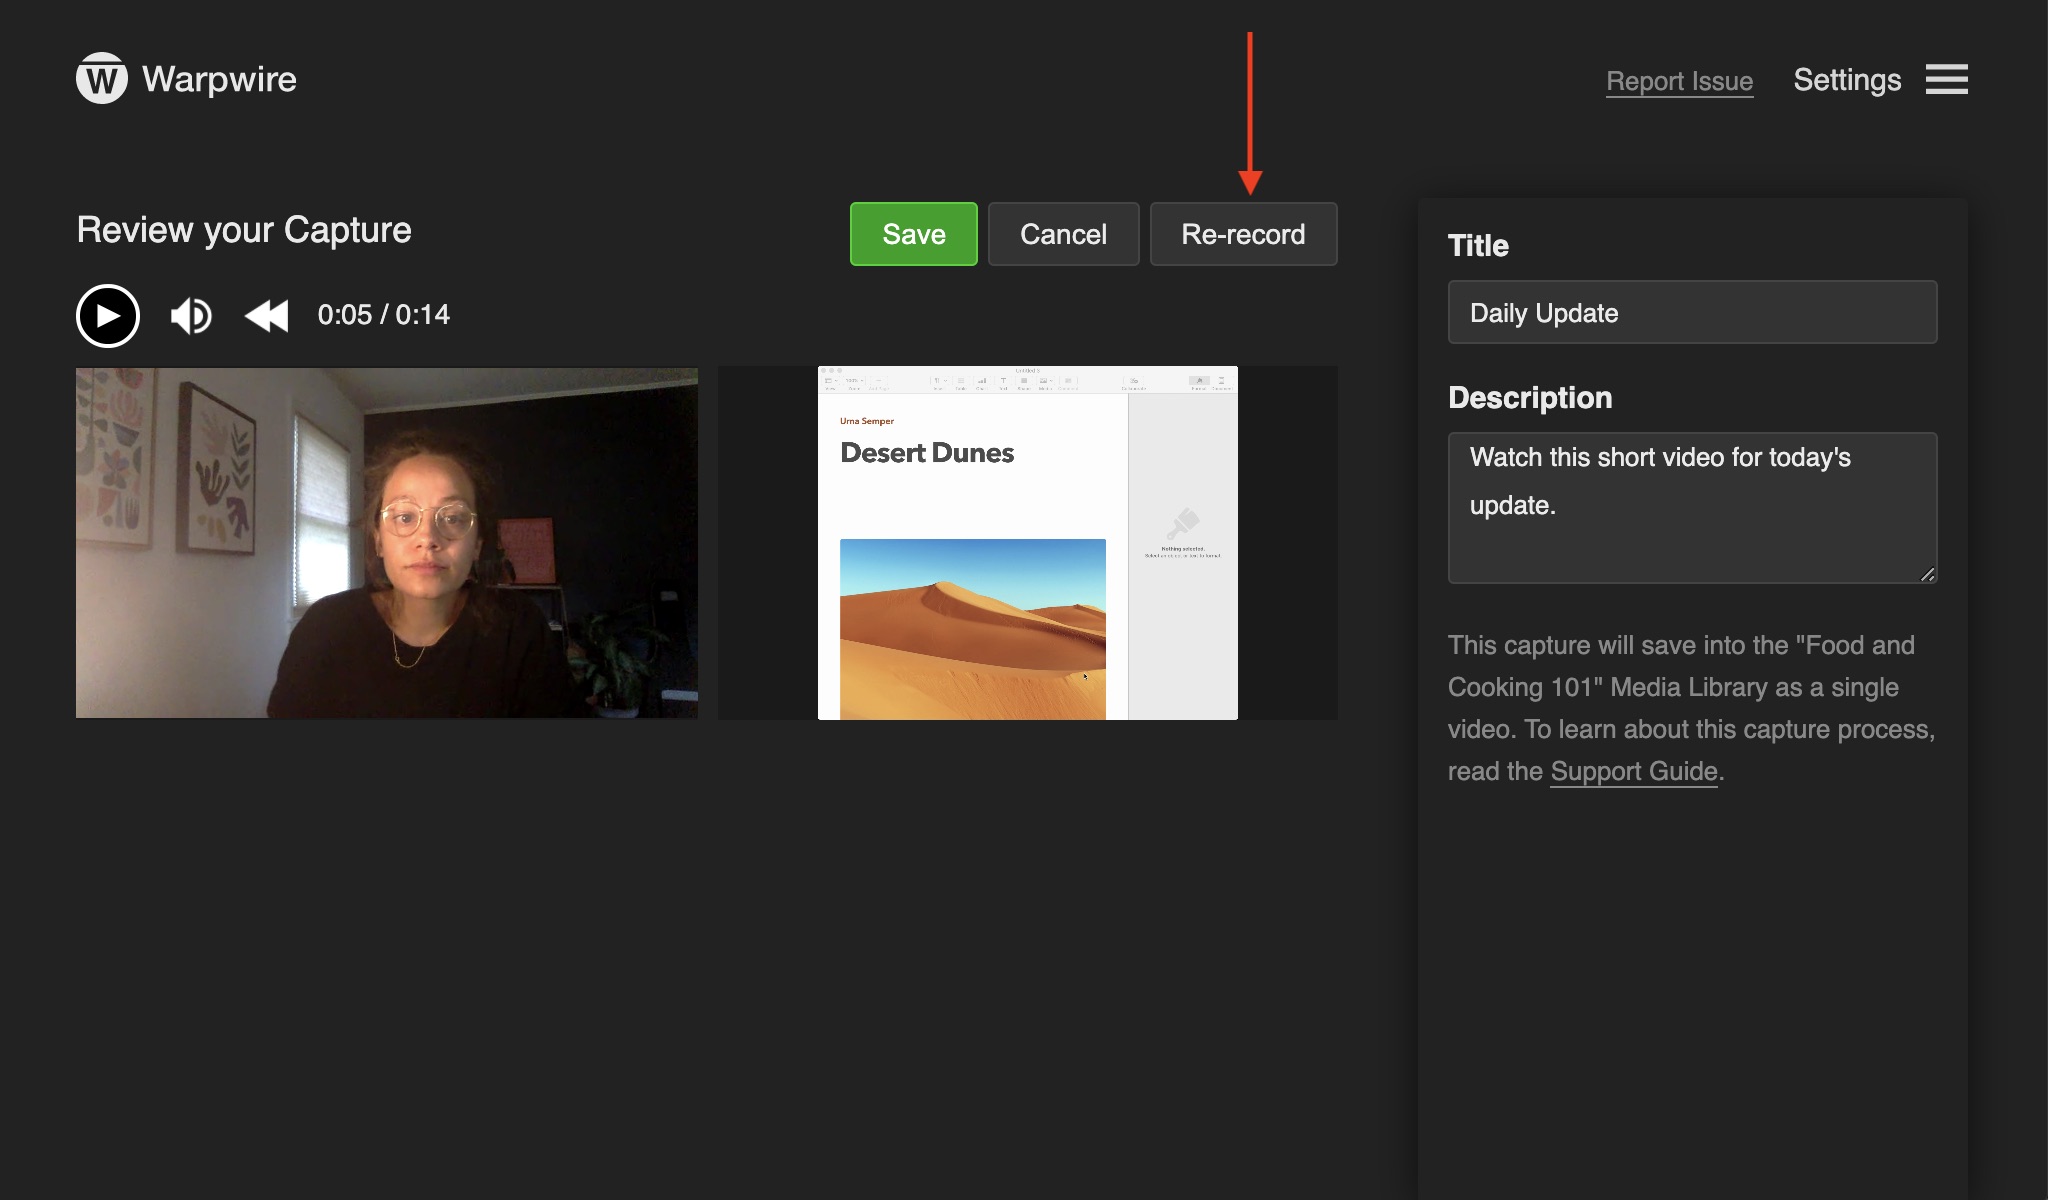
If you are unhappy with your recording, simply click the "Re-record" button to begin again.
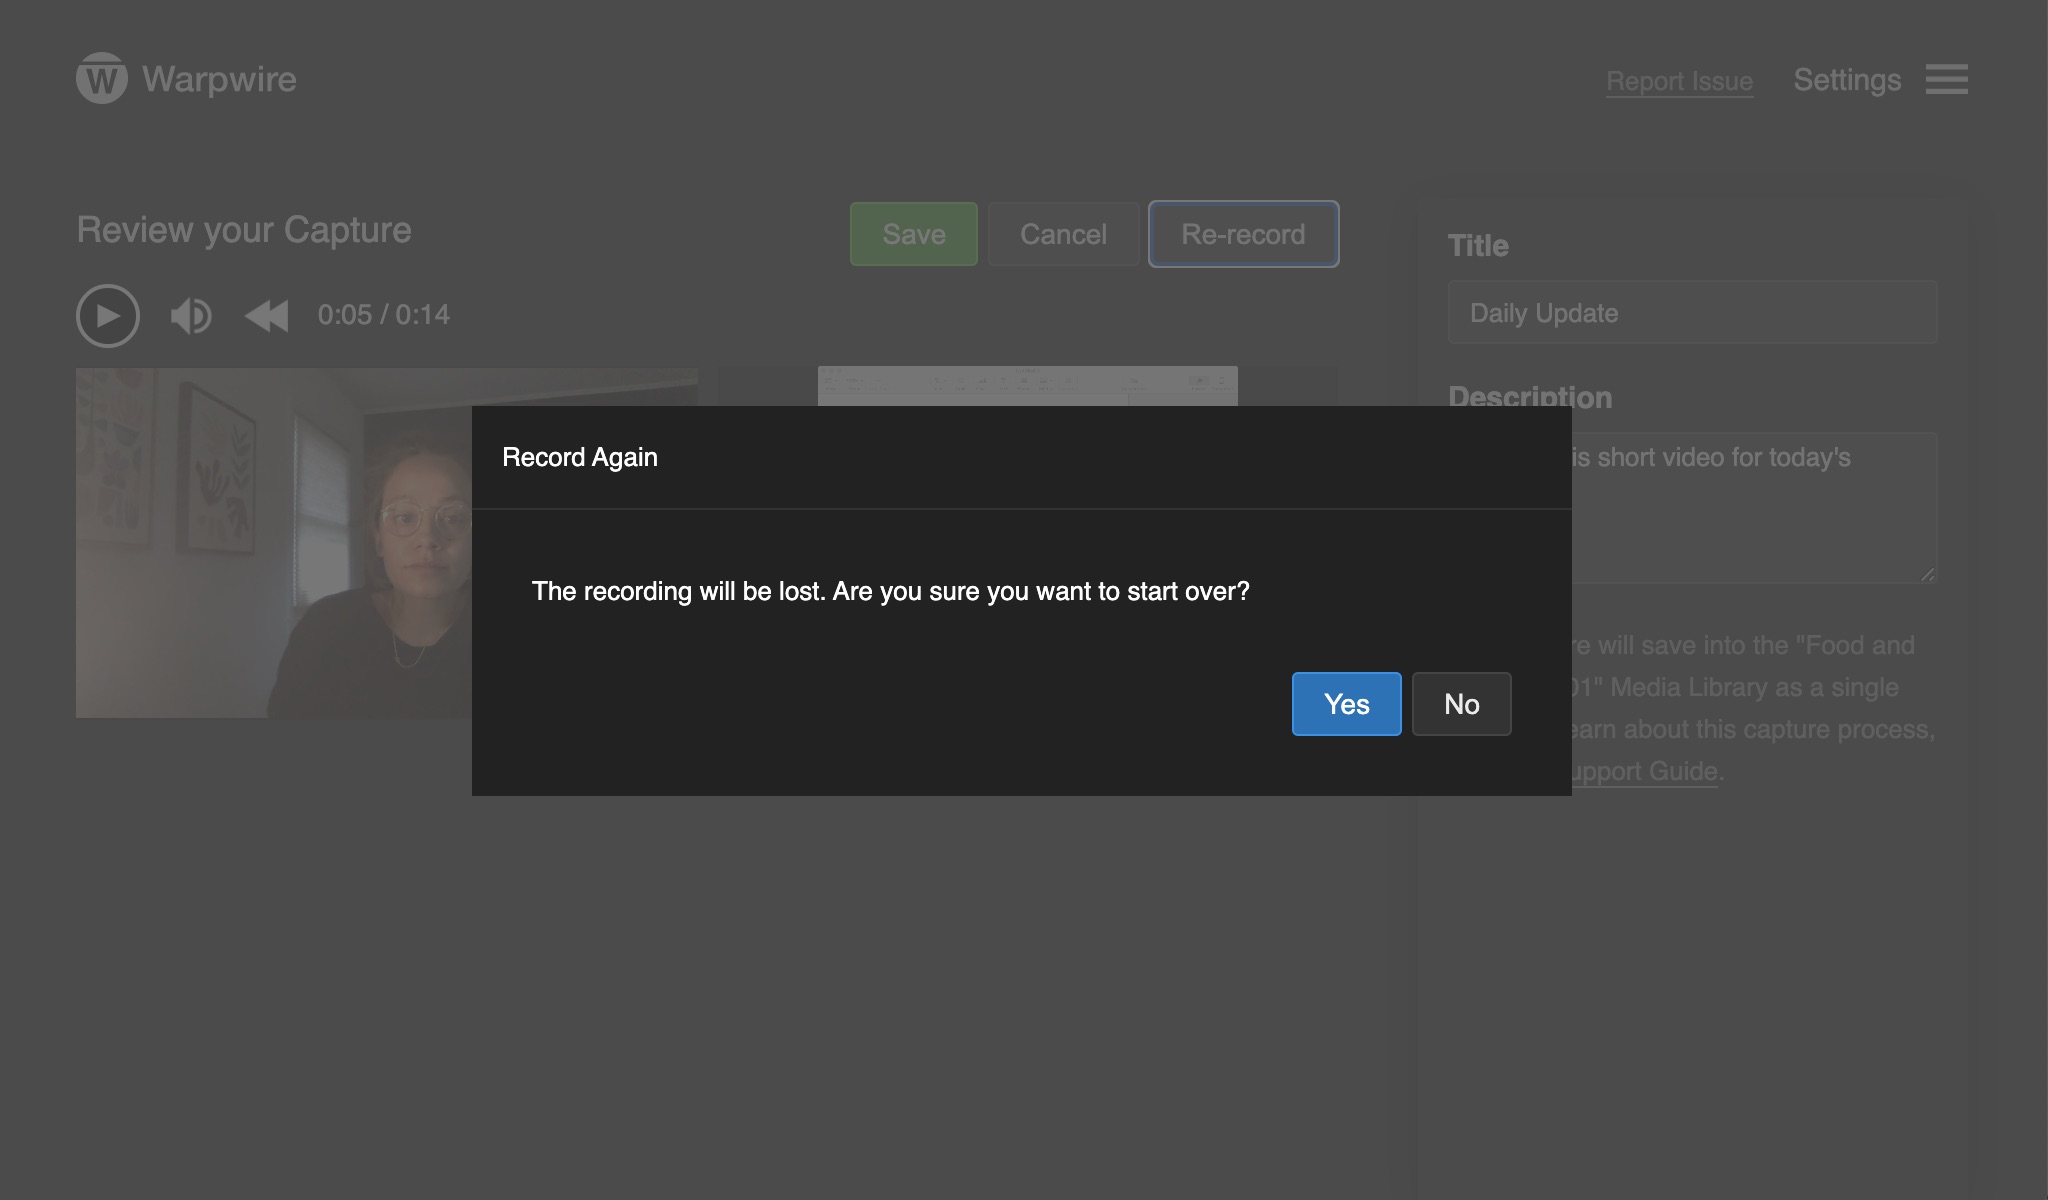
Click "Yes" if you are sure you want to re-record. If you decide to re-record, your original recording will be lost.
To cancel the recording and return to the Media Library, simply click "Cancel". When you cancel your recording, any parts of it will be deleted.
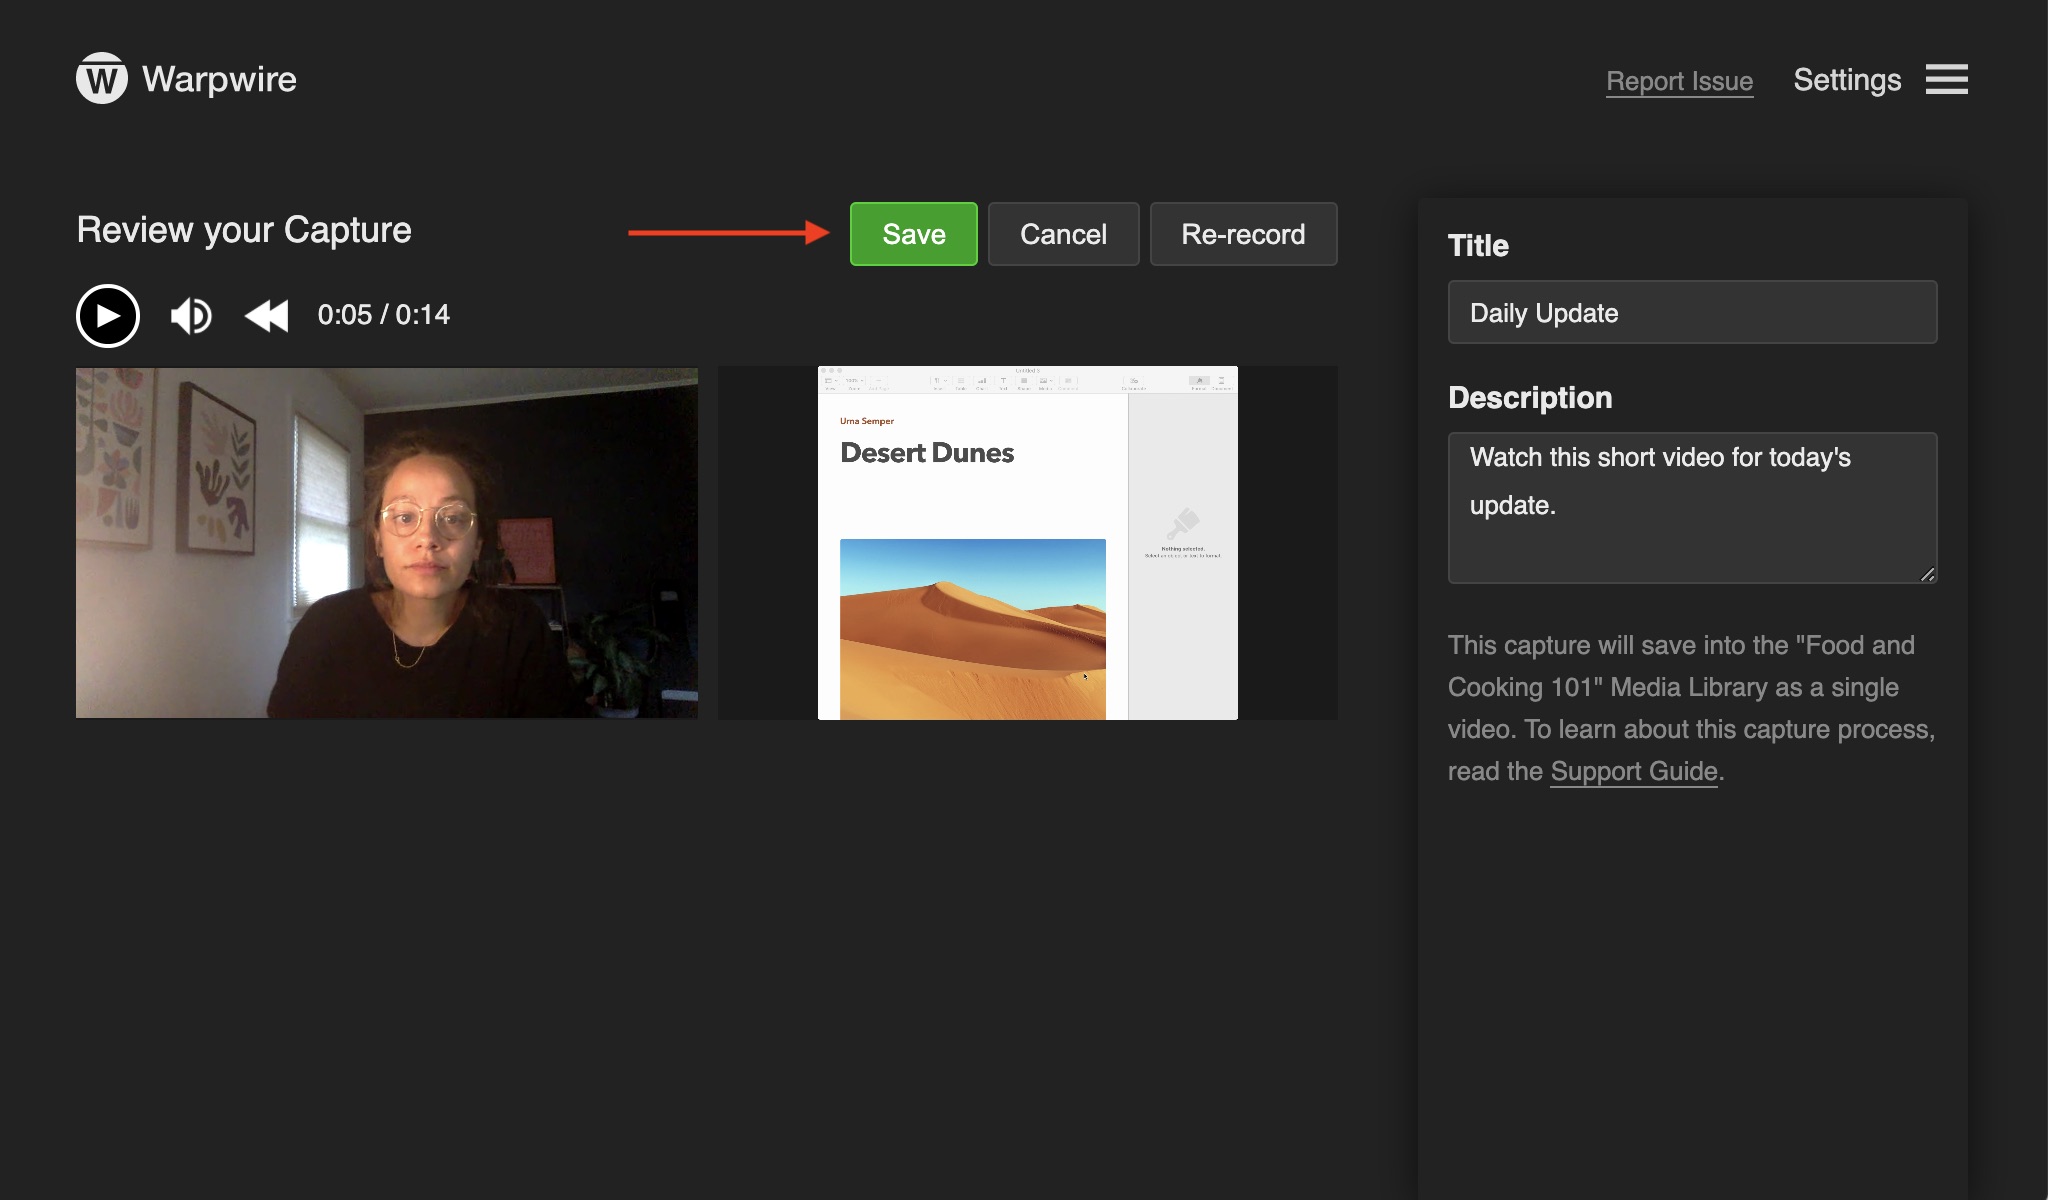
When you are ready to save your recording, click the green "Save" button.
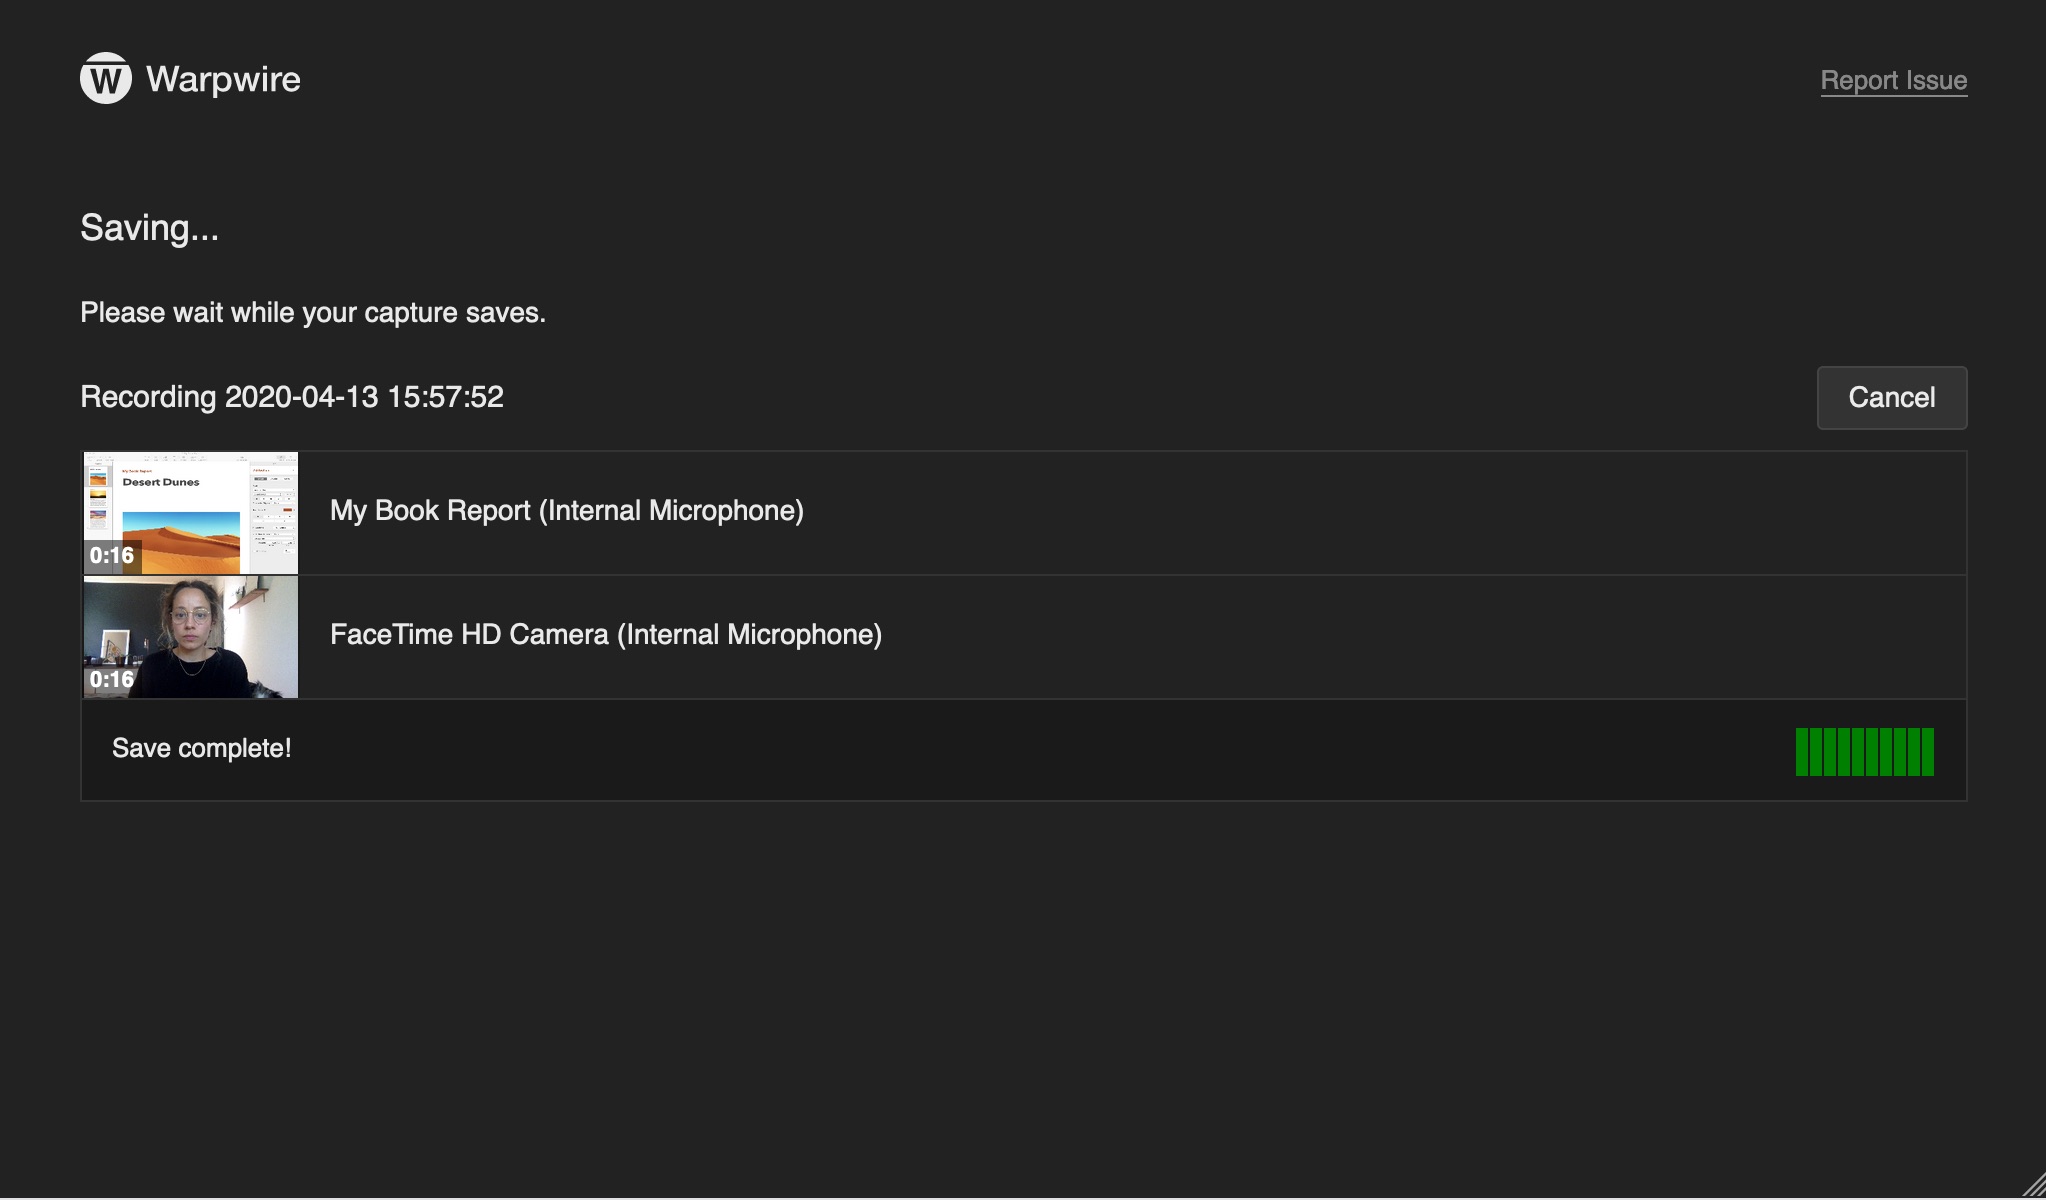
Once you click the "Save" button, you will be directed to the "Saving" page. Once Warpwire has saved all the files, you will be automatically directed back to the Media Library where the capture session is saved. If you "Cancel" during this step, the save process will not delete the capture. You will be able to recover and save it at a later time. If the save process fails to complete, you will be able to download the capture to your local computer.
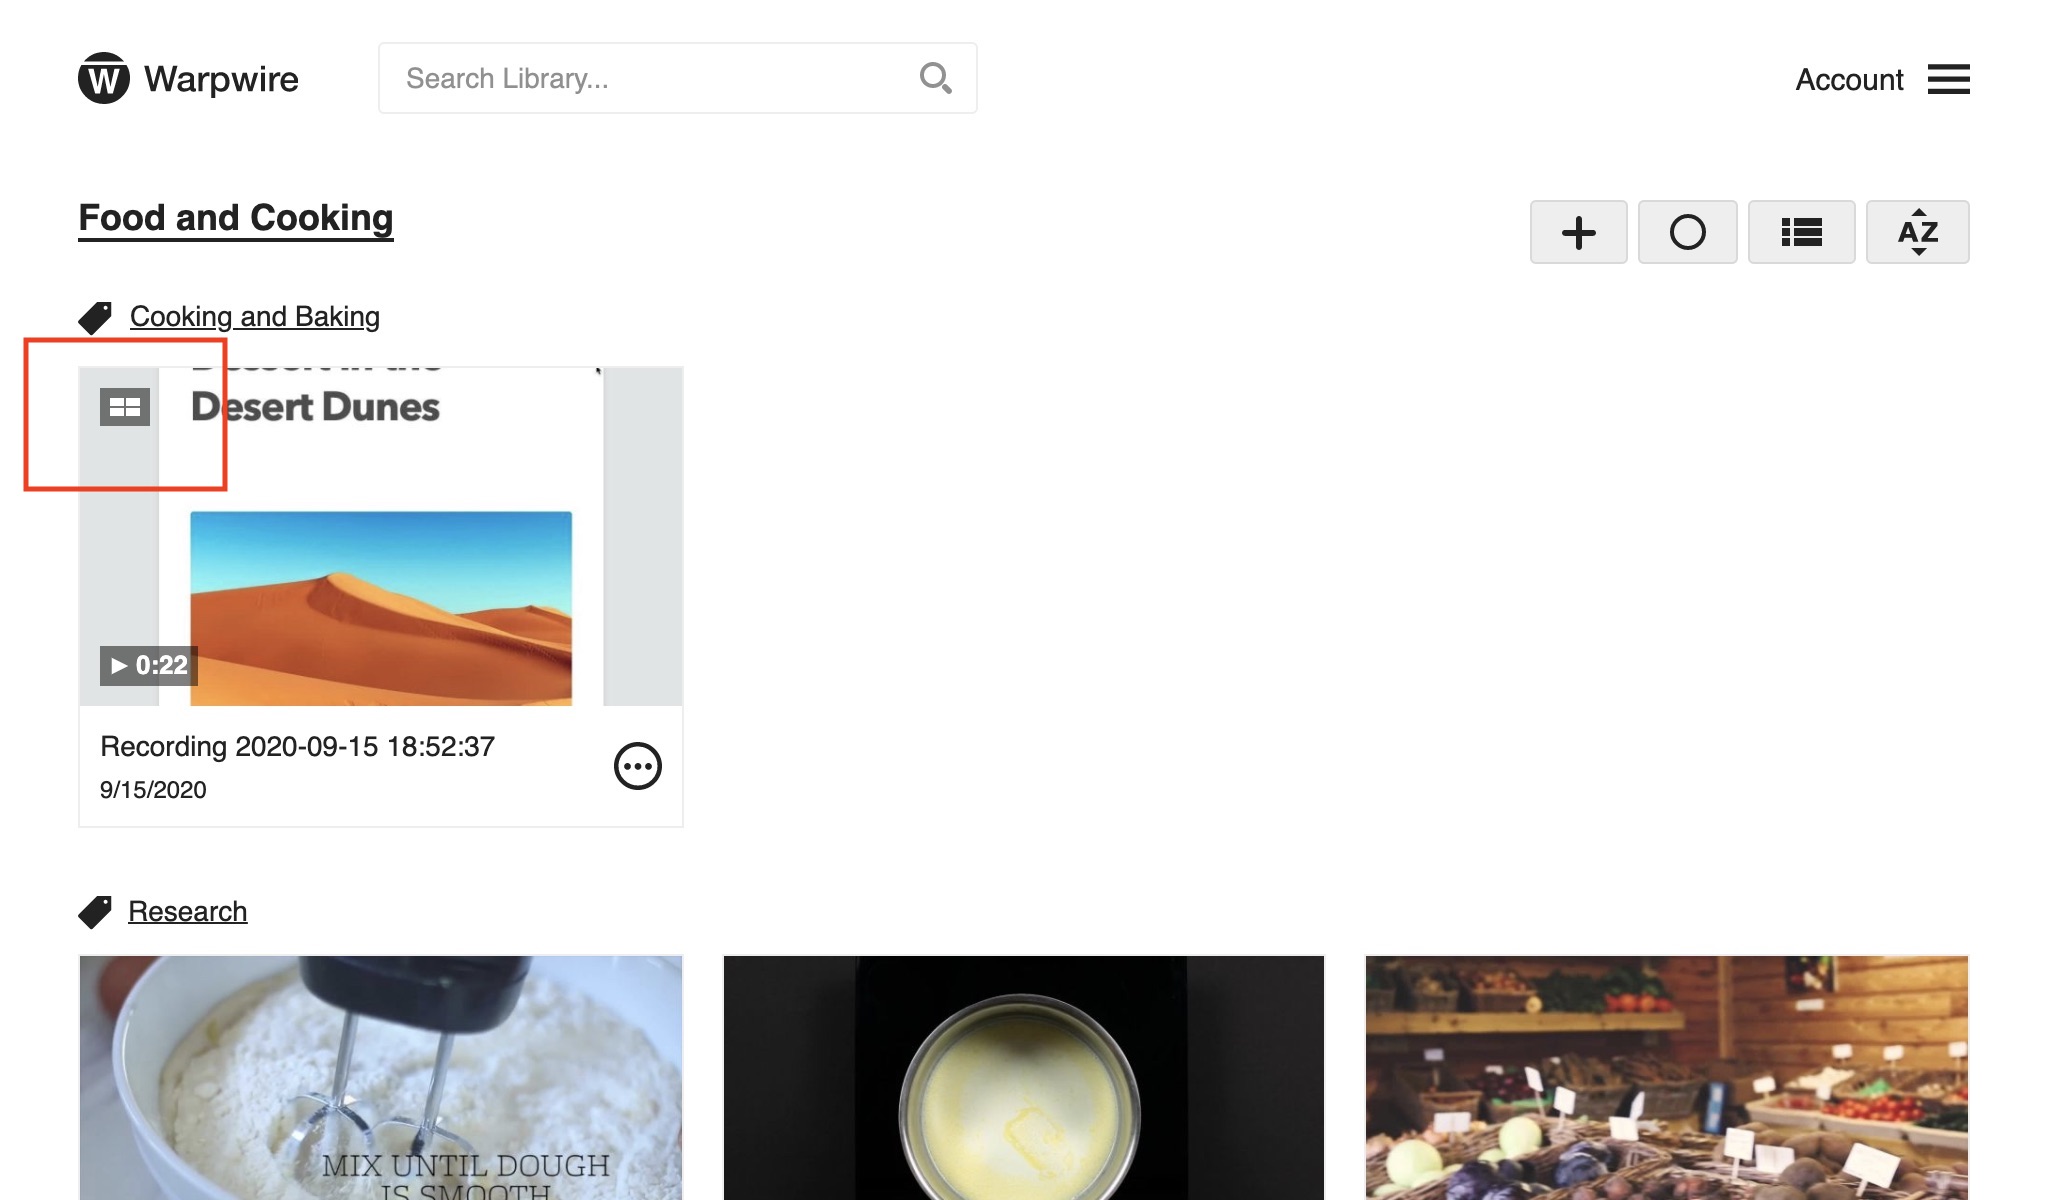
Your recording will then save in the Media Library. If you have captured from multiple video sources, your media asset and sources will play using the Multi-Source Playback system. In the Media Library view, all media assets with Multi-Source Playback will be identified with an icon at the top-left of the thumbnail.
If for any reason you are kicked out of your session during a recording, Warpwire will attempt to find unsaved captures and allow you to recover them when you next open the Camera Capture or Screen Capture process.
In this case, you will be directed to the "Capture Recovery" page. To recover a recording, click the green "Recover" button. Warpwire will then attempt to recover the recording by restarting their upload process. If successful, all video sources will save as separate media assets directly into the Media Library that originally started the capture process. If the save process fails to complete, you will be able to download the capture to your local computer.
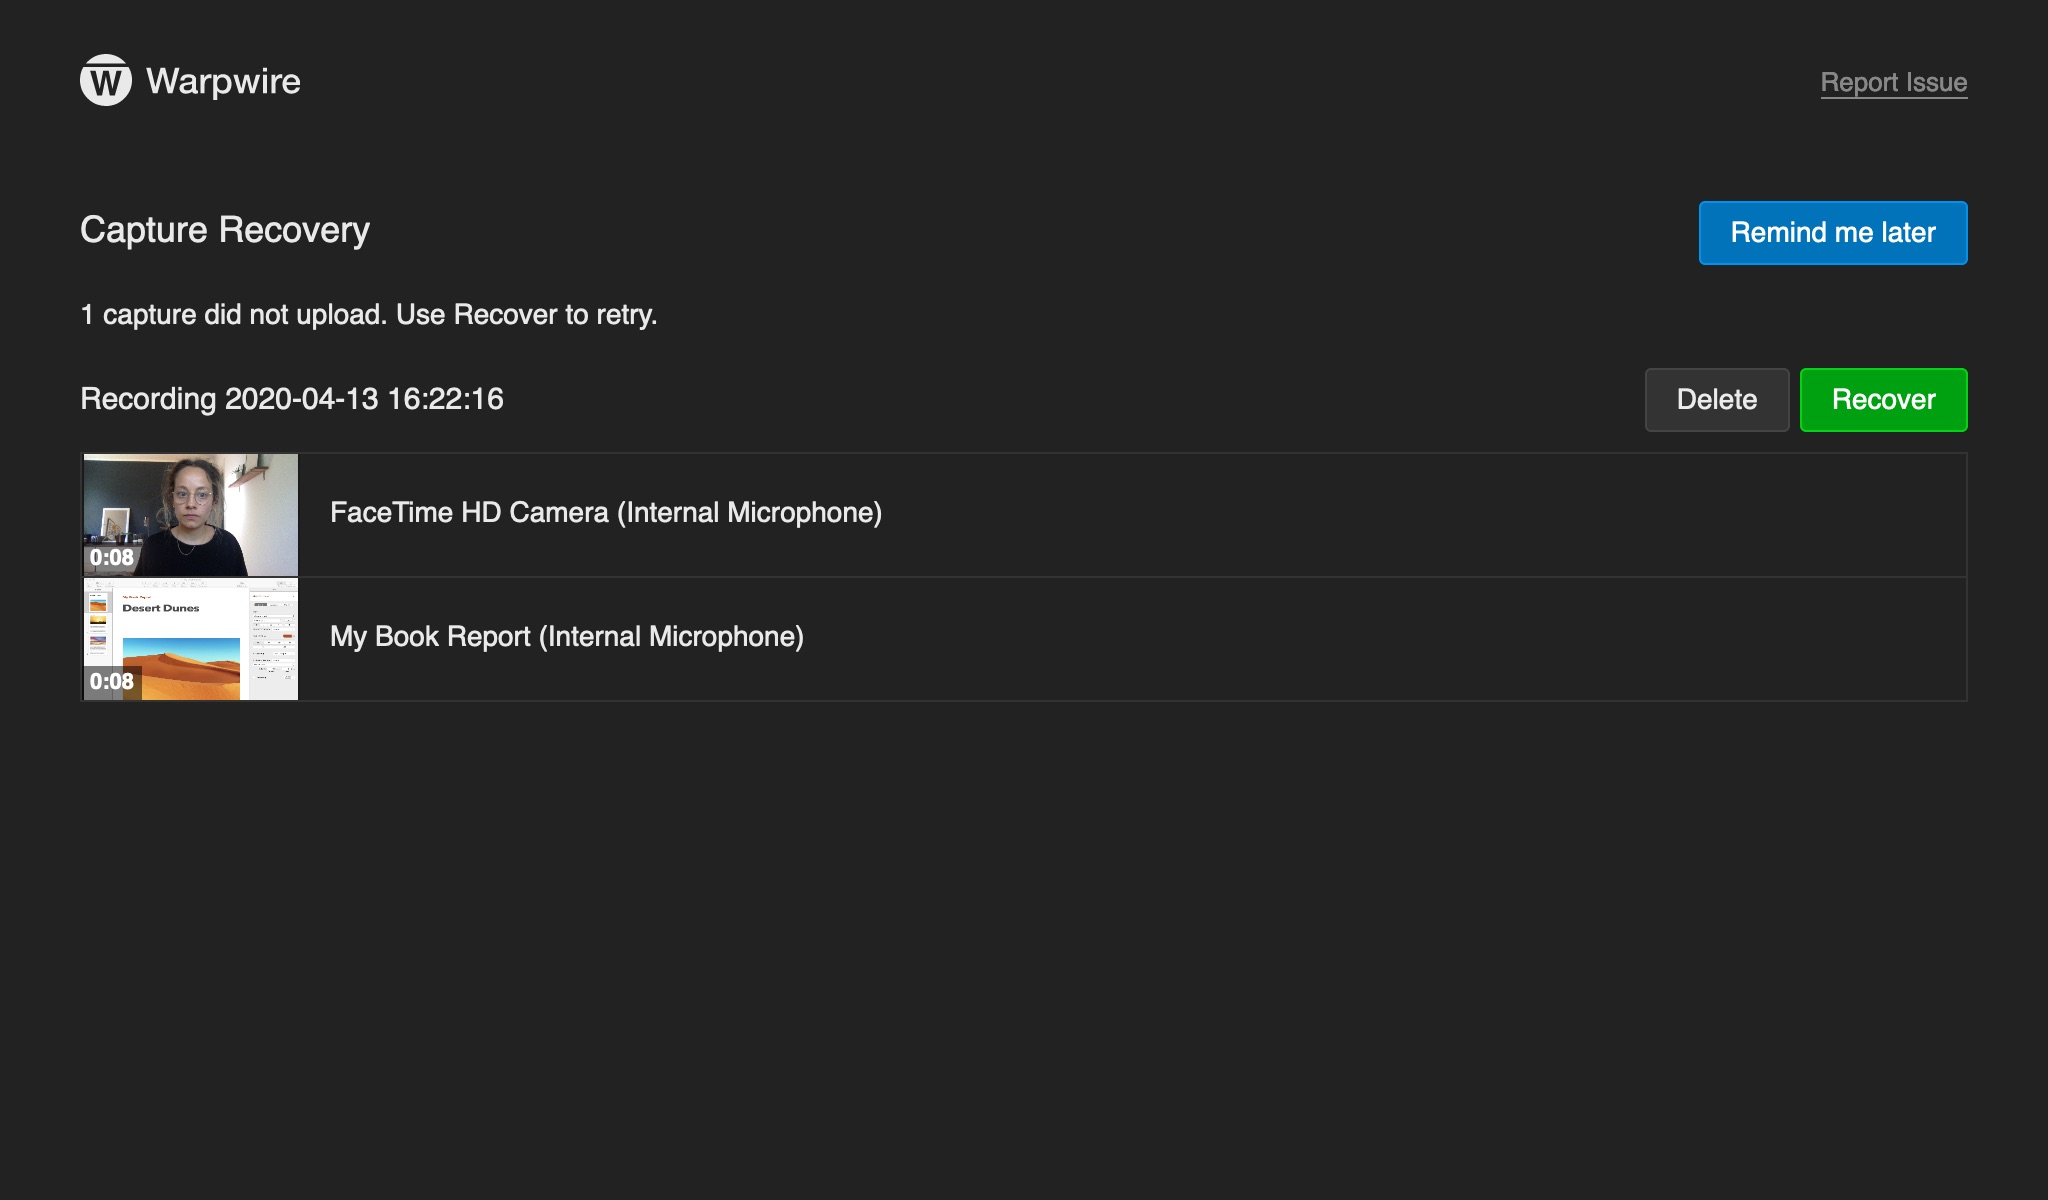
You can delete the unfinished captures by clicking the "Delete" button. To leave captures in the Capture Recovery page, click the blue "Remind me later" button.
Note: Not all browsers support recovering sessions. Recordings under 6-seconds in length will not be saved. Warpwire can also not recover recordings if a private web browser session is being used.
If you are using MacOS 10.15 or higher, you will need to allow the web browser to access Camera, Microphone, and Screen Recording devices.
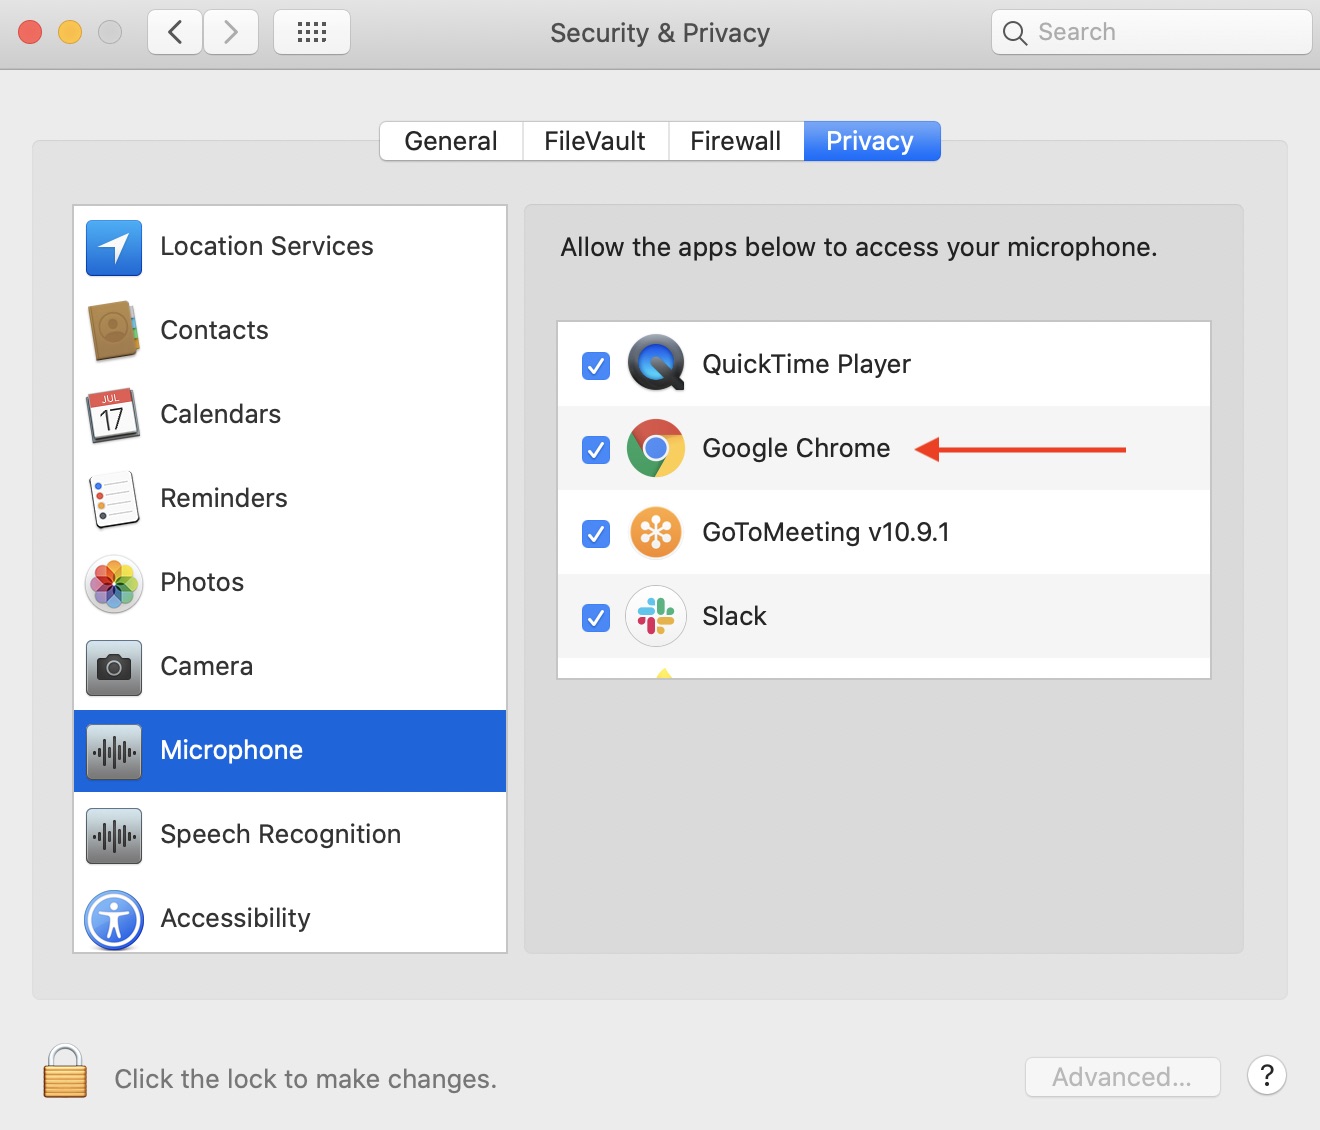
To do this, navigate to "System Preferences". Click "Security & Privacy". Within the "Privacy" tab, select "Camera" from the left-side menu. Check the box next to the web browser (in this example, Google Chrome) of choice to allow Warpwire to access your Camera.

Follow the same steps to enable your web browser to allow access to your Microphone.
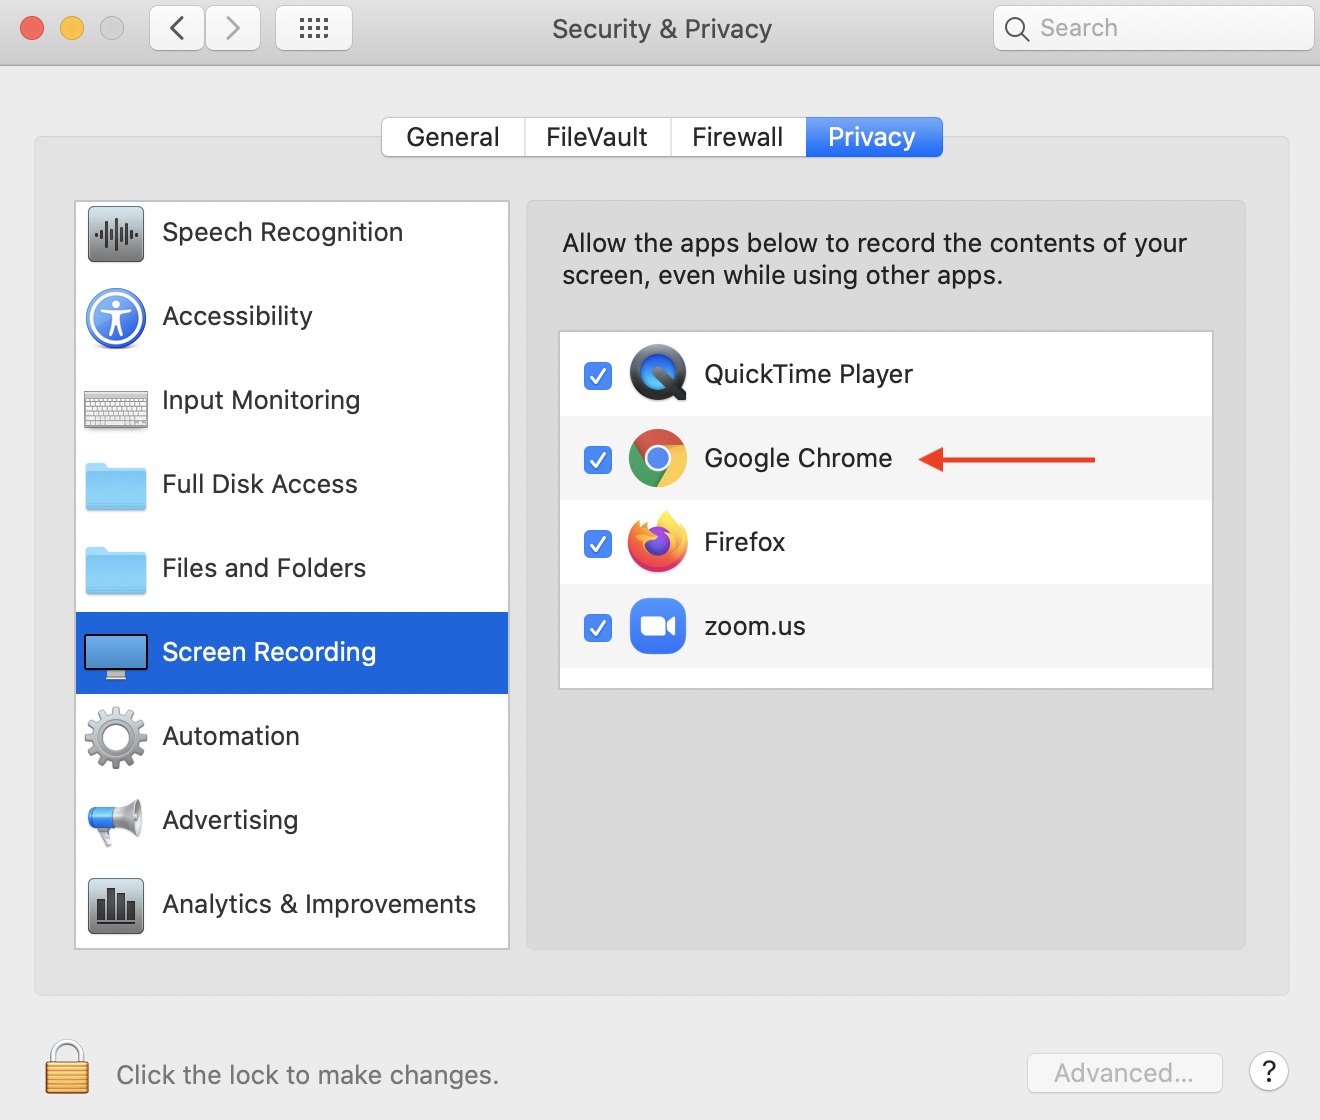
And Screen Recording.
If you run into any issues, please use the "Report Issue" link on the top right to let us know. This will really help us fix bugs and add enhancements to this Multi-Source Capture tool.